Partnerships – Partner Record List
Navigating the
Partner Record List
In the BNTouch CRM, your partner records
are all kept in an organized, easy-to-navigate database. You can access and
manipulate these files using the Partner Record List. All records for agents,
realtors, attorneys, and other partners in your BNTouch CRM will be listed
here, whether they were added manually or imported to your system. To access
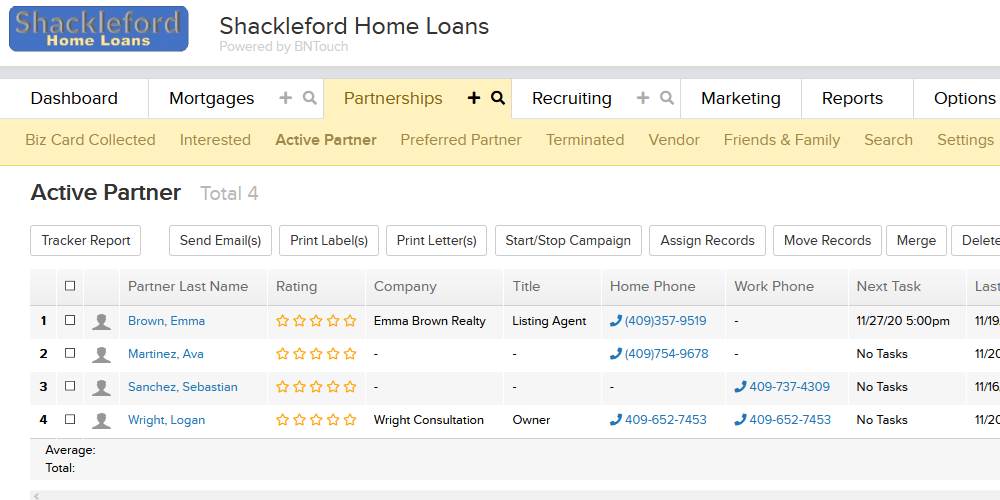
this list at any time, simply click the Partnerships Tab.
The organization of the Partnerships Tab
will depend upon the View Settings that are currently in place for your CRM.
Sub-tabs at the top of the page will allow you to quickly browse subsets of
your partner database. You may want to categorize your partner records based
upon their step in the Marketing Sequence Pipeline, by Group association, or by
another Customized view system. View settings can also determine which fields
appear in the Partner Record List to the right of a partner’s name. To learn
more about the views available in your CRM, please watch our “View
Settings” training video in this series.
Record List
Information
Below the sub-tabs, you will see a list
of your partners as rows in a table. Details from each partner’s record will
display to the right. Depending on your access privileges in your company, this
list will show either all records in your CRM or those specifically assigned to
you.
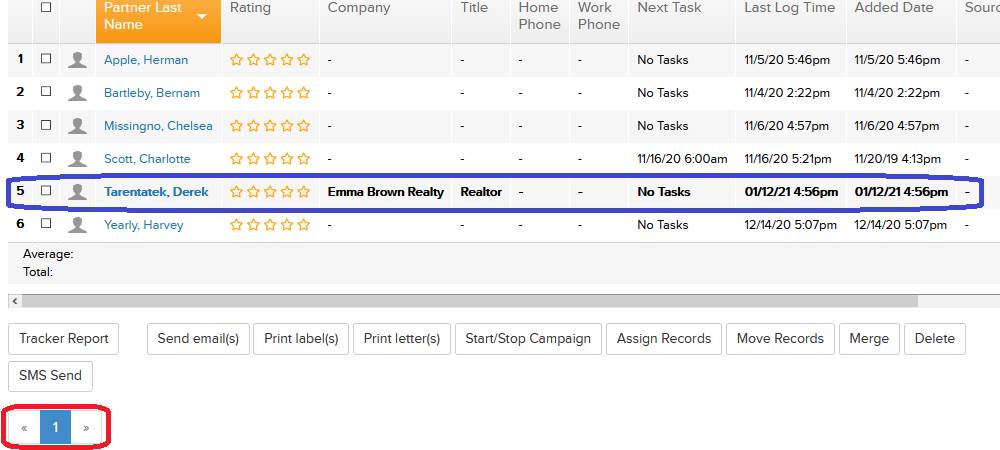
Only a portion of your partner records
will display on-screen at a time. You can navigate between pages of records
using the numbers and arrows in the lower left corner of the page. You can also
change the number of records that display on each page using the menu in the
upper-right corner. Note that displaying more records at once may affect page
loading times.
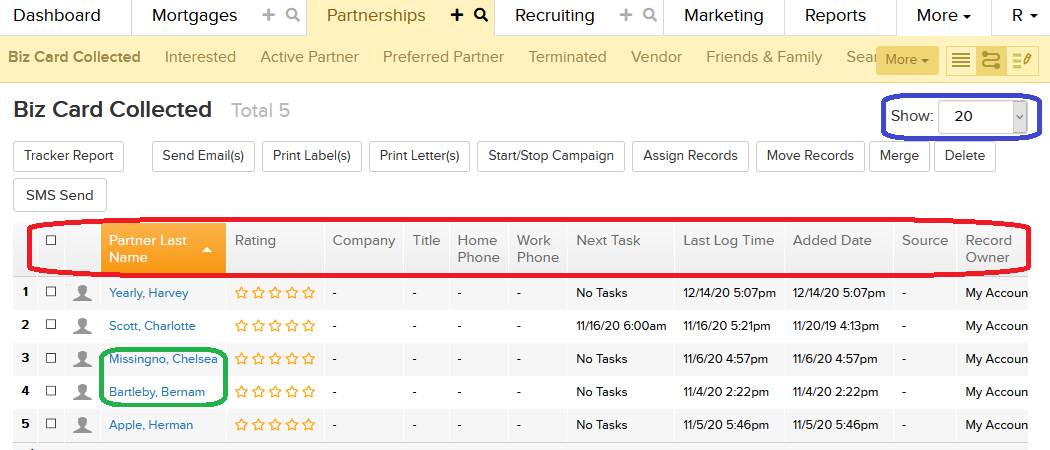
The list of records can be reordered by
clicking on any of the column headers. Clicking a header again will reverse the
sorting. Any new records that haven’t been opened yet will appear in bold.
Individual records can be opened and edited by clicking the partner’s Name.
Record Actions
No matter which view is used, several
options will be available for records in the Partnerships tab. Actions can be
taken on multiple records at once by using the checkboxes to the left and the
buttons above the record list. Which options appear as buttons here will depend
upon the modules that are active for your account. If you do not see a button
covered here in your CRM and would like it added, please contact your
administrator.
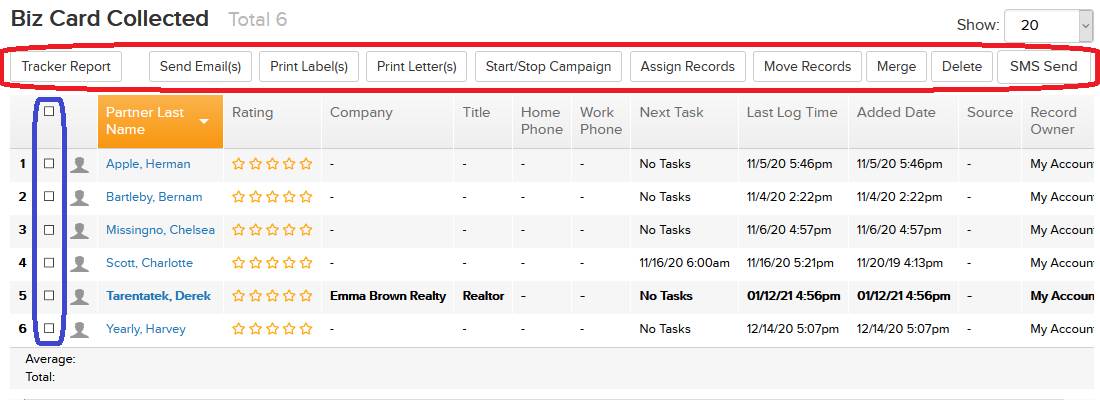
“Tracker Report” will let you see all
tracker events that have been created for the selected records. To learn more
about how the Event Tracker works and the reports available for it, please watch
our “Partner Event Tracker” training video in this series.
“Send Emails” will open an email editor
and add the selected records automatically listed as recipients. “Print Labels”
and “Print Letters” will do the same for physical mail communication instead of
email, allowing you to print mailing labels or pre-made letters uploaded to the
Marketing tab Documents Library.
When you click “Start/Stop Campaign”,
you’ll see a listing of your marketing campaigns, which you can then either
start or stop for all checked records. You can set a date and time for the
campaigns to start, and you can even re-start campaigns for records that
already have the campaign started.
The “Assign Records” button will show a
list of your CRM users, who you can then assign the ownership of selected
partner records to.
“Move Records” can be used to change the
“Marketing Sequence” stage for the selected records or to change the “Groups”
assigned to the records. You can select multiple groups for each record using
the checkboxes in the list, or you can remove the records from all groups using
the box below the menu.
If you have selected only two records
that are assigned to the same user, you can use the “Merge” button to sync the
information in both records into a single one. You
will be shown a list of the information for both records, and you can choose
which record’s information will be kept in the new file using the radio
buttons. You can use the “Select All” buttons at the top of the list to mark
all subsequent fields for that record. Then, you can select to combine them
into a single record, copy the information to both records to associate with
one contact record, or simply keep the selected record and remove the
unselected one.
“Delete” can be used to remove multiple
checked records at once.
Lastly, the “Send SMS” button allows you
to compose an SMS Text Message and send it to each of the selected records.
This feature is only available to accounts with the “BNTouch Voice” module
active that have enabled the “Bulk SMS” setting. Similarly, the “PB Dialer”
button is used to make Phoneburner calls to the
selected records if that module is enabled.
Adding New
Records
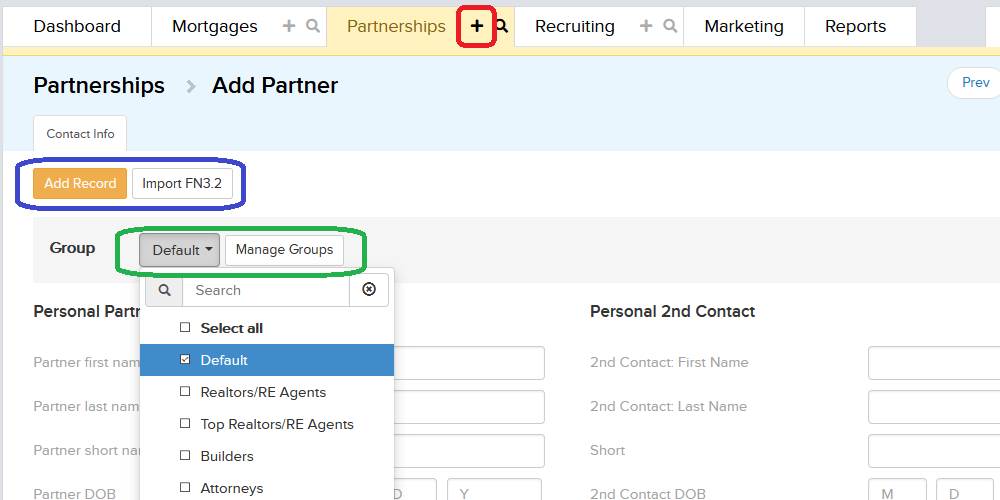
You may have noticed two icons adjacent
to the “Partnerships” tab at the top of your screen. The Plus Sign icon can be
used to create a new partner record. When you add a new partner, you can enter
information manually using the text fields below. You can include as little or
as much information as you like. You can add the new record to any relevant
groups using the drop-down menu at the top of the page, and new groups can be
created using the “Manage Groups” button.
Alternatively, you can import a record
from a Fannie Mae 3.2 file by clicking the “Import FN3.2” button at the top of
the screen. When importing records, make sure each file has a unique File Name.
When finished entering the partner’s
information, click the “Add Record” button to create the new record. Once you
do, it will appear in the Partner Record List and you will be taken to the
“Partner Info” section of the new record. More options are now available for
adding information to the record; these new options and data fields are
separated into various sub-tabs.
Searching
Partner Reords
The second icon to the right of the
Partnerships tab is a small magnifying glass. Clicking this will open Pik-a-Search, a highly customizable record-finding tool. To
learn more about finding partner records, please watch our “Pik-a-Search”
training video in this series.
Want to Learn More?