Options – Web Forms Manager
Using Webforms
to Create Records
When generating leads, you want to make
the process as simple as possible for your potential clients. BNTouch offers
several tools to help you gather contact and mortgage information for new leads,
even if you already have your own website. Using the Webforms Manager, you can
quickly and easily create forms that will slot seamlessly into your own
website, allow future clients to securely send you relevant information, and
automatically add the data from those leads into your CRM database. You can
even do the same for finding new mortgage partners or recruiting new staff
members.
Creating New
Webforms
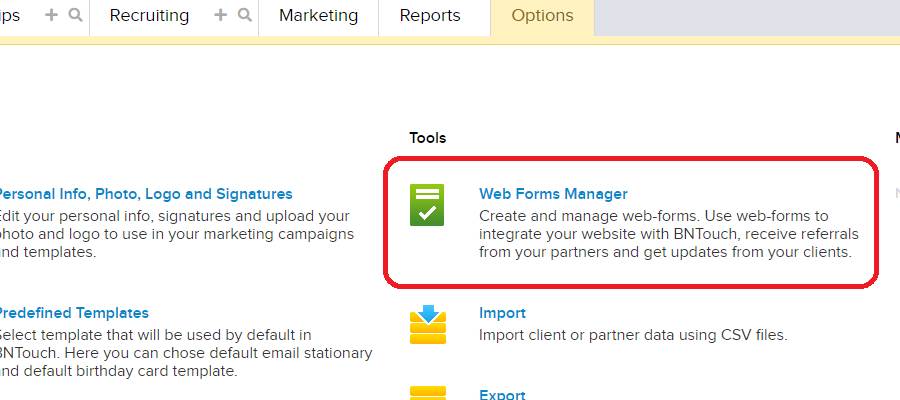
In the “Options Tab” of your CRM, look
for the “Webforms Manager” link and open it. You can find it easily by
selecting “Integrations” from the option categories to the left. When you open
the Webforms Manager, you’ll see a list of any website forms you currently have
active for your account.
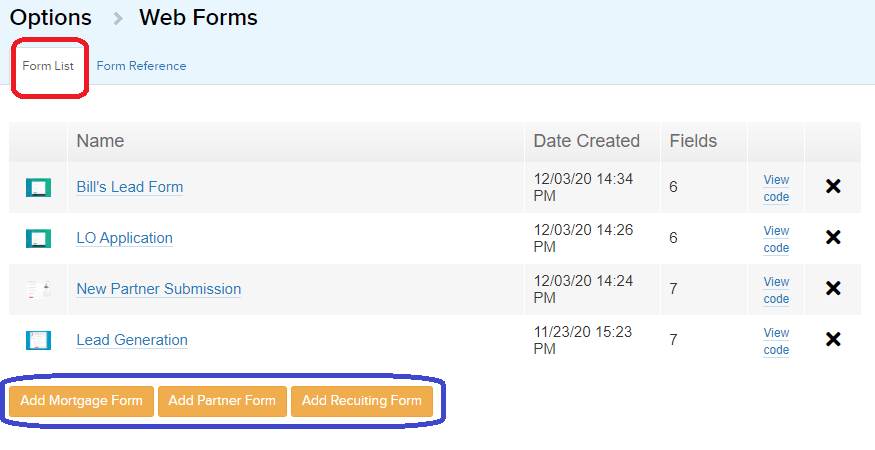
If none appear on this list yet, don’t
worry; you can start a new form by clicking one of the “Add Form” buttons
below. Each button corresponds to the database that new entries from your form
will be assigned to once information is entered. If you are looking to create
new leads and borrower records, click “Add Mortgage Form”. To create a form
that will add new partner records for agents, CPA, or other people you work
with for client mortgages, click “Add Partner Form.” The final option, “Add
Recruiting Form”, can be used to add records for potential hires to the
optional “Recruiting Tab” of your CRM.
When you start a new form, the first
steps are straightforward: enter a title for the form in the “Form Name” field,
then choose whether the form will be available to all users of your office or
just yourself.
Next, you can choose the Marketing
Sequence and Group that new entries of this type will be added to when the form
is completed. For example, if you want new records that borrowers add through
the form to be entered into your CRM as “Leads”, you can choose that from the
“Place to Marketing Sequence” drop-down menu. If you are creating a form
specifically for new Insurance Agents to complete, you can choose that from the
“Place to Group” menu for partners.
If you want a customized message to
replace “Submit” for the button that people will click to send you their
entered information, you can enter that in the text field here. You can also
choose whether to display a “Thank You” page with custom text when users
complete the form or to enter a website URL you would like to open when they do
so.

To ensure you don’t receive fraudulent
entries, you can opt to include a Google Captcha feature to the form that
clients and partners will need to complete in order to
submit their data. If you enable this feature, you need to list the domain of
the website where the form will be hosted in the provided text box. You don’t
need to include the full website URL or the specific page, but the Captcha
security feature will not work if the site’s domain is not entered here.
Next, you can start adding elements to
the form. Using the “Select…” menu, choose what fields from your CRM records
that you would like to gather from people who complete the form. By default,
“Borrower First Name” will be listed here for Mortgage Forms, but you may also
want to gather more information, like the new lead’s Email Address, their phone
number, what type of loan they are looking for, or the like. When you click the
“Add” button, the new form field will appear below the “First Name” entry.
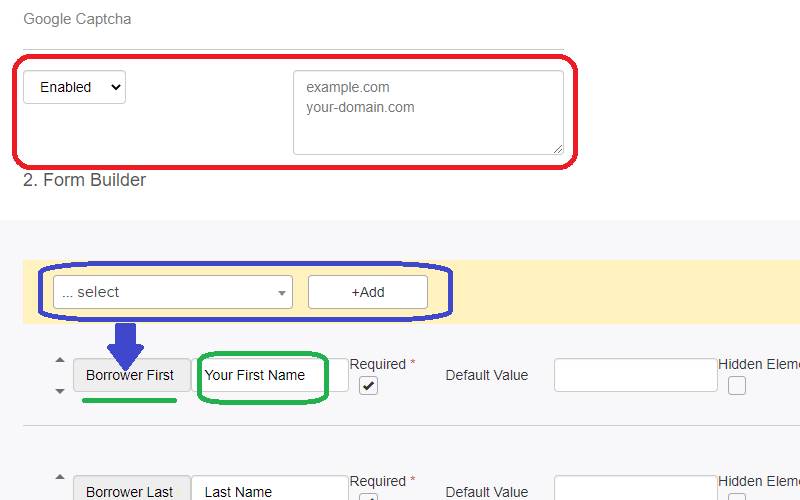
For each field, you can enter a new name
for the field that the person filling out the form will see. This can be
different from the original field title. For instance, you may put “Your First
Name” instead of “Borrower First Name” here to make it seem more personal. You
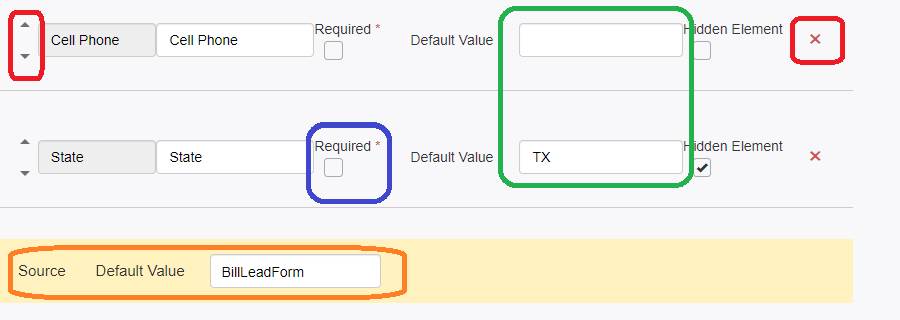
can re-order form questions using the up and down arrows to the left, and you
can remove any fields using the “X” icon to the right. If you want to require
that any fields have data entered in order for people
to submit the form, check the “Required” box for that entry.
The “Default Value” box can be used to
pre-populate information into a field. For example, you may put “Dallas” in the
“City” field if the majority of your clients come from
that city.
The “Hidden Element” checkbox will
prevent that question from appearing on the form for the client. This can be very helpful for auto-completing record fields that you
already know the answer to. For example, if you only work within a specific
state, you could put that state in the “State” field and make it “Hidden”, and
every record created from the form will automatically have that data entered
for that field.
Similarly, you can set a “Default Source”
value that will be added to each record created via this form using the field
below. This is important because it lets you know exactly which records have
been made from each survey you are running, allowing you to see just how
effective your webform has been.
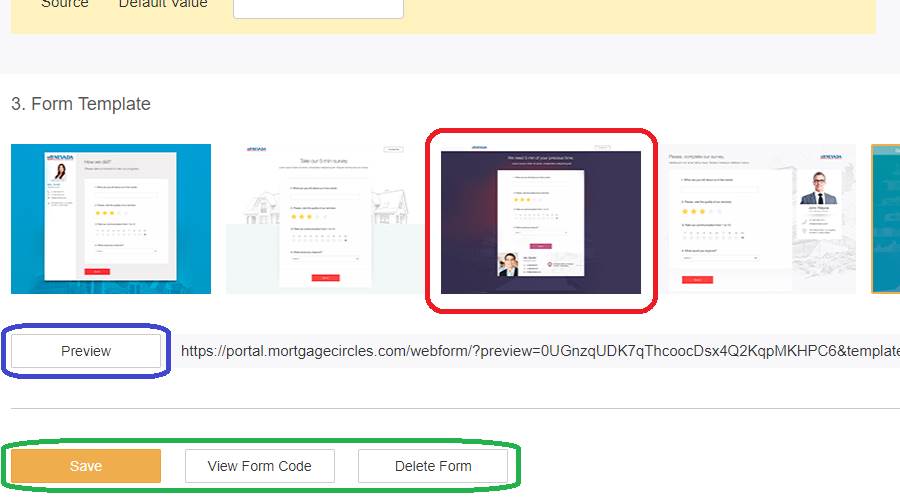
Towards the bottom of the page, you can
choose a design template for your form to make it look just the way you want
it. You can also click the “Preview” button to see what it will look like when
your clients are using it. Once you are finished configuring the form, click
the “Save & View” button to add it to the Webforms Manager.
Webforms List
You will be returned to the Forms List,
and the new form you created will appear below. You can see a thumbnail
preview, the creation date, and the number of contained fields for each form
here, and the “Name” link of forms can be used to edit them with any later
changes.
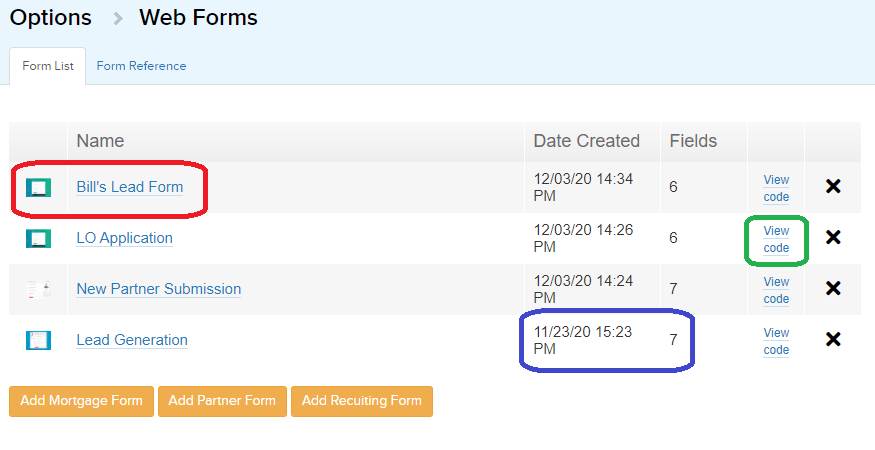
When you are ready to copy the HMTL code
for the form and put it into your own website, you can click the “View Code”
link to display the form’s code in detail. The code will appear on the left
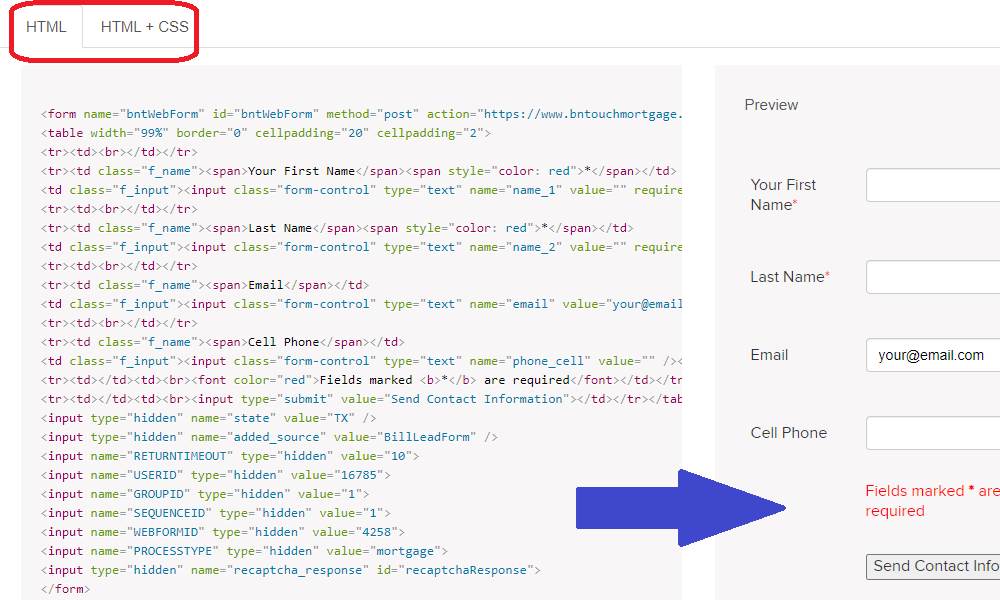
side of the screen, and a preview of the embedded form will show on the right.
You can use the tabs at the top of the page to determine whether you want the
code for just the HTML of the form or to also include CSS data to ensure the
form’s appearance stays unchanged.
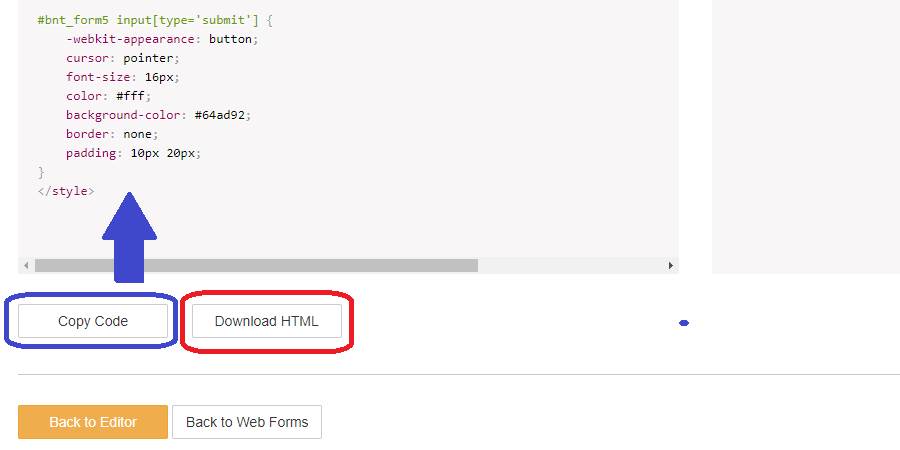
At the bottom of the page, you can use
the provided buttons to either copy the displayed code to your clipboard or to
download it as a “.TXT” file. You can then use either the “Back to Editor”
button to continue working on that form or the “Back to Web Forms” to return to
the Form List.
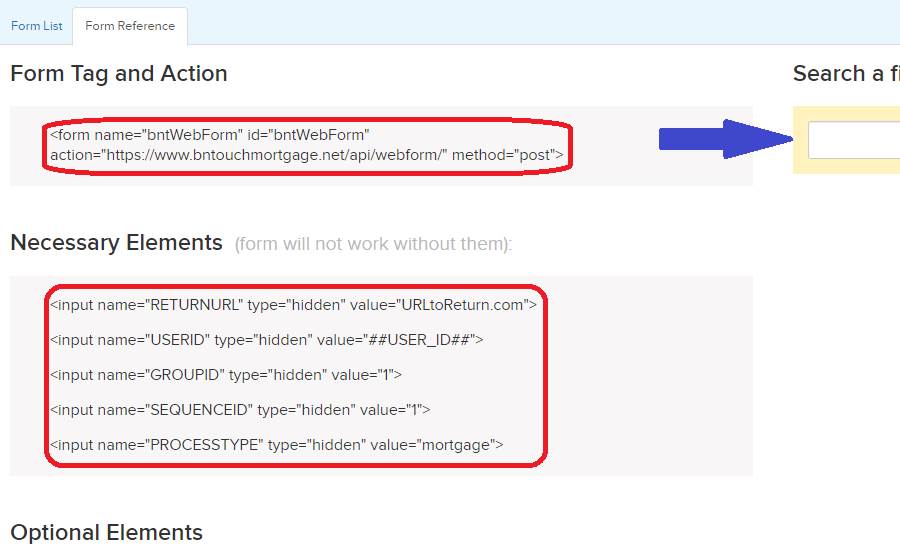
Form Reference
The second sub-tab in the Webform
Manager, “Form Reference”, contains several helpful HTML tags you can use when
embedding your form into your website. These code snippets can be copied and
pasted into the editor you are using in order to
redirect to a different page when the person finishes the form, to add specific
partners as participants to leads generated by a form, or to include various
partner information as metatag data.
You can also find specific field input
tags using the “Search a Field” box to the right. These can be used to further
customize how the form appears on your website and how information can be sent
to your CRM.
Want to Learn More?