Modules – BNTOuch Surveys
Gathering
Testimonials Using the Survey Module
The BNTouch Surveys Module allows you to
create questionnaires and testimonial pages to send to your borrowers and
partners. These surveys can be used to gather feedback and information directly
from your clients, allowing you to learn more about them, improve client
satisfaction, and update your internal processes. Testimonial pages can be
created to gather survey data from many people at once, and you can use the
answers they submit to organize your record database in your CRM.
Accessing the
Surveys Module
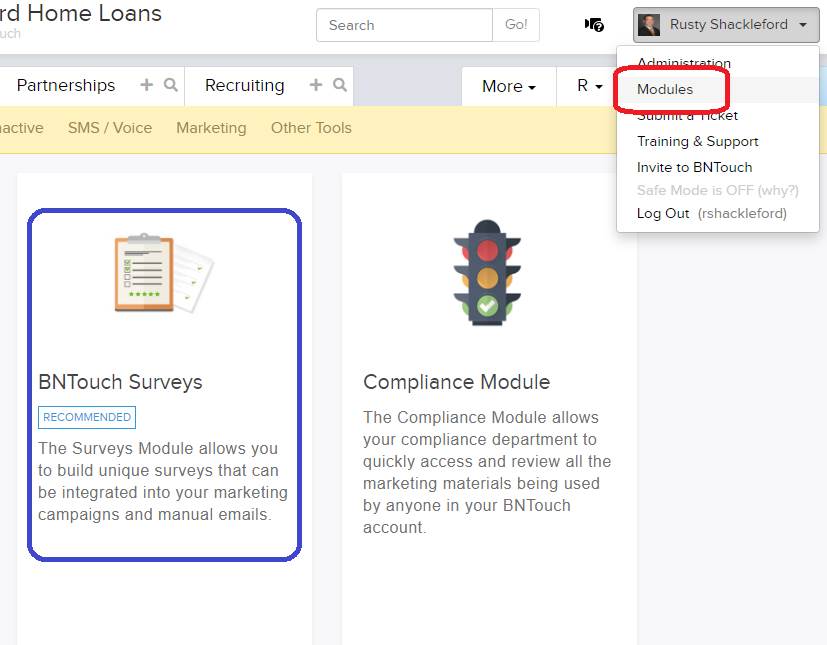
Surveys and Testimonials are an optional
module that can be enabled for your account by your administrator. If you are
an administrative user for your company, you can open the User Menu in the
upper-right corner of the screen, click “Modules”, and then find the “Surveys”
module and enable it.
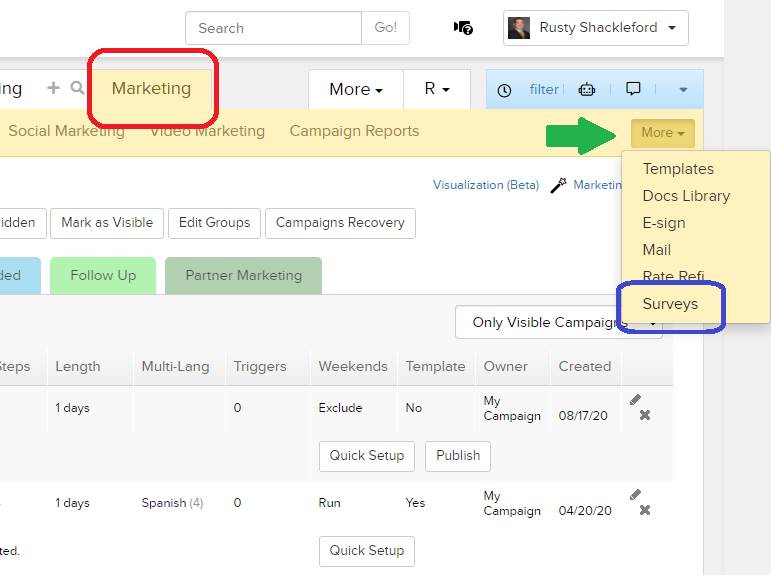
Once enabled, you will have access to a
new area of your Marketing Tab labeled “Surveys”. If you cannot see this in the
sub-tabs at the top of the Marketing page, click the “More” link to view any
hidden sub-tabs.
Creating New
Surveys
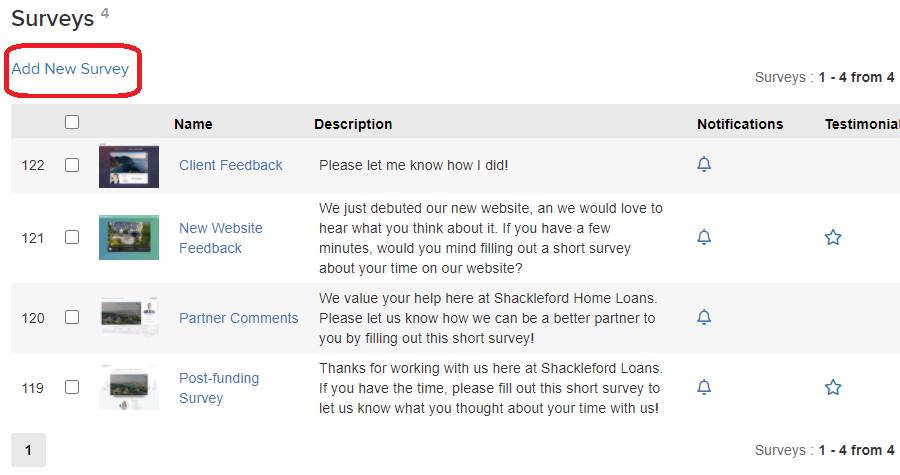
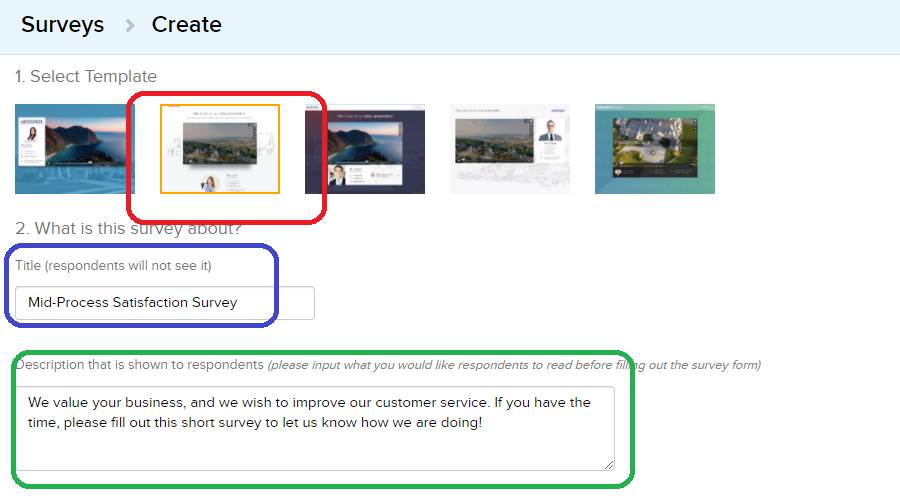
To create a survey, click the “Add New
Survey” button. You will then be able to choose a Survey Template; this will be
the design of your new survey that your clients and partners will see.
Next, you can enter a Survey Name. This
is an Internal identifier that only you will see. You can also add a brief
description of the survey that clients and partners will see before they fill
out the form.
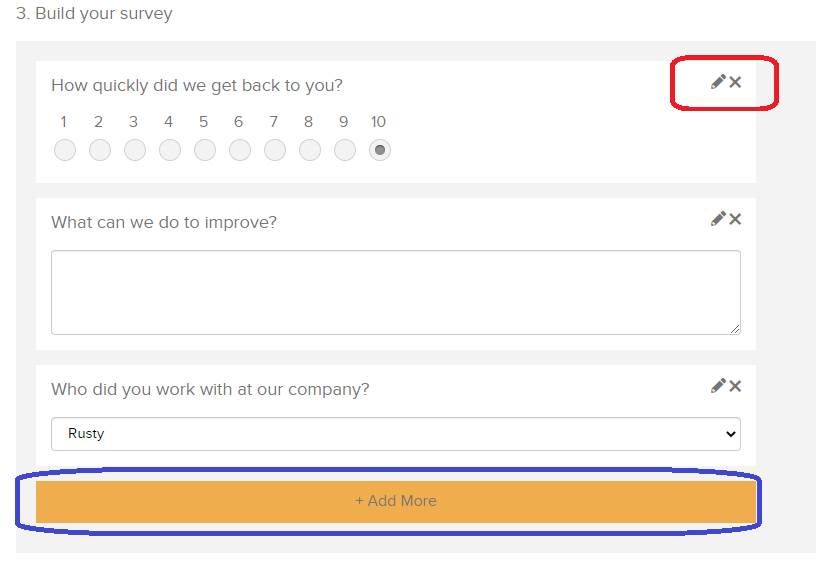
Below, you can build your survey by
adding new elements piece-by-piece, including star ratings, drop-down option
menus, text response fields, and the like. You can add new elements by clicking
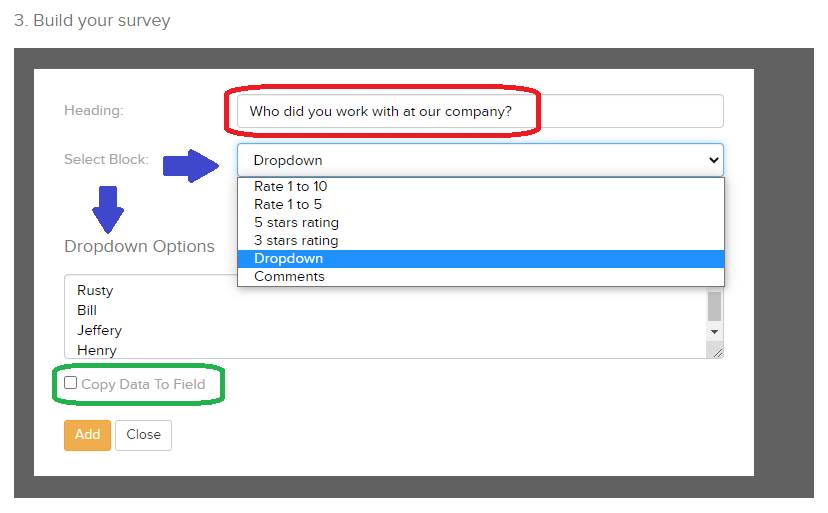
the “Add More” button. Enter a “Header” that will appear as the question for
this element, then choose the type of response you want the client to input. If
you are creating a drop-down menu, you can enter the available response options
in the text field.
If the “Copy Data to Field” box is
checked, the response that the client or partner enters for this survey
question will be added to a specific field in that client or partner’s record
in your CRM. You can use the drop-down menus here to select exactly which
field, and you can type search terms into the menu to find what you are looking
for.
When ready to add an element to the
survey, click the “Add” button below. You can use the icons to the right of an
element to edit or delete it.
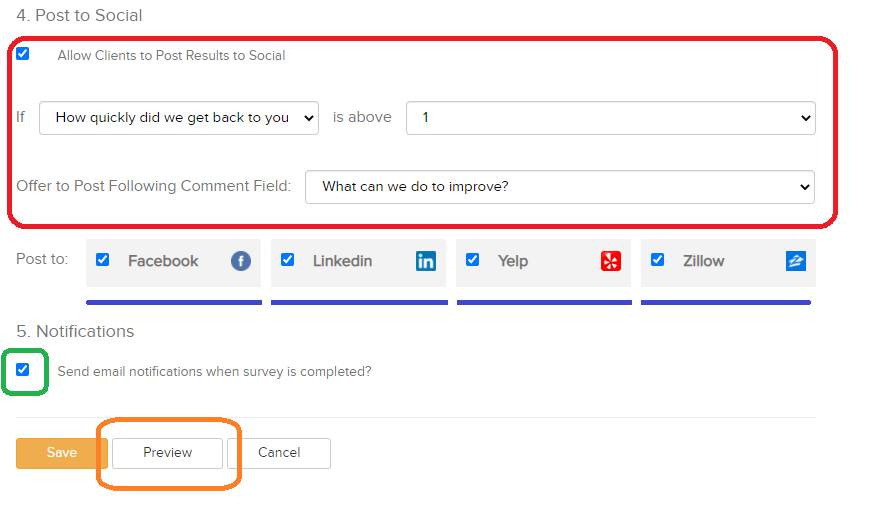
If you have linked your social media
accounts for your business in your CRM, you can allow clients and partners to
post results of a survey to their social media pages using the “Post to Social”
checkbox. If your survey includes numbered or star rankings, you can limit this
ability to clients who have provided at least a certain ranking using the menus
here. If you do, you can then choose which comment fields from the survey they
can share to social media. Lastly, you can check the box for each social media
service that you would like to provide a sharing link to your survey
recipients.
The “Notifications” checkbox can be used
to send an email to you whenever a new result is submitted for this survey.
You can see what your survey will look
like for your clients and partners using the “Preview” button at the bottom of
the page. When you are done editing survey elements, click the “Save” button.
Using the Survey
List
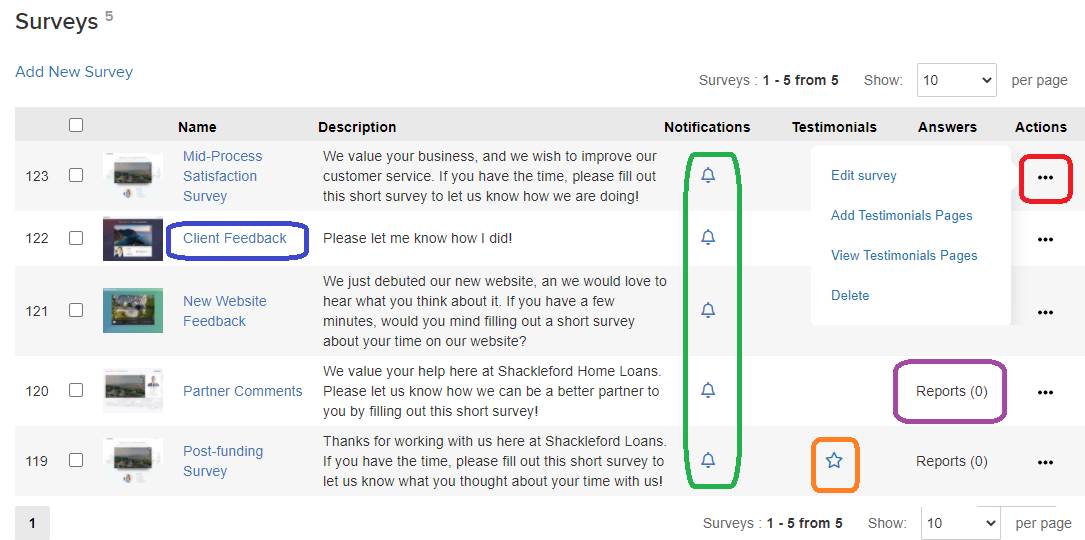
All surveys that have been created for
your account are stored in the “Surveys” sub-tab of your Marketing Tab. Surveys
will be listed in the order they were created, with the newest ones appearing
at the top. You can edit a survey by clicking the blue survey name or by using
the “Actions” menu to the right, which will re-open the Survey Builder we
covered before. If you have enabled email notifications for a survey, a bell icon
will appear to the right of its description in this list.
Adding Surveys
to Email and Campaigns
Once you have created surveys for your
account, you can include links to them in email communication and marketing
materials that you send to clients and partners. When you are editing an email
message or a campaign step in the Marketing Tab, you can use meta-tags to
include a link to a survey testimonial page.
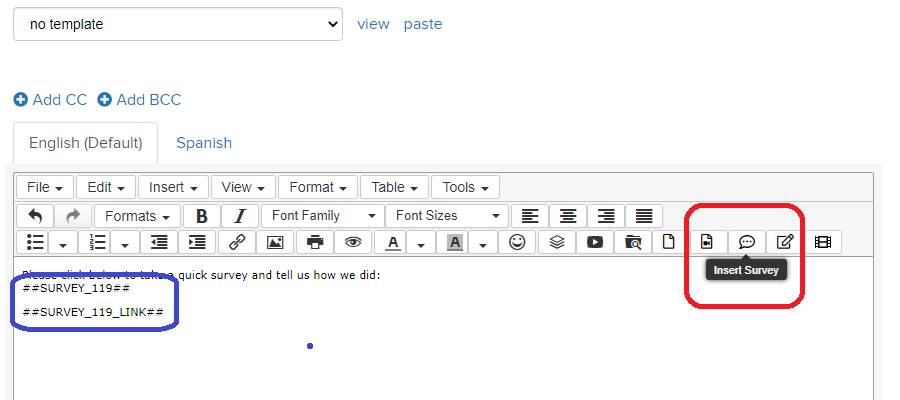
The “##SURVEY_[ID]##” and
“##SURVEY_[ID]_LINK##” metatags will be replaced in the recipient’s email with
a link to the corresponding survey in your list. You can also add these tags to
your campaign using the “Surveys” button in the text editor.
Viewing Survey
Results
You can also view comprehensive
statistics for a survey by clicking the link in the “Answers” column of the
Survey List.
This will open a summary report of the
responses to that survey, including the number of answers that have been
submitted, in total and for various time periods, and a set of charts for each
of the survey questions below. The data that is used for these graphs can be
limited to a specific date range using the “Filter Report” option above the
charts. Each chart will correspond to a
specific question of the survey, and you can hover over the graphs to view more
details.
At the bottom of the page, you can also
see any comments or emails that were submitted with the survey results.
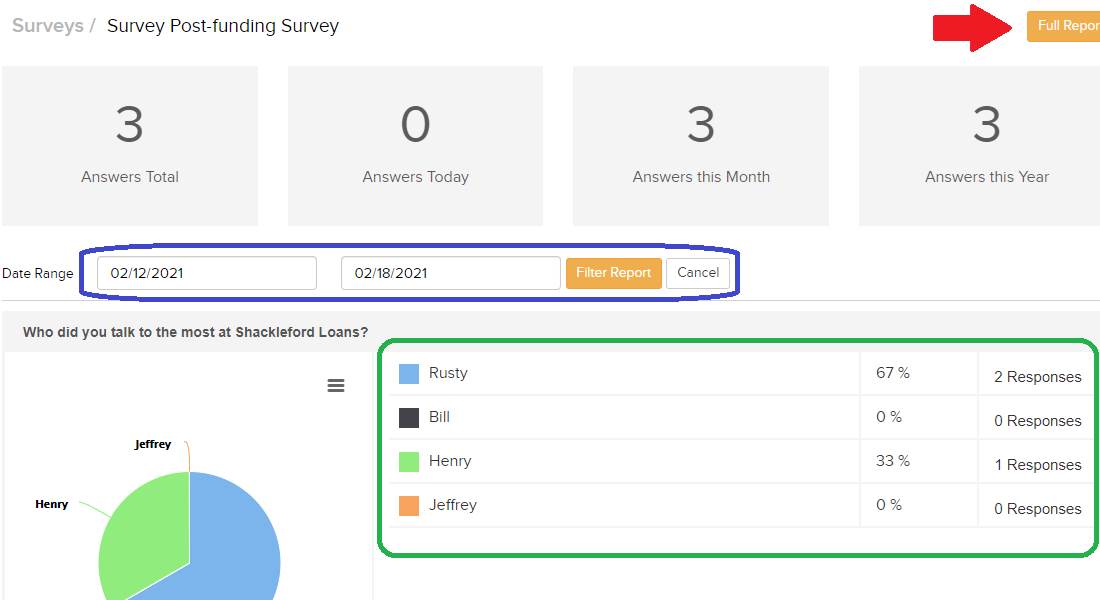
In addition to this summary, you can use
the “Full Report” button in the upper-right corner of the page to search for
clients and partners according to specific criteria from their survey results.
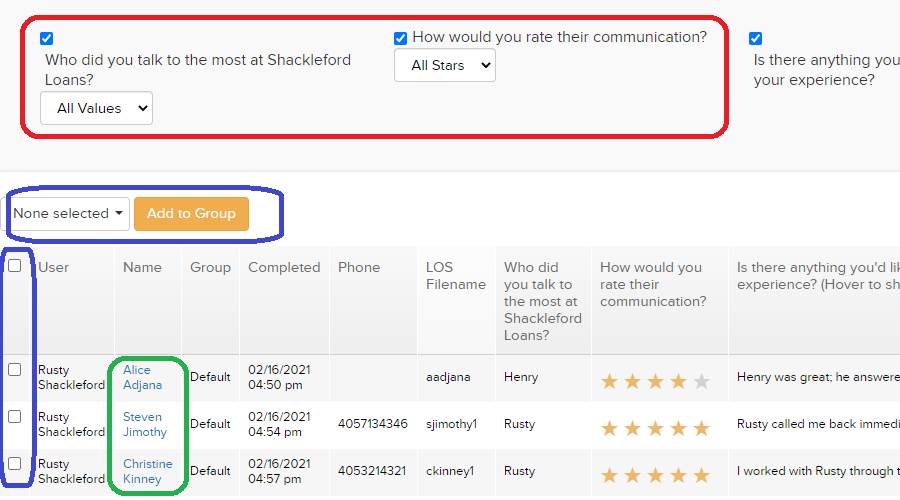
You can check the boxes of any of the survey’s questions to narrow your search
by the client’s response to that question, and you can choose from the possible
answers you want to match for using the drop-down menus. You can also look for
records that are assigned only to specific users in your CRM using the menu in
the upper-right. When ready to perform the search, click the “Filter” button
above.
A list will appear that includes all
client and partner records whose answers to the survey questions match the
criteria you set above. You can see all of the survey
answers for these records in the list, click the record “Name” link to access
their file in your CRM, and even check the boxes to the left and assign multiple
records to groups using the menu above the list.
Creating
Testimonial Pages
Back in the Survey List, the actions menu
for each survey can also be used to create and view Testimonial Pages for that
survey. These are static portal sites that you can send to clients and partners
so they can view results of the linked survey at any time. You can also view
any testimonials that have been set up for a survey by clicking the star icon
in the Survey List.
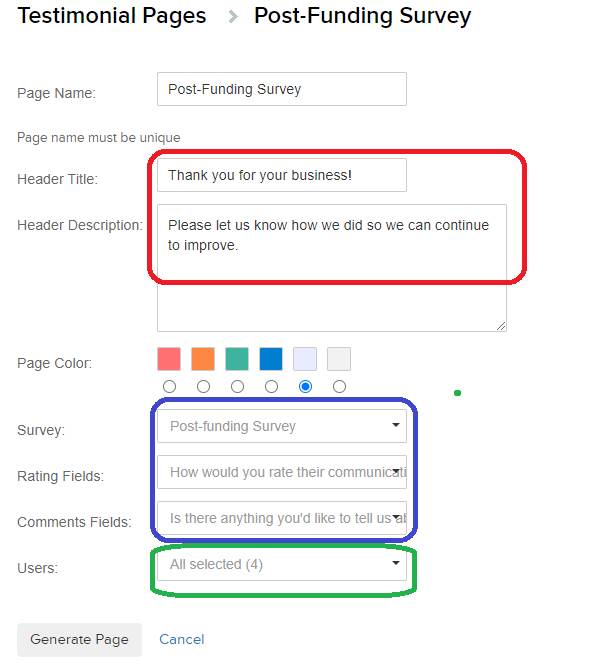
When you add a new testimonial page for a
survey, you can enter a name for the website, enter a header and description to
introduce the survey to visitors, and choose the background color for the page.
Depending on the survey that you have selected for the testimonial page, you
can choose rating and comment fields to include using the drop-down menus. If
you want the testimonial page to be assigned to a specific CRM user, you can
choose them from the drop-down menu. When everything looks good, click the
“Generate Page” button to create the testimonial page.
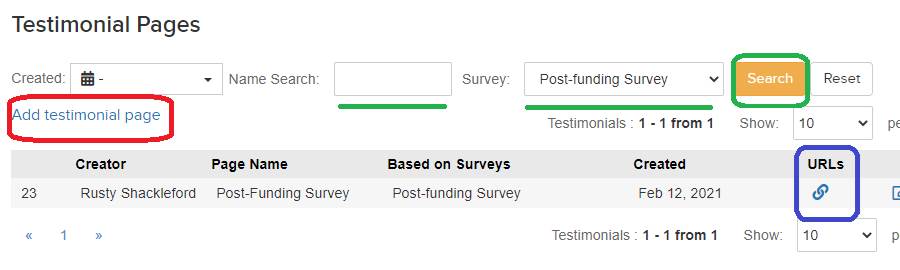
Each user in your account will have a
unique Testimonial Pages list which will display all portal sites they are
linked to. Here, you can see who created the page, the title of the
testimonial, which survey it is using, when it was created, and find a shareable
link to the testimonial page. If you need to change anything for a testimonial,
click the “Edit” icon to the right to re-open the customization screen.
Users can search through their
testimonial pages using the date ranges, search box, and drop-down menus above
the list. They can also create new testimonials and link them to
already-created surveys using the link above.
Viewing
Individual Survey Results
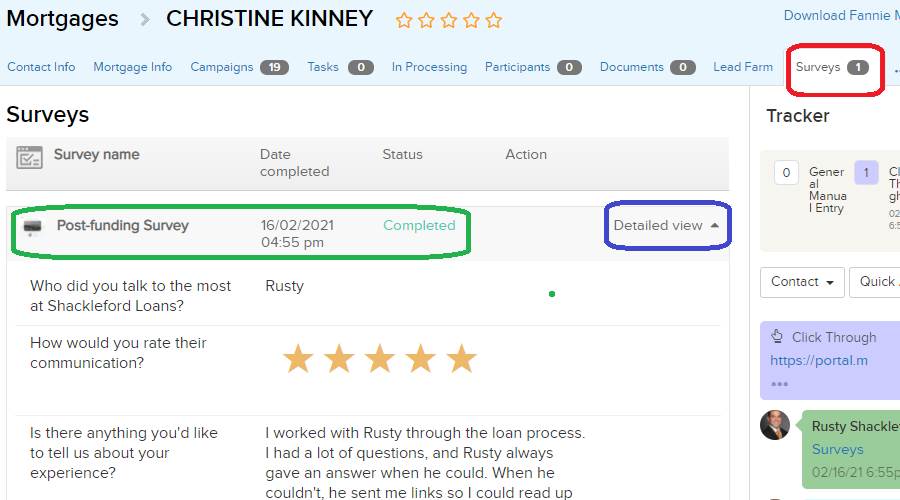
In addition to viewing summary and
detailed reports for all answers to your surveys, you can also see the answers
that specific partners and clients have given for a survey. When you open a
record in the Mortgages or Partnerships tab of your CRM, you will see a new
“Surveys” sub-tab available for each client and partner.
Here, you can see a list of all surveys
that this person has interacted with, including the date they accessed the
survey and their completion status. If you click the “Detailed View” link to
the right, you can see all of the answers that client
or partner gave for each question in the survey.
Want to Learn More?