Options – CSV Import
Importing Data
from .CSV Files
Entering borrower and partner data can be
time-consuming--especially when switching CRM services. Some lead providers and
LOS systems can sync with BNTouch to automate the migration of this data. In these
cases, BNTouch recommends checking with our support team to see if this option
is available and for help setting up the connection.
In other cases, you can upload a file
containing borrower or partner data to BNTouch to import the records into your
CRM. The type of file used for this transfer is called a “.CSV File,” for
“Comma-Separated Values.” These files can contain vast amounts of information,
and they separate the individual fields with a series of commas. If you have a
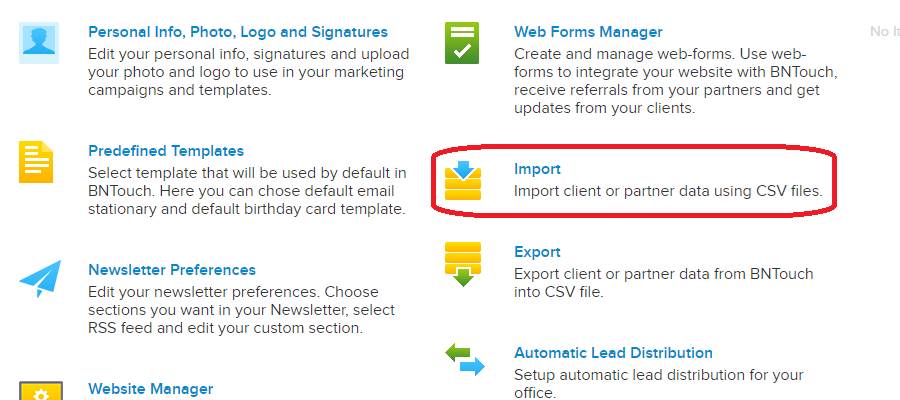
.CSV file with borrower or partner data, you can upload it in the Options tab
under “Import.”
Most software programs or systems will
have the ability to export contained data into one of these .CSV files. If you
aren’t sure how to do so or where the file is on your computer, please check
the support information or contact a representative of the service.
Uploading a .CSV
File
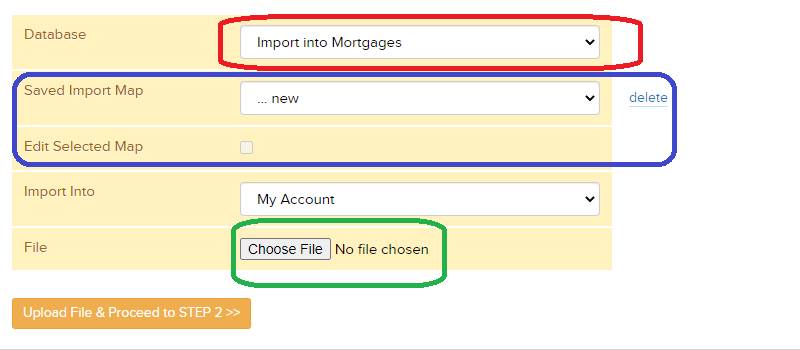
First, choose whether you are importing
Mortgage/Borrower data or Partnership data using the “Database” drop-down menu.
The “mapping” options can be used when uploading future files to follow the
same pattern used in previous uploads. If your business has multiple BNTouch
user accounts, choose which account the records will be uploaded to from the
“Import Info” drop-down menu. Click the “Choose File” button to select the file
you saved to your computer, then click “Upload File & Proceed to STEP 2.”
In “Step 2” of the import process, you
will first choose which fields in the “.CSV” file correspond to the fields in
your BNTouch CRM. Choose which fields match the fields in your data file. At
the very least, make sure the .CSV file contains the “First Name,” “Last Name,”
and “Email Address” fields.
Below, preferences for the imported data
can be configured. The “Add to Pipeline” menu will determine what step in the
marketing sequence will be applied to the new records. “Duplicate Preferences”
will let you either skip or overwrite any duplicated records when importing.
“First Row Preferences” will let the import system know whether the first row
in the .CSV file is a set of names for the columns or the actual data. If you
organize your records by groups, you can select a group to apply to the
imported records from the “Choose Group” menu.
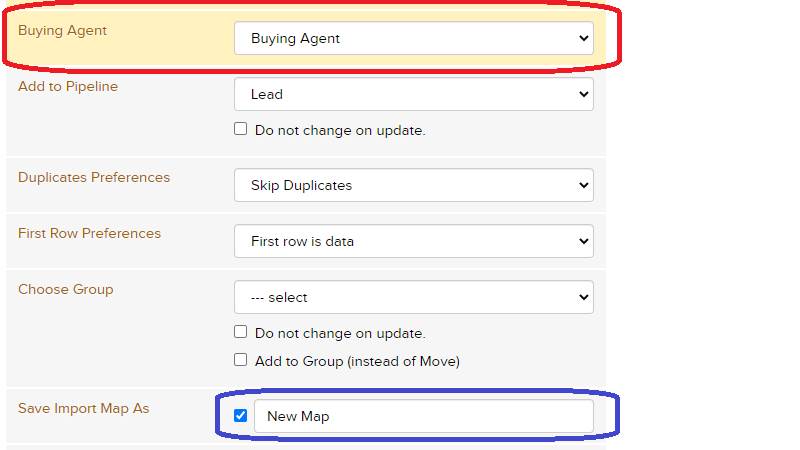
If you will be importing records
frequently, you can save the import map settings you used for this upload to
use for future uploads by checking the “Save Import Map As” box and entering a
name for the map. If you want to avoid any automated marketing triggers from
activating for the imported records, check “Skip Triggers on Import.” If you
want to make your mapping settings public for other users in your company to
use when importing .CSV files, check the “Make Map Public” box.
To avoid duplicate records, you can check
the boxes for “Identify by Email” or “Identify by Cell Phone” to determine how
to check for unique records. By default, BNTouch will automatically check to
see if multiple fields from the imported file are set to import to the same
field in the CRM. If you want to combine text fields into the same CRM field,
check “Skip Mapping Check.”
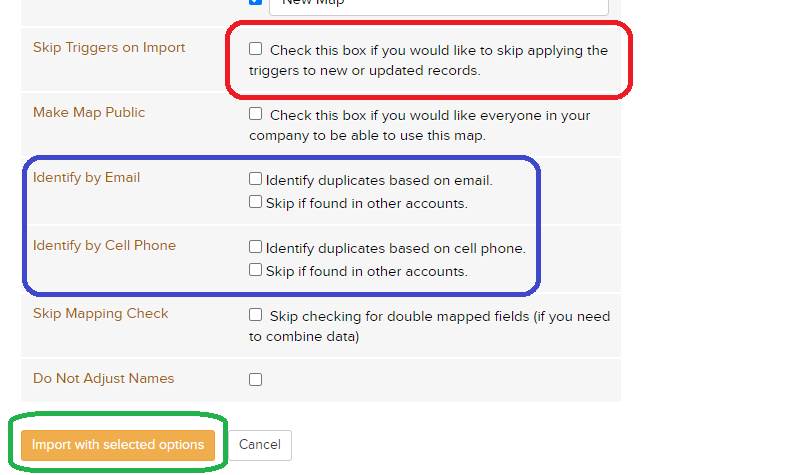
When finished, click “Import with
selected options” to bring the information into your CRM.
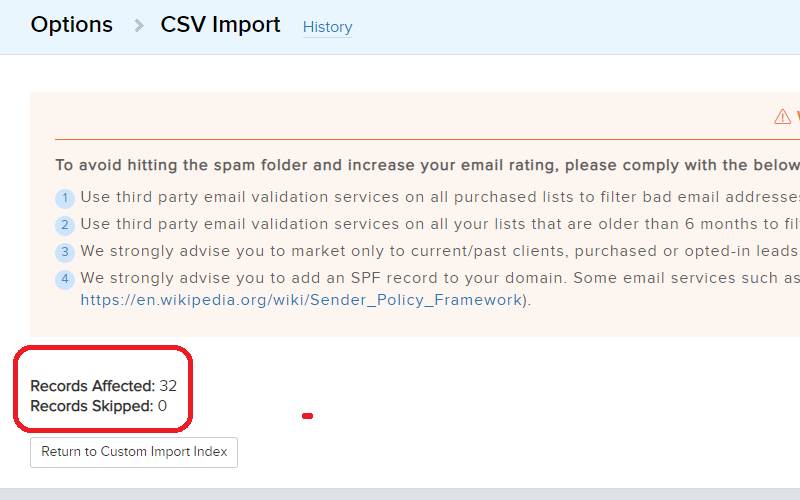
A summary of the imported records will
display. If any errors or mistakes have occurred, you can still reverse this
import by clicking the “History” link above. Find the import action you just
performed and click the “Remove Records” link to the right.
Want to Learn More?