Miscellaneous – Text Editor Options
Using the Text
Editor to Design Your Communications
One of the most important elements of any
mortgage business is communication. In order to stay
top-of-mind for your clients, your marketing needs to be both eye-catching and
packed with important information. In the BNTouch CRM, you can personalize your
communication with clients and partners using the custom text editor. This tool
is available throughout your CRM, whether you are sending an individual email
to a partner, creating a new template to use for future marketing, re-designing
your campaign steps, writing your personal newsletter for your clients, or even
adding pages to your website.
Text Editor Menu
Options
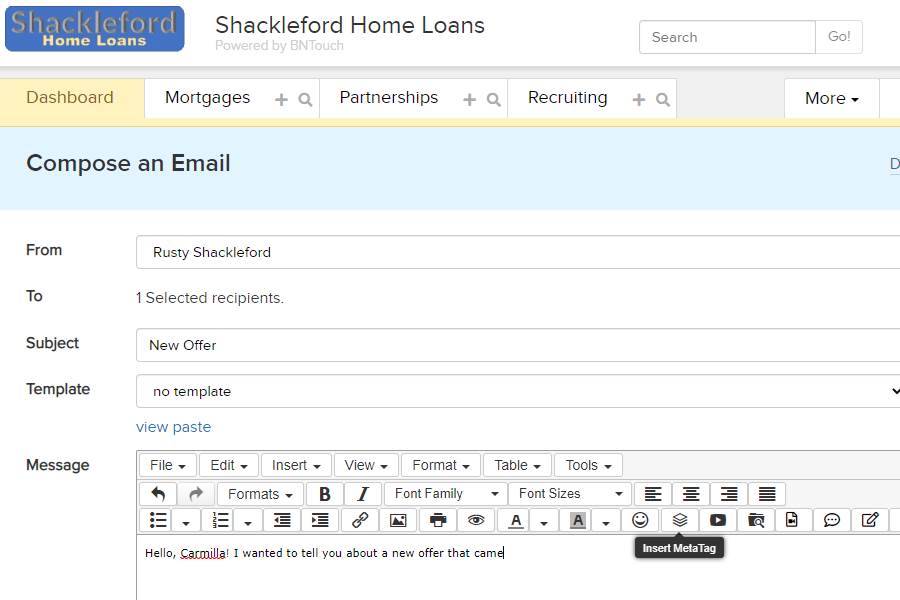
Whenever you start working on a message
to your clients or partners, you’ll see a large text box appear with a panel of
menus buttons at the top. This is the text editor, and you’ll see these same
options appear when you edit most of your communications elsewhere in the CRM.
There are some exceptions, like SMS text messages and printed postcards, where
you won’t have the same formatting options or advanced tools. In these cases,
you will see a simple text box without any buttons at the top.
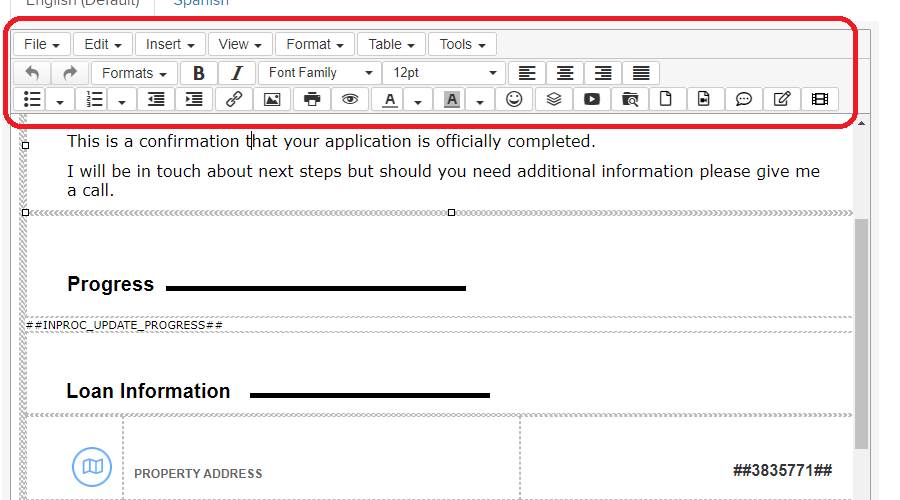
The first set of options that appears in
the text editor is a series of drop-down menus. These allow you to modify the
document as a whole or add elements to your message. You can navigate these
menus by clicking “File”, “Edit”, or another menu, hovering over the displayed
options, and clicking one.
The “File” menu has two basic features.
“New Document” will clear everything from the text box and start with a clean
slate. Only use this if you are sure you don’t want anything that is currently in
the editor, as this option will delete all material in the box below. “Print”
can be used to send a copy of your current work to your printer.

“Edit” contains tools that will save you
considerable time while working on emails and marketing campaigns. “Undo” will
cancel the last modification you made to your message, and “Redo” will bring it
back. “Cut”, “Copy”, and “Paste” work just like elsewhere on your computer,
allowing you to duplicate text and formatting you find elsewhere. If you just
want to paste the text you have copied and ignore any style or formatting,
click “Paste as text”. “Select All” will highlight everything in your
document—which can be helpful for changing the alignment or font size for
everything at once. Lastly, “Find and replace” will search your message and let
you replace what you find with something new.
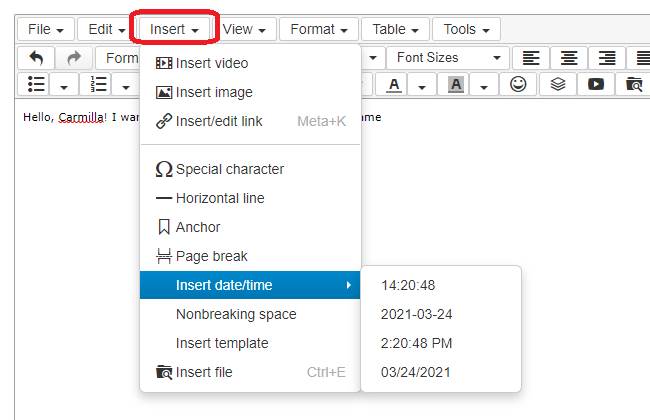
The “Insert” menu can be used to add
various elements to your message. Inserting a Video or Image will open a prompt
allowing you to enter a web address for an externally hosted image or video
file. You can then enter dimensions and customize embedding options. In the
“Advanced” tab for images, you can enter HTML style tags or set buffer space
and a border around your picture, and for videos, you can include embed codes for
externally hosted videos. “Insert/Edit Link” will let you create a hyperlink to
a website, either creating new text or using text that you have selected. Page
formatting elements can also be inserted, including a variety of special
character, horizontal lines, HTML anchors, page breaks, the current date and
time, and non-breaking spaces. Lastly, you can access the File Manager using
“Insert File” to attach many types of files to your message.
Under “View”, you can change the way that
the text editor displays information for your message. “Show Invisible
Character” will display hard-to-locate objects like non-breaking spaces, while
“Show Blocks” will outline each of the text boxes and paragraphs used in your
writing. The “Preview” link can be used to see what your message will look like
when clients and partners open your message, and “Fullscreen” mode will enlarge
the text editor to the bounds of your current browser window. You can return to
the original size of editor by choosing this option again.
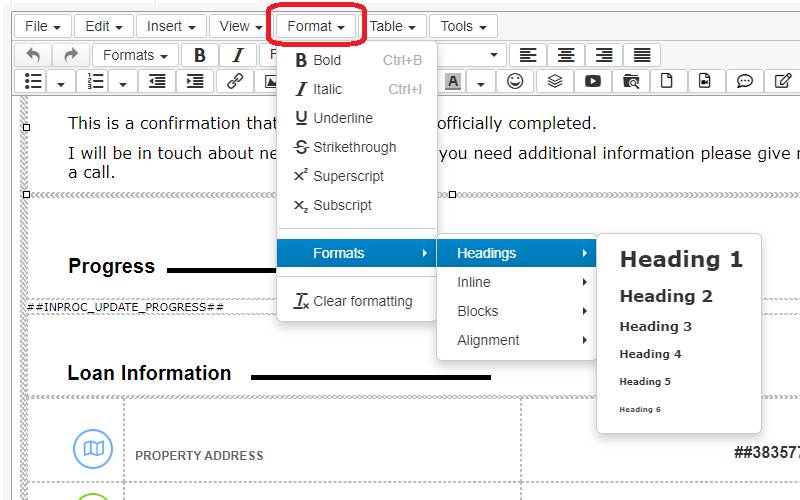
“Format” allows you to apply basic
formatting to text in your document. This will affect either text that you
currently have selected or the current text block that contains your cursor, if
you do not have anything highlighted. Simple modifications like Bold, Underline,
and Strikethrough can be applied here, as well as a series of formatting
presets listed under “Formats”. These can be helpful for keeping your
communication consistent in style. If you want to remove all format options
from the text you have selected, click “Clear Formatting”.
You can use “Table” to create and modify
grid-based organizational tools for your message. When you hover over “Insert
Table”, you can choose how many rows and columns you want to add, then click
the grid to create the table. When you are editing the table and text inside
it, you can use “Table Properties” to customize the cell spacing, borders,
alignment, size, and colors. To modify specific cells, rows, or columns, hover
over the lower options in the “Table” menu to change them individually. You can
remove an entire table by clicking inside it and choosing “Delete Table”.
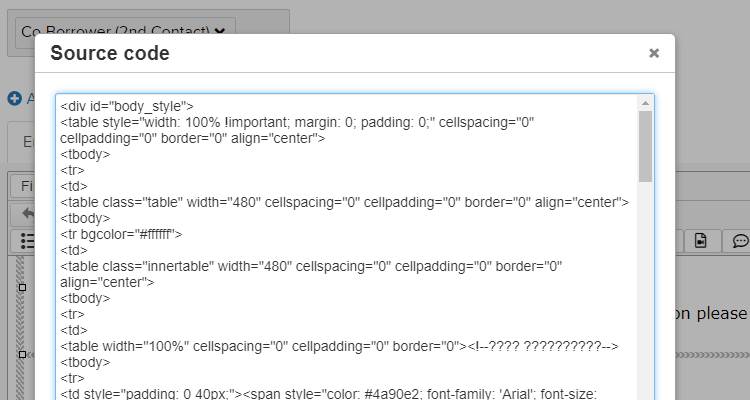
The final menu option, “Tools”, allows
you to access the HTML source code for your communication. This option can be
helpful if you have experience designing websites and other online documents,
but we recommend doing so only if you know what you are doing. When you click
“OK” after working in the source code for your message, all HTML tags will be
converted and display their contents in the text editor.
Common and
advanced Text Options
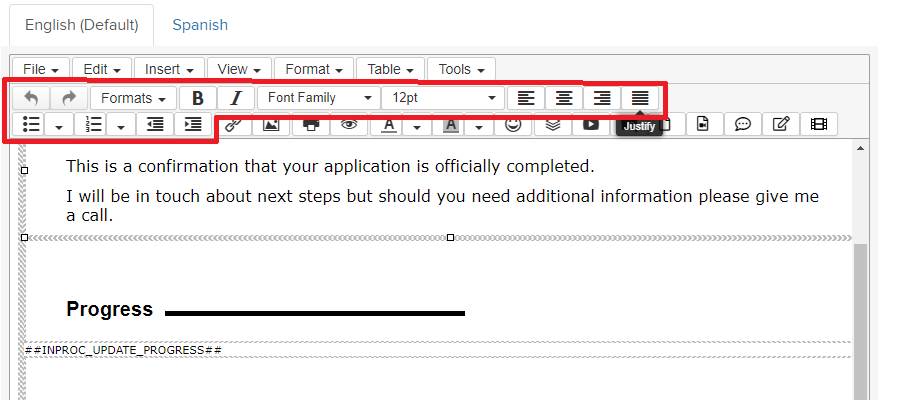
While working on your message, you can
easily add or modify elements using the buttons that appear below the drop-down
menus. The first set of these can be used to perform basic modifications to the
text of your message, including undo-ing and redo-ing actions, applying preset formats, making text bold or
italic, changing the font and size of text, alternating the paragraph alignment
and justification, and creating bulleted and numbered lists. Most of these
options will apply to whatever text you have selected at the time or to the
text block containing your cursor.
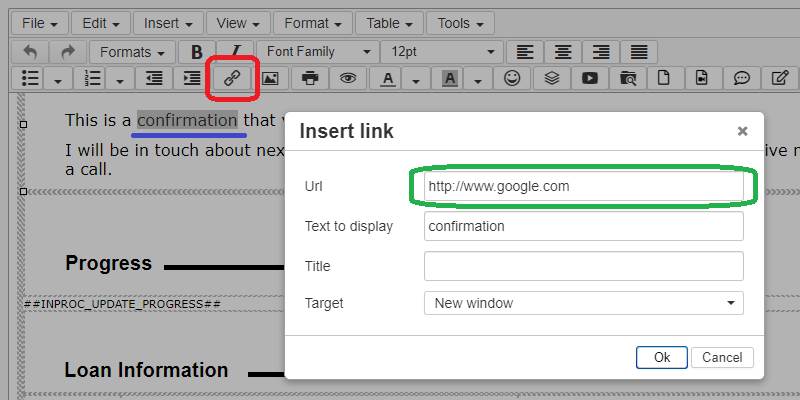
After these options, more advanced
elements can be added to your communication using the following buttons. The
“Link” button allows you to make text into a hyperlink that recipients can
click to open a website or send an email. The “Print” and “Preview” buttons
work just like their menu counterparts, allowing you to see what a recipient
will see or send the message to your printer.
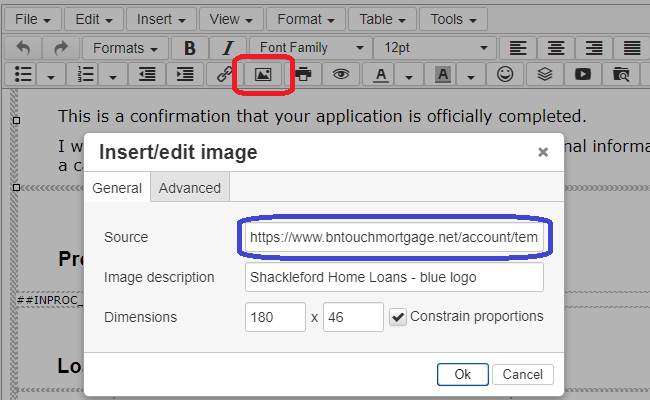
When you click the “Insert/Edit Image”
button, you can enter the URL for an image that you have hosted elsewhere that
you want to add to your BNTouch marketing. You can enter description text and
specific dimensions below, and the “Advanced” tab can be used to add HTML style
tags, buffer space, and borders to the image. Please note that images inserted
this way are dependent upon the external host—if the image is taken down or
changed by the source, this can affect your marketing material.
By hovering over the “Text Color” and
“Background Color” options, you can change how selected sections of text will
appear in your message. You can also add smiley faces using the “Emoticons”
button.
BNTouch Tools –
Meta-Tags
The next set of buttons include options
that are specific to your BNTouch CRM, allowing you to connect and use the many
features available to your mortgage business when communicating with your
clients and partners.
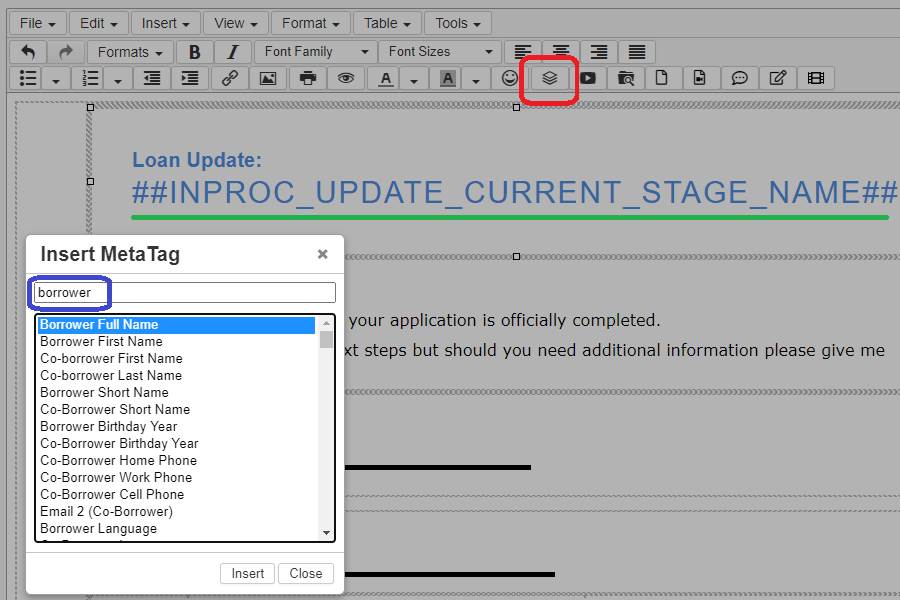
The first button, “Meta-Tags”, will allow
you to search and add meta-tags to your document. Meta-tags are stand-in codes
used to populate your communication with relevant information. Each meta-tag is
a block of text surrounded by two hashtags on either side. These meta-tags can
be used in the place of company, borrower, partner, or other information in your
CRM to conveniently pull the corresponding information. For example, the
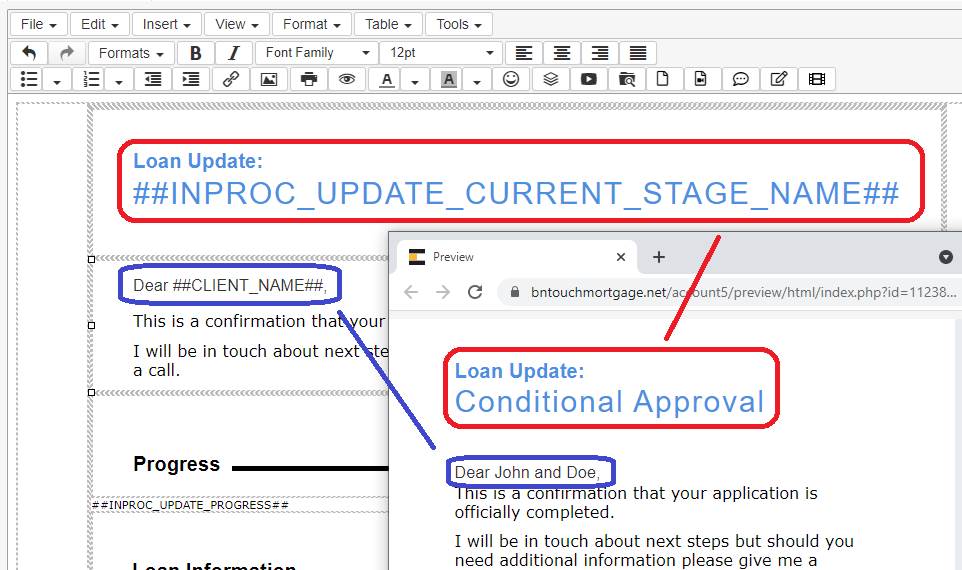
“Borrower’s First Name” tag looks like this: “##CLIENT_NAME##. Whenever this
text appears in the text of a marketing campaign, your CRM will auto-populate
each borrower’s name into each email sent--without needing to write each
borrower’s name in their specific email. If you send a campaign out to Alice,
Bob, and Catherine, each of their messages will be personalized with their own
name.
To
learn more about Meta-Tags, check out our “Meta-Tags
in Campaigns” training video.
You can also embed videos directly from
YouTube by clicking the “Insert YouTube Video” button. Instead of needing to
upload the video file, just paste the YouTube link in the field, click OK, and
the thumbnail for the video will appear in your message.
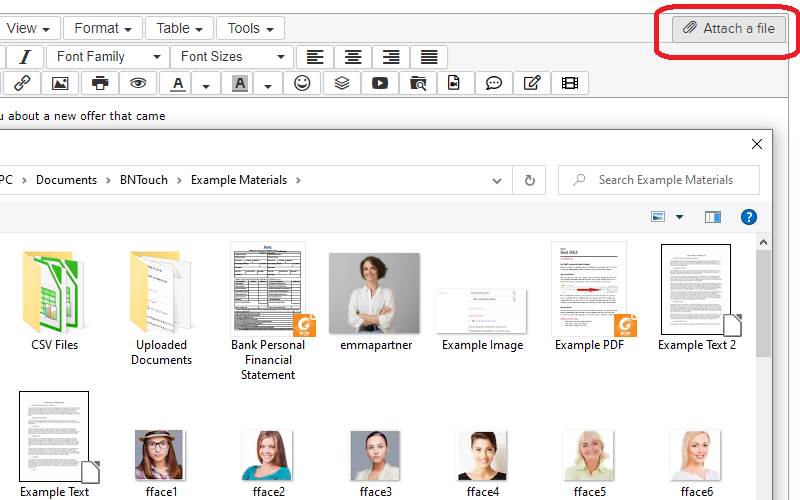
BNTouch File
Manager
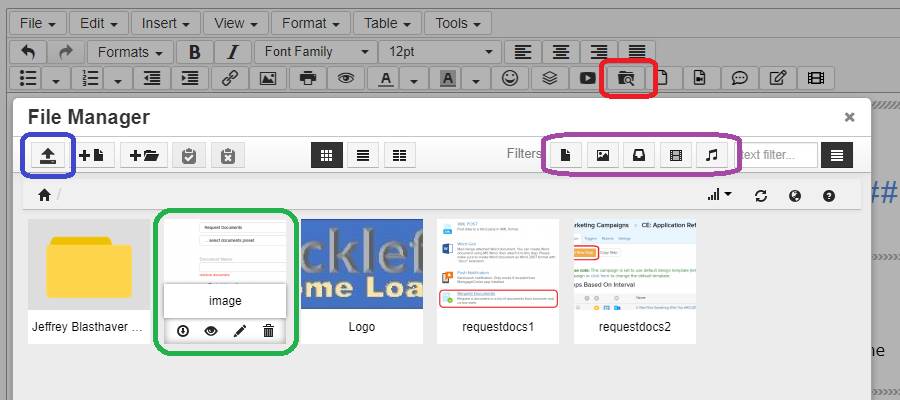
The next button will open the File
Manager. Here, you will see a library of files you have uploaded or added in
any text editor throughout your CRM. You can instantly add any file you have
previously used by clicking the thumbnail, and you can hover over them to
download, preview, rename, or delete them. New files can be uploaded from your
computer using the button in the upper-left corner, where you can drag-and-drop
a file, select it from your file explorer, or use a java applet to handle large
files.
You can create simple text-based
documents using the “New File” button, where you can enter text, a new
filename, and a file extension, like “.txt”, “.html”, or “.css”.
Folders can be created and moved to organize your commonly used documents, and
you can copy and paste files from your computer using the clipboard buttons.
The list of files that appears can be
configured using the view options above, the filter icons to the upper-right,
or the text search box. Below the search bar, you can sort files, refresh your
file list, or change the language used in this manager.
If you wish to add material to your
marketing message from a template outside of BNTouch, you can do so using the
“Add Content” or “Add Template” button. Please note that this feature will only
appear when you are editing a campaign step or creating a template in your
system, not when you are drafting an email. When you click this button, you can
drag and drop “.html” and image files from your computer to the prompt window.
When you click “Import”, any HTML material will be added to the text editor for
your campaign or template.
BNTouch Module
Content
The final few buttons allow you to add
content from the various add-on modules to your BNTouch CRM. While these
options may appear in your text editor, you may not have access to the modules
they are connected to. If you need help enabling or using the following
buttons, please contact your administrator.
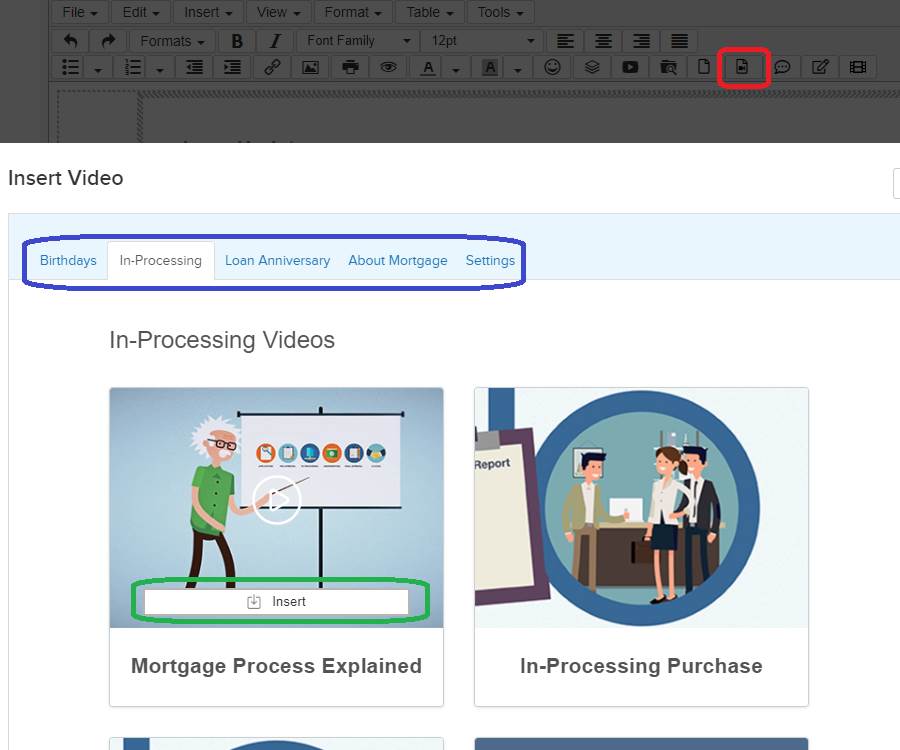
The “Insert BNTouch Video” button lets
you select from a series of pre-made videos that are perfect for your most
common marketing campaigns. Using the tabs above, you can choose from Birthday,
In-Processing, Loan Anniversary, or general Mortgage-related videos. When you
hover over any video thumbnail, you can click the play button to preview it or
the “Insert” link to add it to your message. If you want to customize what the
video player will look like, open the “Settings” tab
and choose a page design.
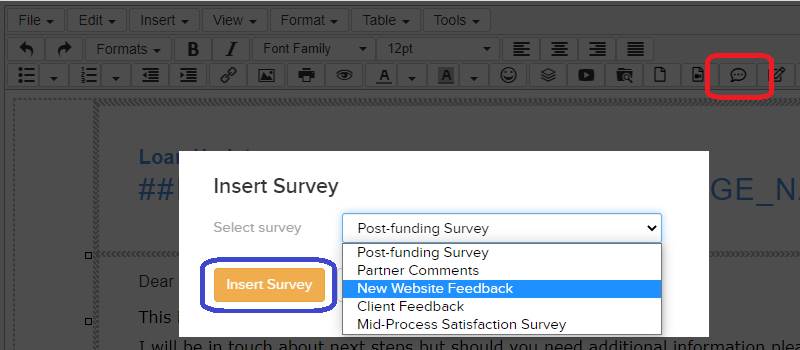
To include a link to one of your custom
Surveys, click “Insert Survey”. You’ll see a list of your currently offered
surveys, and the corresponding Meta-Tags will be added to your message when you
click “Insert Survey”. To learn more about this feature and how to design
questionnaire and testimonial pages, please watch our “BNTouch
Surveys” training video.
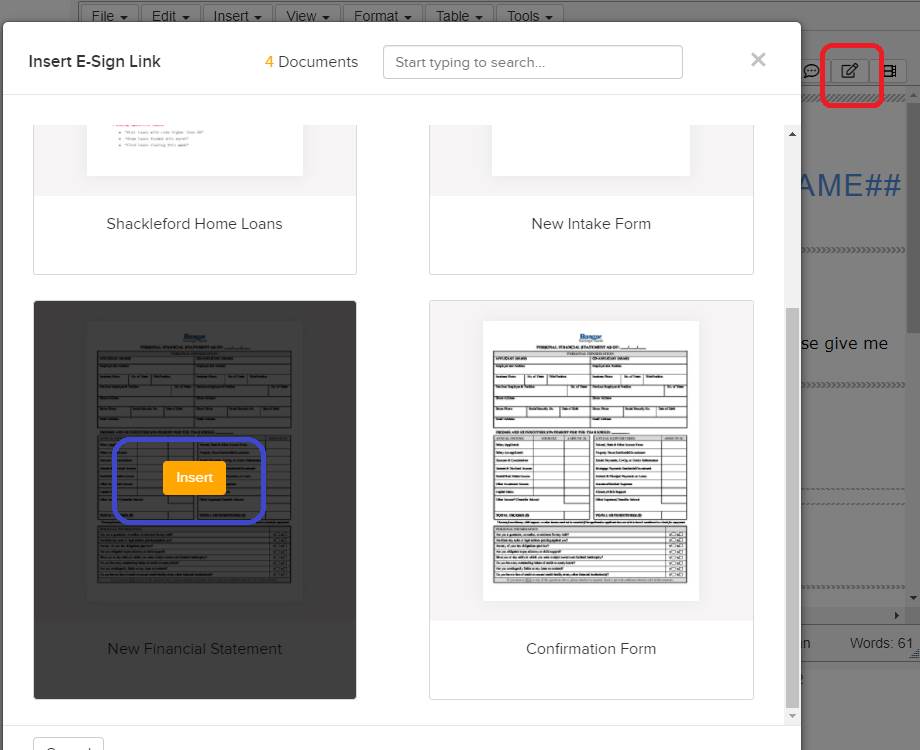
If you need to securely manage electronic
signatures, you can include a document for e-signing by clicking the “Insert
E-Sign Link” button. This will show a list of documents you have set up for
electronic signature functionality in the Marketing tab. You can search for
documents using the box above the list, and you can add any file by hovering
over the thumbnail and clicking “Insert. To learn more about creating and
requesting e-signatures, please watch our “E-Sign”
training video.
Lastly, you can insert pre-recorded
personal videos that you have recorded by clicking the “Insert Video Message”
button. Any recordings you have made will appear, and you can search and sort
them using the options above. Just hover over a video thumbnail and click
“Select Video” to add it to your message.
Document
Information
At the bottom of each text editor screen,
you can view a tally of the number of words in your message in the lower-right
corner. This will only count text you have typed into the box above, not any
advanced elements.
To the left, you will see a tiered
indicator showing what item you are currently modifying in the text editor. You
can click the links here to select larger elements of your message.
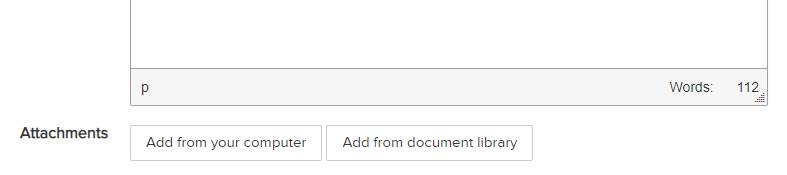
If you are creating an email using the
text editor, you can connect a document to the email as an attachment using the
“Attach a File” button in the upper-right corner of the text editor. You can
choose a file just like you did with the file manager upload process, but this
file will not be included in the message of the email; it will be attached to
it and can be downloaded by the recipient. Some text editor instance in your
CRM will also have buttons below the editor allowing you to add files from your
computer or the document library in the same way.
Want to Learn More?