Mortgages – View Settings
Customizing
Pipeline and Custom View Settings
When navigating records in your CRM, it
is important to have the most relevant information available for each client,
partner, or staff member. BNTouch allows you to fully customize the data you
see for each record that appears in your Mortgages, Partnerships, and
Recruiting database lists. You can also choose which fields display while you
are searching your system for records. By configuring View Settings to show the
information relevant to your business, you’ll be able
to save time and avoid errors.
Marketing
Pipeline View Settings
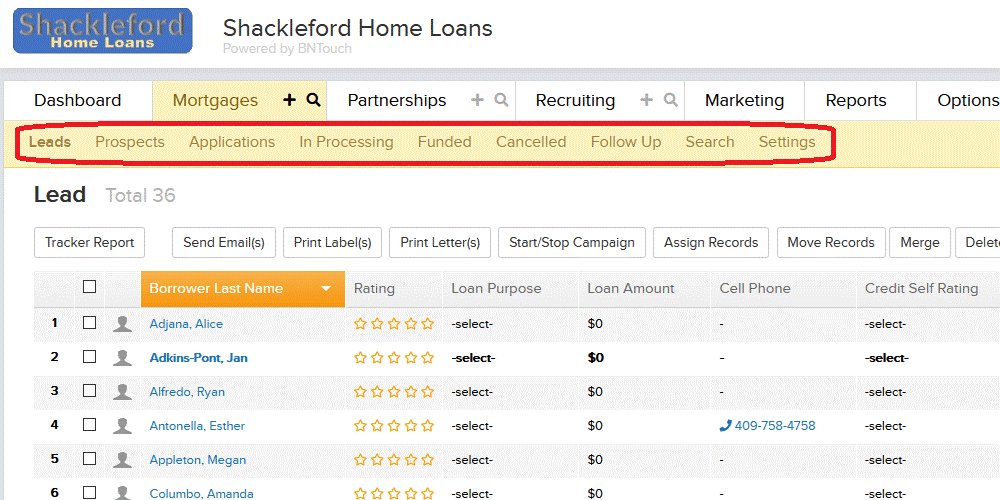
In your CRM, your client records are
stored in the “Mortgages Tab”. Similarly, people you interact with in the
mortgage industry are tracked in the “Partnerships Tab”, and staff members can
optionally be managed in the “Recruiting Tab”. When you open any of these
databases, the first screen that will display is a list of records. You can
organize these records in various ways, but the default view is the “Pipeline
View”, which separates them by their current step in the Marketing Sequence
pipeline. This view can be opened at any time by clicking the “Pipeline View”
button in the upper-right corner.
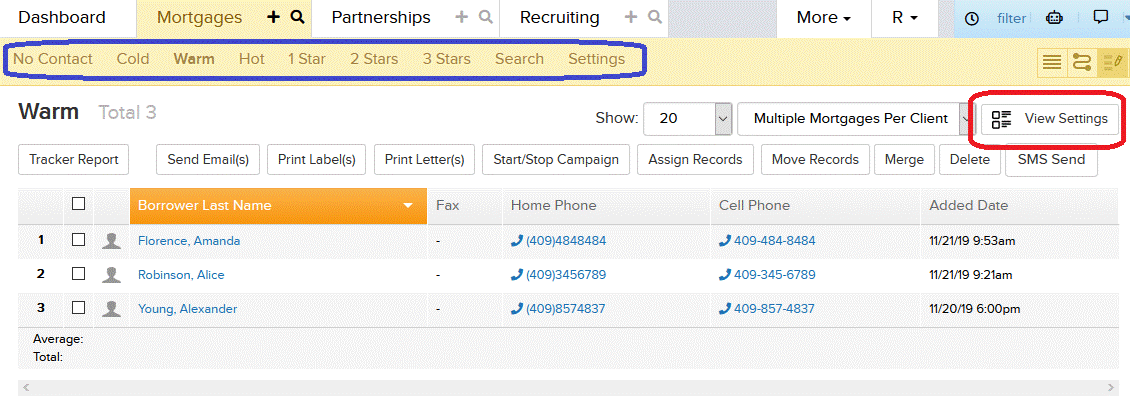
In the Pipeline view, you can see records
in various stages of the marketing pipeline by clicking the sub-tabs above the
list. For each record, you’ll see a blue “Last Name”
link along with several data fields in a row to the right. The fields that
display from these records can be changed in order to
show or hide information relevant to your business. To customize these fields,
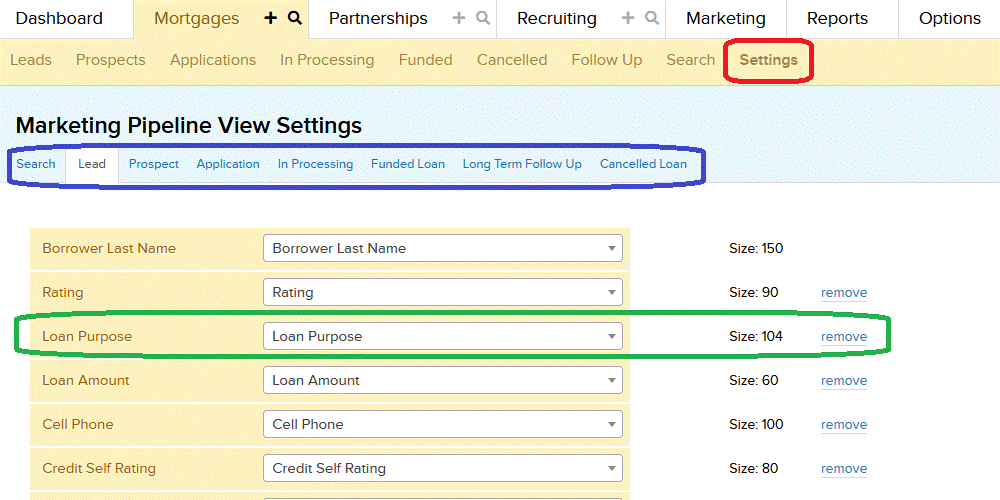
click the “Settings” sub-tab to the right of the marketing sequence stages.
Here, you will see a list of drop-down
menus organized into the various marketing pipeline stages. These correspond to
the stage screen in the tab you are customizing. For example, you can set
specific fields to display when you look at “Lead” records in your Mortgages
tab, then set different fields to show when you are looking at “Active
Partners” in your Partnerships tab.
For each stage, you can choose the field
that will display using the drop-down menus. You can scroll through the options
available for each, and you can type into the search boxes for these menus to
help find the fields you are looking for. The field at the top of the list will
appear closest to the record name in the record list, and each field below it
will appear one column to the right. You can lower the number of columns in the
list by clicking the “Remove” link to the right of a field, or you can insert
additional columns by clicking the “Add Field” button below the list.
Before you leave the page or switch to
another marketing stage, be sure to click the “Update Settings” button to save
any changes you have made.
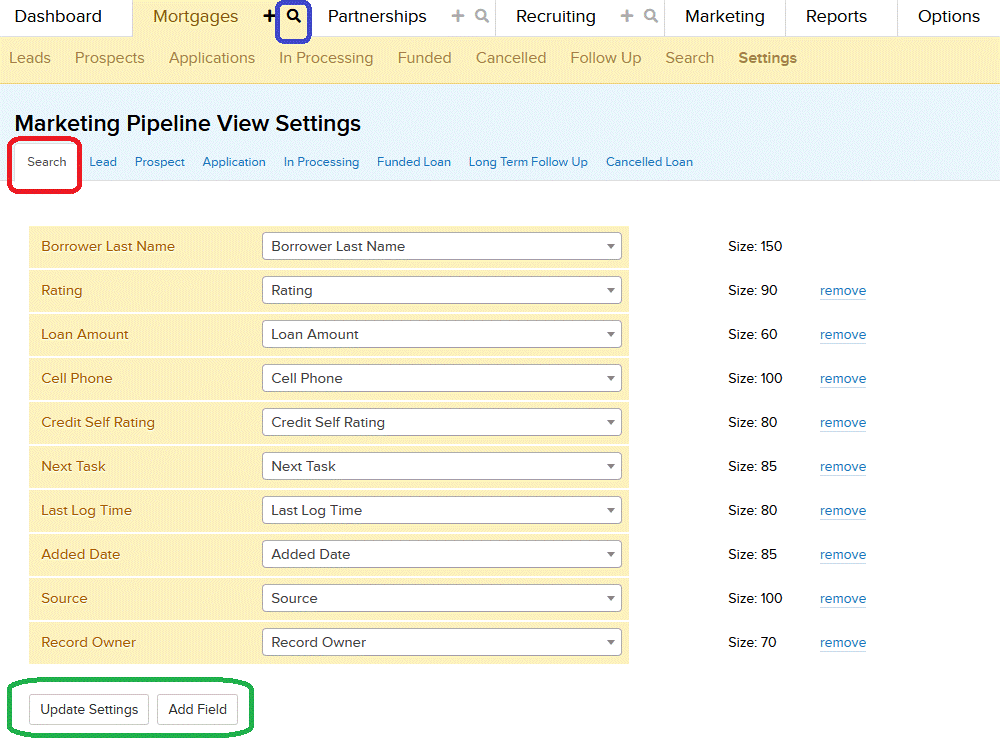
Search Settings
In addition to the fields that display
for record lists in each tab, you can customize what fields appear when you use
the Pik-a-Search tool in that database. When you open
the “Search” section of the Marketing Pipeline View Settings page, you will be
able to add, change, and remove fields as you did for the Pipeline View lists.
The fields you choose for this section
will also apply to any Scheduled Email Reports that you make for records in
this database. Again, be sure to save any changes you make to these options by
clicking the “Update Settings” button at the bottom of the page before navigating
away.
Custom View
Settings
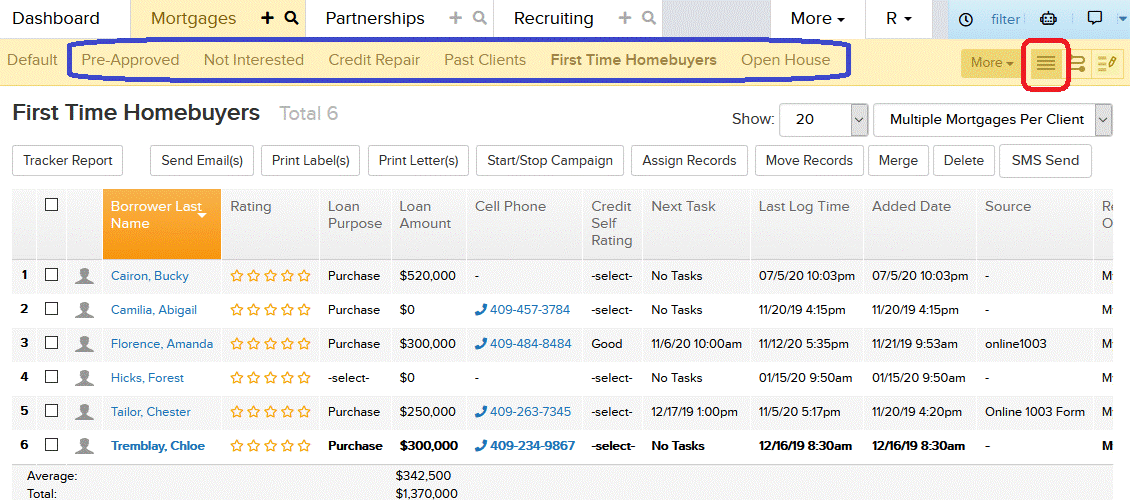
Like the Marketing Pipeline View, you can
also customize the fields that display for records in the “Custom View” for
each database. This view can be opened by clicking the “Custom View” button in
the upper right corner of a record list.
Instead of organizing by the Marketing
Sequence stage, this view allows you to choose which fields are used for
categories of your records. For example, you could choose to have separate
sub-tabs for each status you assign to your records, for the various “Loan
Purposes” of your borrowers, or the “Partner Type” of your partners. The field
that is used for these sub-tabs can be chosen by clicking the “View Settings”
button above each record list.
Once you have a Custom View configured, you
can then choose which record fields appear for the categories you have
selected. Just like in the Marketing Pipeline View, click the “Settings”
sub-tab to the right of the custom categories. Here, you can select fields from
the drop-down menus, add or remove columns, and save your changes just like
before. In this case, however, you will be configuring the fields that will
display in the record list of each category in the Custom View; individual view
settings cannot be set for categories in this view.
Group View
Another record list view, “Group View”,
is available in each of your database tabs. This view will separate records
into customizable “Groups” that can be set within each record. “View Settings”
cannot be configured for this view; it will instead simply show the same record
fields from the last “Pipeline View” screen that you have viewed.
Want to Learn More?