Pik-a-Search – Finding Records in Your CRM
Pik-a-Search
Record Search Tool
The BNTouch CRM helps you manage mortgage
information vital to your business, from borrower contact information to loan
progress data, from communication with your partners to their co-branding for
marketing emails. To make sure you can always find exactly what you are looking
for, our robust Pik-a-Search tool is available in
each of your record databases. With this feature, you can perform detailed
searches, find records based on almost any criteria, and take actions upon
several records at once.
Accessing
Pik-a-Search
Information for borrowers, partners, and
recruits in your CRM is stored in records. Think of a record as a file folder
containing everything that pertains to that person in your system. Every piece
of data, from a phone number to a preferred language, is connected to a record.
These records are then organized into databases, including Mortgages for
borrowers and clients, Partnerships for people you interact with in the
mortgage process, and, optionally, Recruiting for your staff. These databases
can be easily opened using the tabs at the top of the page.
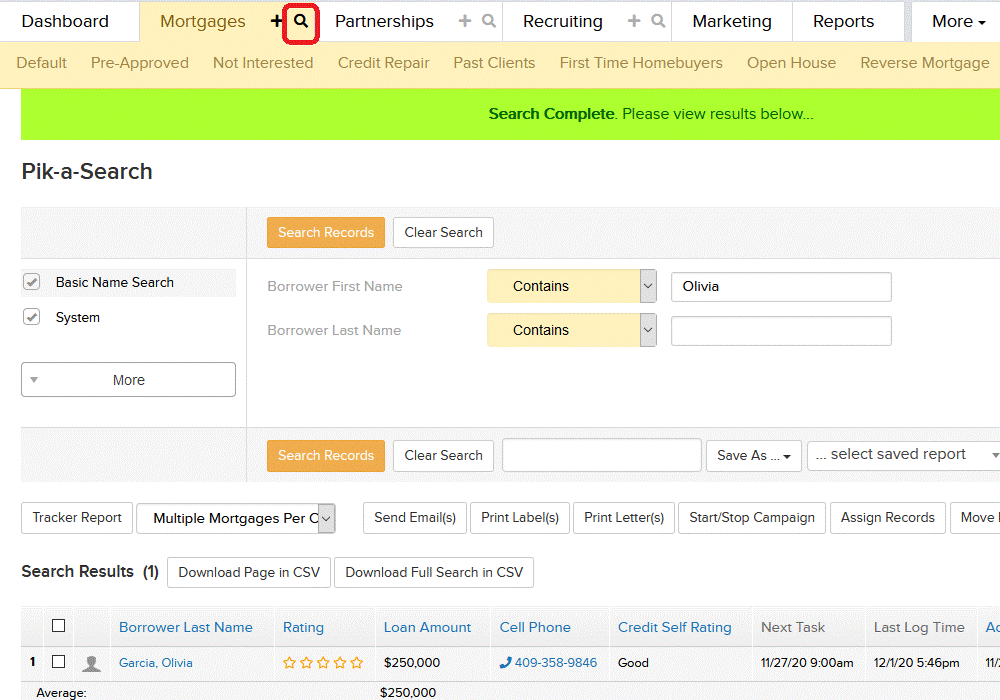
If you click on the title of one of these
tabs, you’ll be taken to an organized list of the records inside it. This list
can be sorted and navigated, but sometimes you need to find a specific record
without browsing through a list of names. In this case, click the magnifying
glass icon to the right of the Mortgages tab. This will open the Pik-a-Search tool for that tab.
Pik-a-Search
Filters
At the center of the page, you will see
one or more search criteria consisting of a field name, a drop-down menu of
qualifiers, and a text box. Each of these lines is a filter that you can use to
search for records in the selected database.
For example, the “Borrower First Name”
filter allows you to search records by the name of the client. Whatever you
enter in the text box will be looked for in the corresponding field of your
records. Following the previous example, you may search the “Borrower First
Name” field of your records for “Christine” to find her record.
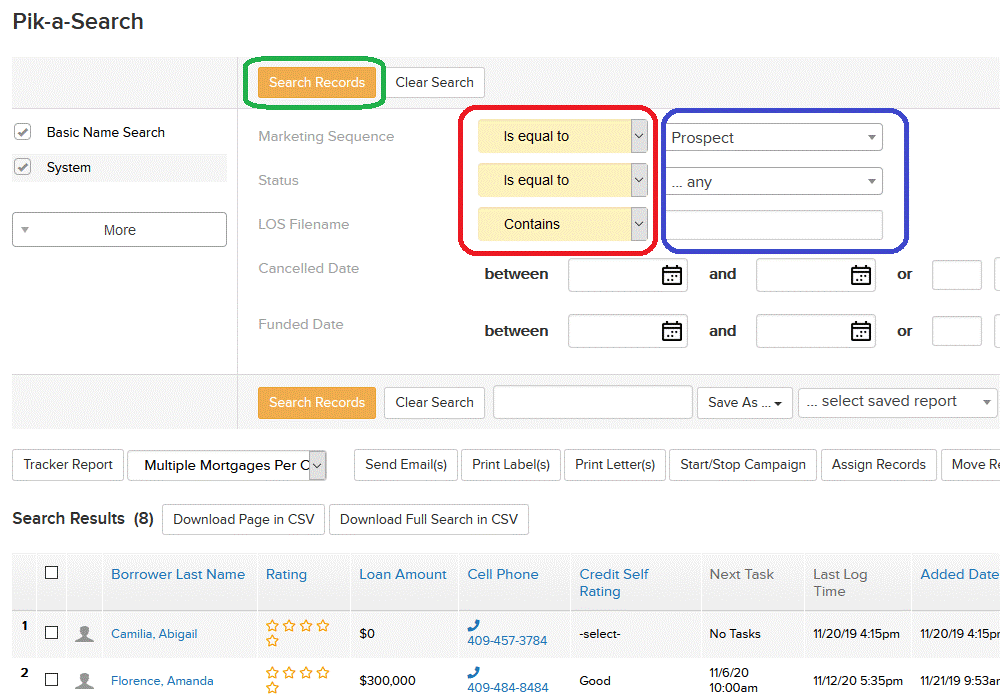
The qualifier menu determines how that
field is searched. In this case, if you were searching the “Property Street 1”
field of your records for “Broadway”, you could use the qualifier to either
find records with an address that “Contains” “Broadway” or that “Does not
contain” it. For some fields, you may see other qualifier types, like “Equals”
or “Does not equal”. In each case, this option lets you choose how the Pik-a-Search tool narrows your search results.
As long as you have at least one filter with text to look for in the text box,
you can click the “Search Records” button above or below to start the search.
Filter
Categories
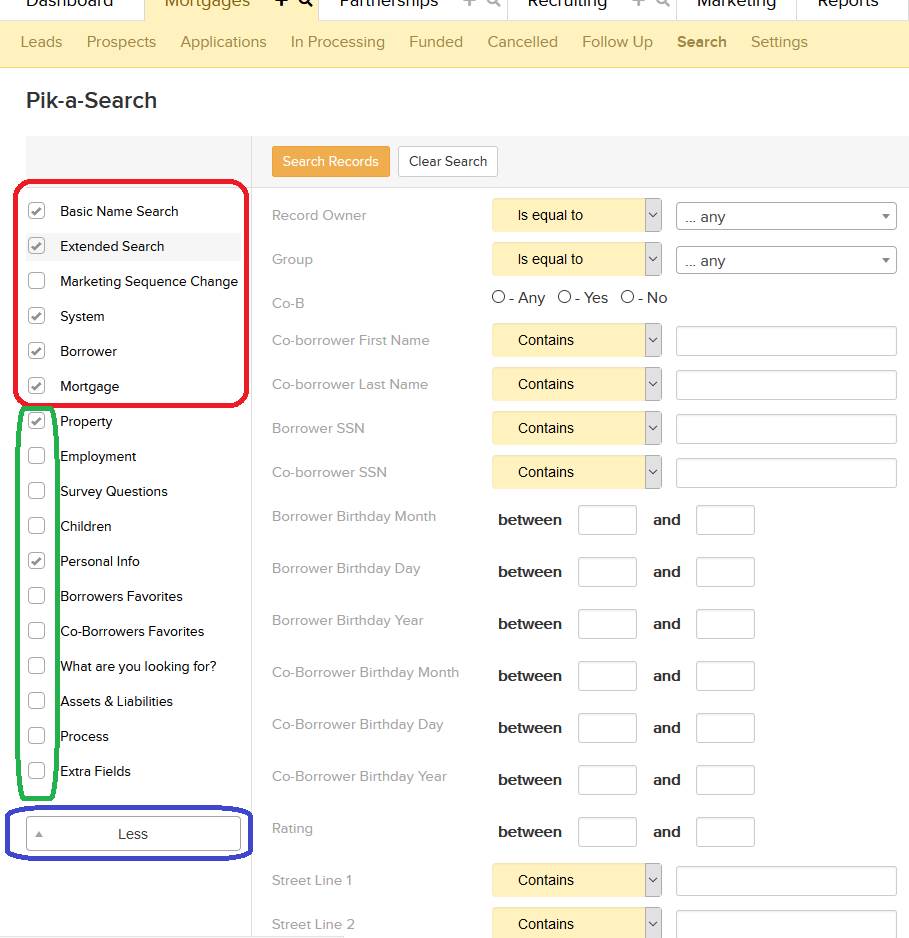
You don’t have to limit your searches to
a single criterion. To the left of the search filters, you will see a series of
options with checkboxes. Each of these represents a category of filters
available for searching your databases. Some are very
specific; if you click on the “Basic Name Search” category, you’ll see
simply “Borrower First Name” and “Borrower Last Name”. Others, however, contain
many data fields; clicking “Mortgage” will show many of the mortgage detail
options from a client’s record, like “Loan Purpose”, “Rate”, and “Estimated
Closing Date”.
You can enter information for several
different filters at a time, and all filters that have text in the text field
will be simultaneously used when you click the “Search Records” button--even if
they aren’t on the screen anymore. For example, if you use the “Property State”
field to look for properties in “Texas”, then use the “Loan Purpose” “equals”
“Purchase” filter, you can click “Search Records” to look for records that
match both criteria--any that have properties in Texas and are Purchase loans.
Many categories are listed to the left of
the Pik-a-Search. Some may be hidden; you can show
them by clicking “More” below the list. If you use some categories more than
others, check the box to the left of the category name. Then, you can click
“Less” to hide all non-checked categories. Don’t worry, they aren’t gone; you can
still access and search criteria in these categories at any time by clicking
“More”, and the search functions will work whether or not
the category box is checked.
Search Options
Before we explore the results, there is
another other important feature to use when searching frequently. Whenever you
open the Pik-a-Search tool, you will see the same
criteria and results from the last search you made. This way, you can look for
similar records or results without having to continuously enter the search
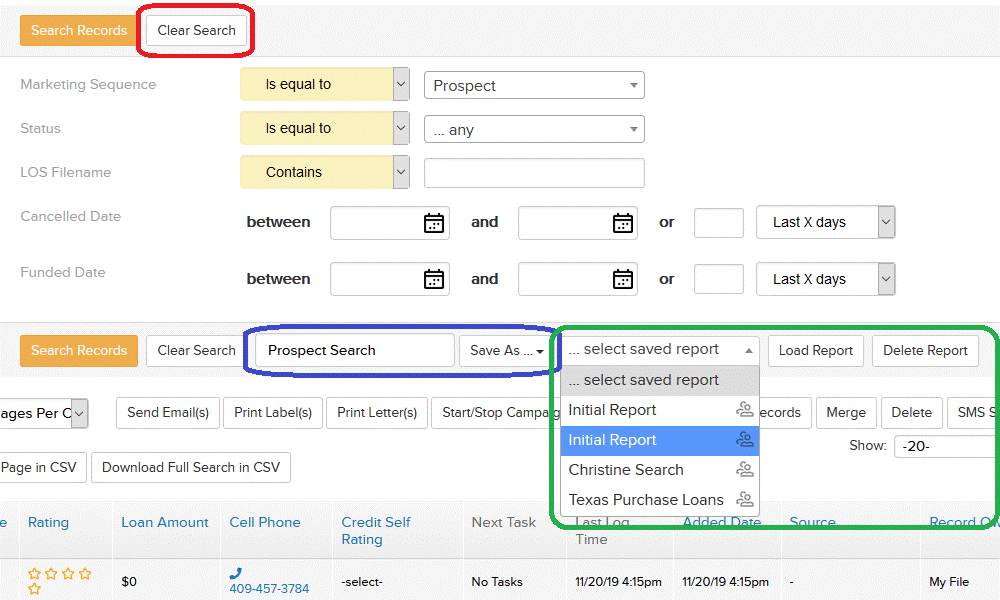
settings every time. If you ever want to start a search from scratch, just
click the “Clear Search” button to start over and wipe all search terms and
criteria.
If you find yourself looking for records
using the same criteria over and over again, you can
also save specific search criteria sets to use later. After performing any
search with any filters, you can enter a name (for your own organizational use)
in the box below the filters. Then, you can click “Save As…” to save it as a
Report. Once saved, you can quickly bring up the same search filters by finding
it in the “...select saved report” menu and clicking “Load Report.”
Alternatively, if you want the results of
a search to be sent to you regularly, you can click the “Save as…” menu and
choose “Create Scheduled Email Report”. You’ll need to enter some details, like
a record name, a date and time it should be sent, and the users it should be
sent to. Once you click “Save”, the selected users will be sent regular search
reports using the criteria you used. If you would like to learn more about this
feature, please watch our “Scheduled
Email Reports” training video.
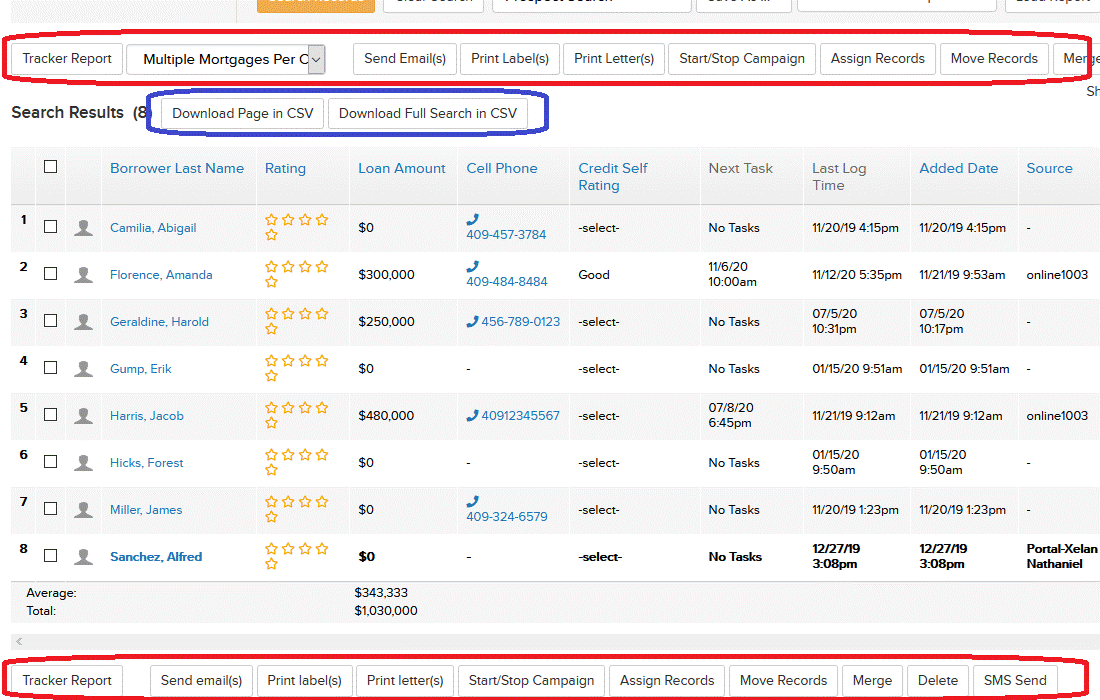
When you use Pik-a-Search
to look for any information in your databases, the results will be displayed
below your search filters. This list will show records as rows with basic
details listed for each. Clicking on the blue name link for a record will open
it. You can also take actions on several of the resulting records at once by
checking the boxes to the left and using the options above and below the list.
“Tracker Report” will let you see all
tracker events that have been created for the selected records. The drop-down
menu to the right of this button can be used to include events from multiple
mortgage loans per client or only a single loan each.
“Send Emails” will open an email editor
and add the selected records automatically listed as recipients. “Print Labels”
and “Print Letters” will do the same for physical mail communication instead of
email, as long as you have enabled the BNTouch Mail module for your account.
When you click “Start/Stop Campaign”,
you’ll see a listing of your marketing campaigns, which you can then either
start or stop for all checked records. You can set a date and time for the
campaigns to start, and you can even re-start campaigns for records that
already have the campaign started.
The “Assign Records” button will show a
list of your CRM users, who you can then assign the selected records to.
“Move Records” can be used to change the
“Marketing Sequence” stage for the selected records or to change the “Groups”
assigned to the records. You can select multiple groups for each record using
the checkboxes in the list, or you can remove the records from all groups using
the box below the menu.
If you have selected only two records
that are assigned to the same user, you can use the “Merge” button to sync the
information in both records into a single one. You
will be shown a list of the information for both records, and you can choose
which record’s information will be kept in the new file using the radio
buttons. You can use the “Select All” buttons at the top of the list to mark
all subsequent fields for that record. Then, you can select to combine them
into a single record, copy the information to both records, or simply import
the selected information into either of the records and leave the other
untouched.
“Delete” can be used to remove multiple
checked records at once.
Lastly, the “Send SMS” button allows you
to compose an SMS Text Message and send it to each of the selected records.
This feature is only available to accounts with the “BNTouch Voice” module
active. Similarly, the “PB Dialer” button is used to make Phoneburner
calls to the selected records if that module is enabled.
By default, Pik-a-Search
will show results in sets of twenty records. You can navigate multiple pages of
results using the arrows and numbers below the list. If you want to view more
records at once, using the drop-down menu to the upper-right of the list. Note
that showing more records per page may take longer for your browser to load the
Pik-a-Search results.
If you want to save a list of the results
of any search for your own backup purposes, you can use the “Download Page in
CSV” to save the current page or “Download Full Search in CSV” buttons to save
them in a spreadsheet file. “.CSV” files, short for “Comma Separated Values”,
can be opened using Excel, Google Sheets, or other spreadsheet programs.
Want to Learn More?
