Portals – Your Partner Portal
Welcome to
Mortgage Circles
Your Partner Portal is an easy, secure
way to coordinate with your loan officer and showcase property sites. When you
log into Mortgage Circles, you’ll be able to communicate with your loan
officer, review transactions you are participating in, submit new leads, create
mini-websites for properties, design open-house forms, and more.
To get started, open the Mortgage Circles website in your
internet browser. You will also need to open the email sent to you by your loan
officer about your new portal. In this email, you will be given a “Mortgage Pro
ID” and a password for access to your portal. To log in, just put this
information into the Mortgage Circles website in the upper-right corner of the
page. Your loan officer may provide you with a password in a separate email for
security purposes.
Your Portal
Dashboard
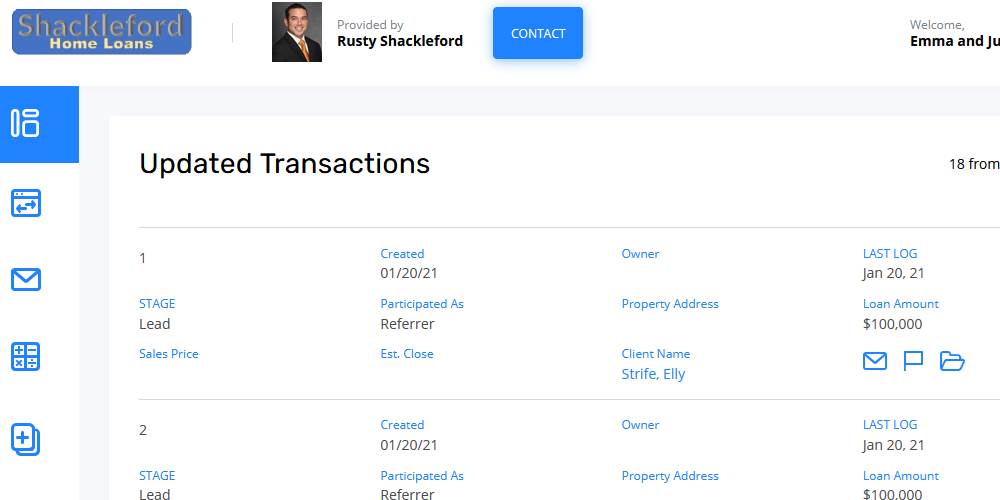
The first page you will see upon logging
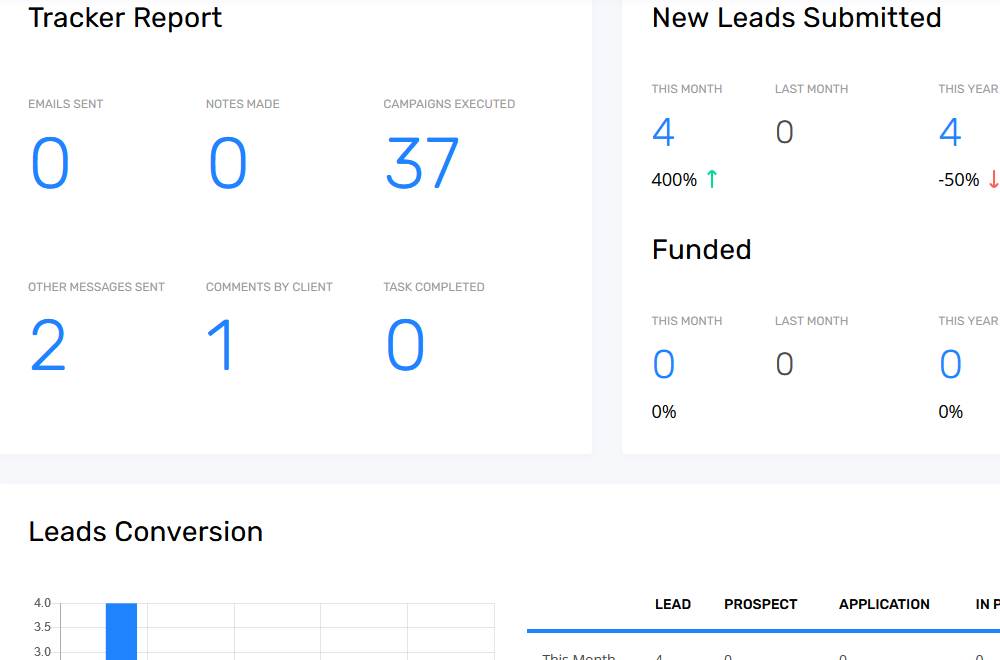
into Mortgage Circles is the “Dashboard.” This screen will give you a brief
overview of your participated transactions, new and funded leads, new updates
to client files, and recent lead conversions.
The Updated Transactions panel will show
any records you are participating in that have been updated since you last
logged in. You can click any client names to open the Participated Transactions
tab for that record, and you can use the icons to the right to contact the
client, create tracked notes on their record for the loan officer, or manage
documents.
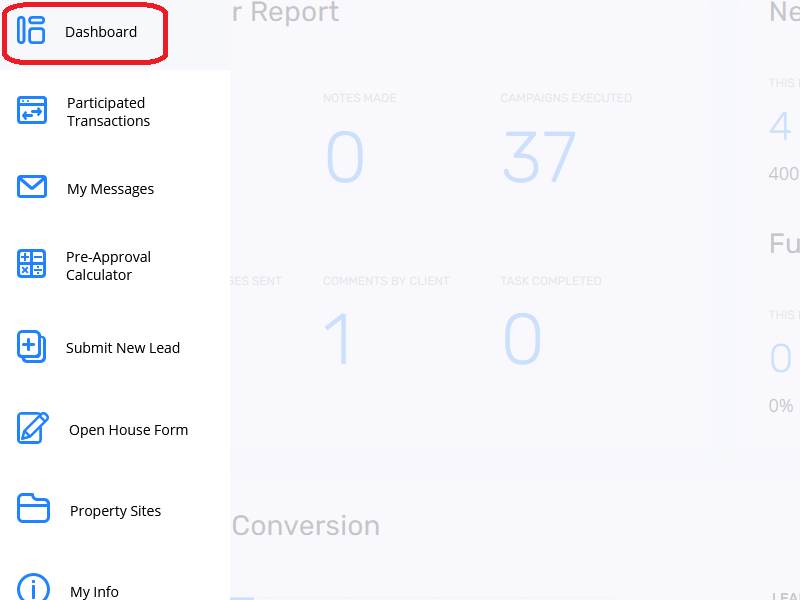
Navigating Your
Portal
At the top of each page, you’ll see
contact information for your loan officer. To the right, you’ll also see your
own. You can click your profile information to log out of Mortgage Circles.
To the left, you will see a series of
icons. This is the navigation menu for your portal; when you hover over these
icons, you can see the various options available and open those pages. You can
return to the Dashboard at any time by clicking the top-most option in this
menu.
The tools and options shown below may
differ from those that your loan officer has enabled for your partner portal.
If you see something here that doesn’t show up in your portal, you can always
contact your loan officer.
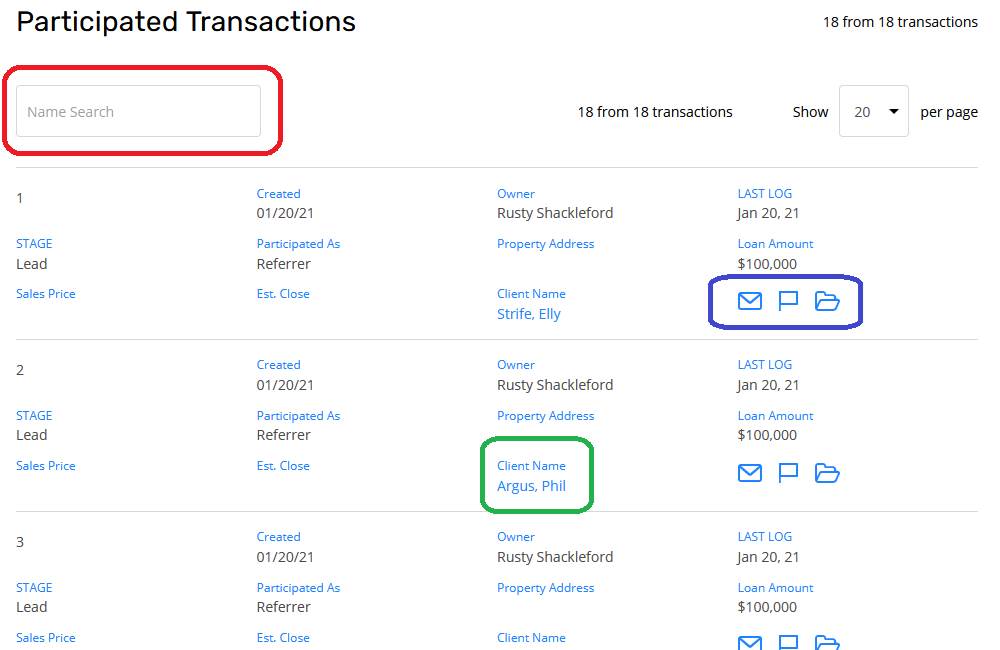
Participated
Transactions
In the “Participated Transactions” page, you
can access records of all the clients whose mortgage processes you are participating
in. Here, you will have the same options available for records that you do in
the “Updated Transactions” from the Dashboard screen, but you can access all mortgages
you are participating in. This means you can quickly search
for specific client records using the “Name Search” option, and you can change
how many records you see at once using the drop-down menu above the list.
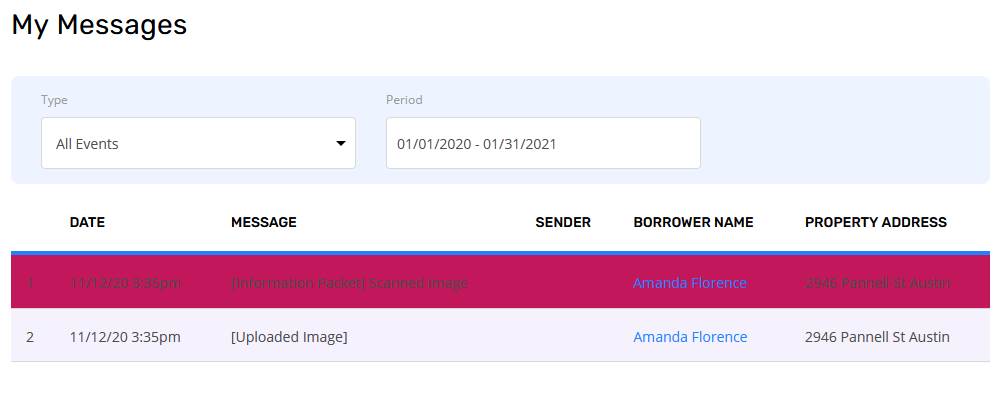
My Messages
The “My Messages” page will show all
events that are relevant to mortgage clients you are helping with, including
tracker updates for participated records and messages between you and the loan
officer. You can view more information for linked clients by clicking the
“Borrower Name” link. Further, you can filter this list by the type of message
using the drop-down menu above the list, and events from specific date ranges
can be shown by clicking the “Period” calendar.
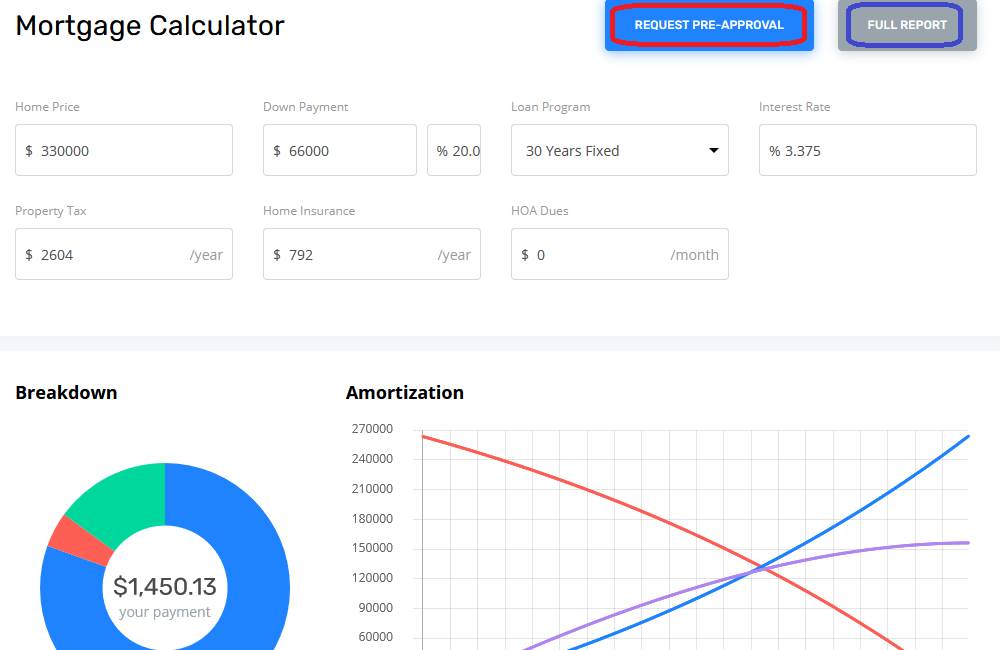
Pre-Approval
Calculator
You can conveniently request pre-approval
for mortgages in the “Pre-Approval Calculator” page. Here, you can enter
mortgage details in the listed fields, and general payment breakdown and
amortization graphs will update below based on the values entered. Next, just
click the “Request Pre-approval” button to start a request.
First, you can select a borrower from your
participated transactions list or click “Add New” to add a new lead from here.
Relevant income information can be added, then click “Send Request” to submit
it.
You can also view a Detailed Mortgage
Report by clicking the “Full Report” button. This will display more details and
additional graphs based on the information you entered before, including a
month-by-month payment breakdown. You can then generate a shareable report from
this information by clicking the “Get Report URL” button and copying the
provided link.
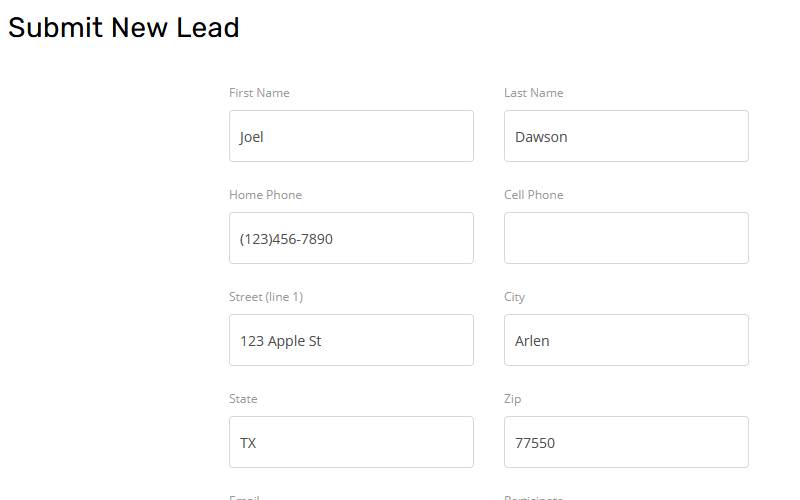
New Lead
Submission
The “Submit New Lead” page provides a
fast, simple way to send new lead information to your loan officer. Here, you
can put client data in the form fields, add any comments for your loan officer
below, and click “Send Information”. This will transmit the new lead data to
your loan officer and automatically list you as the referrer!
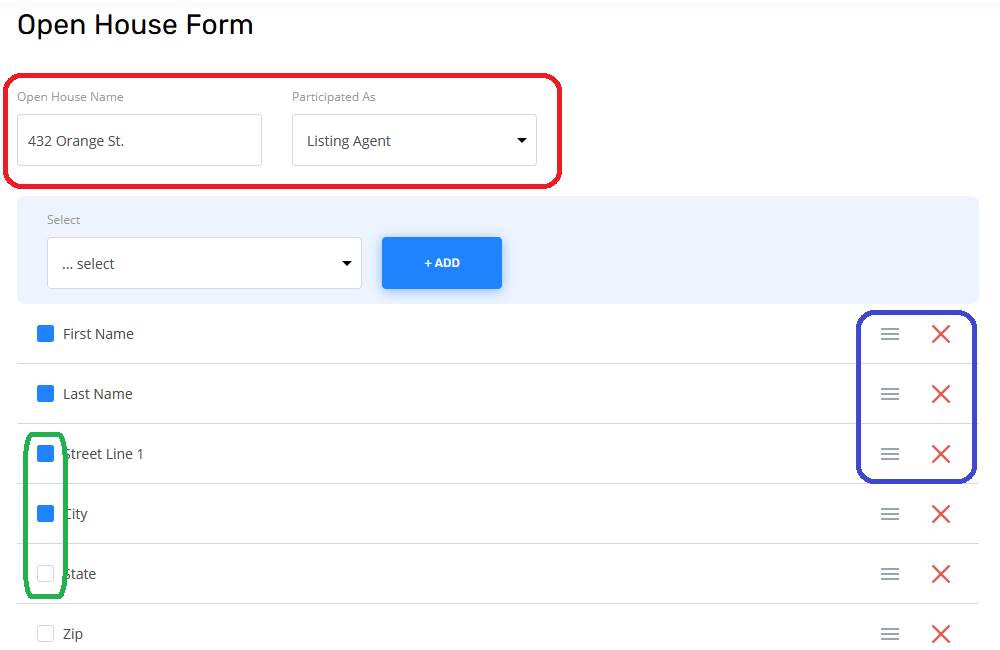
Open House Forms
Another great tool you can use to collect
leads is the “Open House Form” page. Here, you can set up a screen to display
on a tablet or computer at an open house which visitors can use enter their
information. Just like the New Lead form, this page will send a new lead to
your loan officer with the entered data when leads click “Submit Form.”
You can customize this Open House form,
starting with an Open House Name and selecting how you are participating from
the drop-down menu. Below, data fields that will appear on the form can be
chosen using the checkboxes to the left. Any that are filled in with blue will
appear on the form. You can re-order or remove fields using the icons to the
right, and you can add fields to the page using the menu above the list.
Lastly, you can choose from five different Open House templates to customize
the look. When you click “Generate Page”, a new window will appear with the
information you selected.
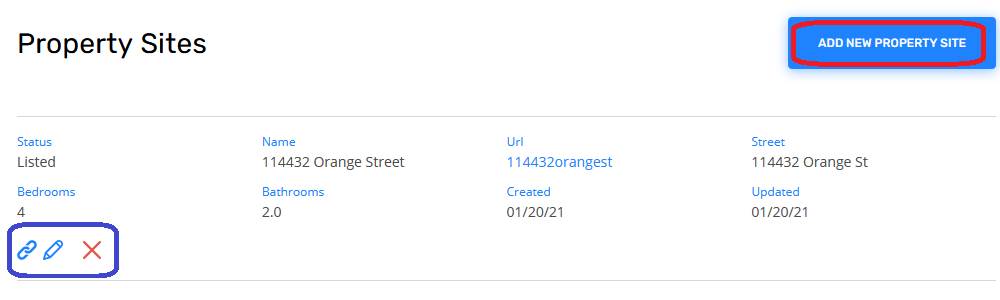
Property Sites
You can create, maintain, and share pages
for properties using the “Property Sites” page. New properties can be added
using the button above the list. Here, you can enter details about the
property, create a unique name and URL, choose a site template, and add a brief
sales pitch to appear on the site. When you click “Add Site” below, a new page
will be created specifically for that property and be listed here.
Once a property site has been created,
you can click the Link button to open it in a new tab. This URL can be copied
and shared with clients. You can click the Edit icon to add more information
about the property to the site. In addition to the Property Details
you entered before, you can now use the tabs above to improve the property
site.
“Property Images” can be used to upload
images of the property from your computer. This is a great way to make the
property site appeal to clients! The “Property Features” tab will provide a
checklist you can use to quickly list elements of the property. You can add
your own features to this list using the field above. Under “Layout”, you can
review examples of the various page templates and select one for the site.
Then, you can use the “Select Layout and Preview Site” button below to see what
the page will look like with all the information you’ve entered.
Partner and
Company Info
Lastly, you can use the “My Info” page to
customize your contact information used in all communication via the Partner
Portal. Here, you can upload a Profile and Company picture from your computer,
add personal contact information, and list a personal website if relevant. Once
entered, the information will be updated when you click “Save” at the bottom of
the page.

Want to Learn More?