Marketing – Creating a Marketing Template
Designing
Templates to use with Your Marketing Campaigns
Marketing messages need to be
interesting, clear, and consistent in order to be most
effective. In the BNTouch CRM, you can use Templates in your marketing
campaigns to design unique email and print media stationery, apply styles
uniformly to multiple types of communication, and even create entire reusable
letters and messages for various marketing purposes.
What are Templates?
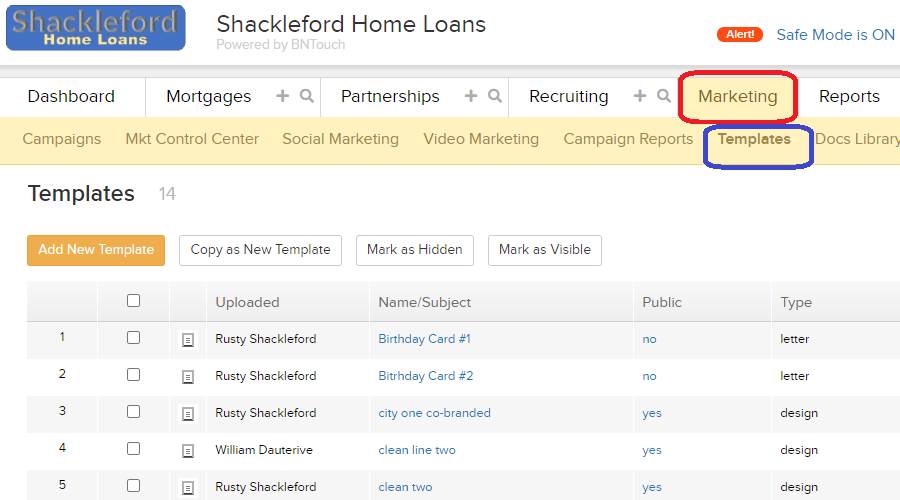
To manage your office’s marketing
templates, open the Marketing Tab in your CRM, then click the “Templates”
sub-tab. If you don’t see it listed, click the “More” menu in the upper-right
corner to view any hidden sections.
Here, you will see a list of all
templates in your system. Templates represent reusable designs for your
marketing messages. Each template will display in the list below, along with
the user who created it, its type, sharing status, and group.
BNTouch divides templates into two types:
“Letter” and “Design”. A “Design” template functions like a type of stationery;
it is a style and format that can be applied to emails or letters sent from
your CRM to make them look more interesting or official than just a plain-text
message. A “Letter” template, on the other hand, is a complete email or letter
that can be sent to your clients and partners whenever you need to. This can be
helpful when you send similar messages to many clients for a single purpose, as
you don’t need to re-type and design your marketing material every time you
send it.
Templates can also be configured for
“Public” use or only your own. In the “Public” column, “Yes” means that the
template has been made available to all users in your office. “No” signifies
that the template is only available to you, its creator.

Adding and
Creating Templates
Your account may already have templates
listed on this page; these have been added to your account or created for your
use by your administrator.
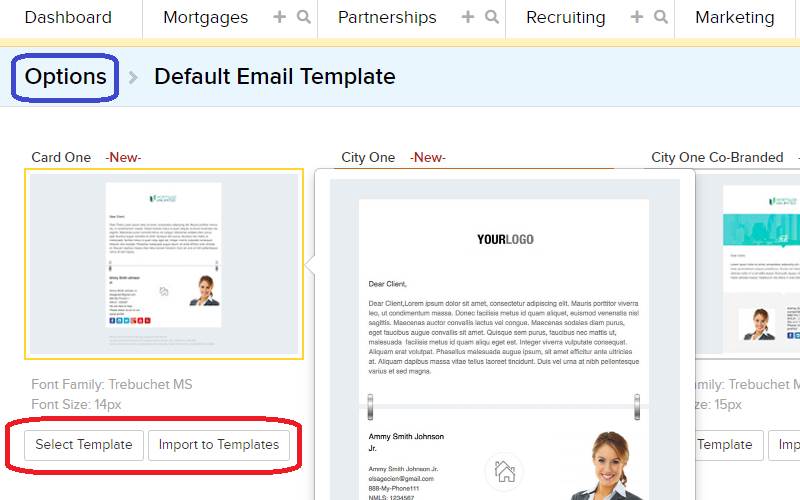
BNTouch has several pre-made templates
available for everyone to use. You can add these for your own use (or for other
users if you are an administrator) in the Options tab of your CRM. If you would
like to learn more about importing these to your account, please watch our “Predefined
Templates” video in our “Options Tab” series.
In addition to importing pre-made
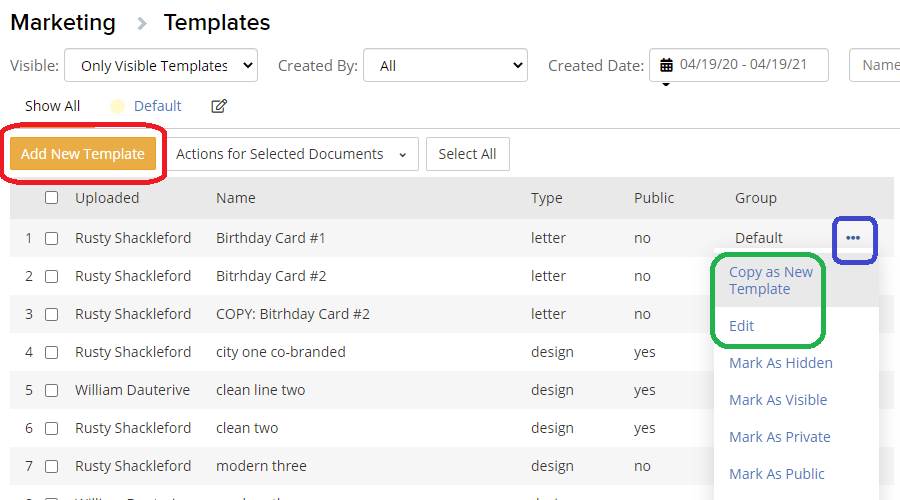
templates, you can also create your own. If you want to use another template as
a starting point, just open the Actions Menu icon to the right, then click
“Copy as New Template”. You can then edit the new template by opening the
Actions Menu again and clicking “Edit”. If you want to start a new template
from scratch, just click the “Add New Template” button above the list.
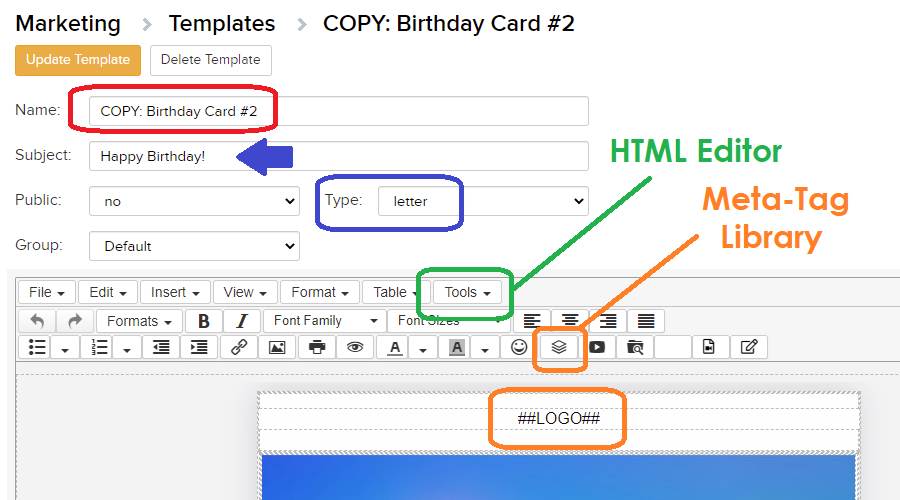
When creating or editing a template, you
will see a screen much like a Marketing Step editor. Your first step is to
enter a Name and Subject. The “Name” is for your own organizational use;
clients will not see this. The “Subject” field will be the title of the email
or letter for marketing that uses this template. As such, it should only be
used for “Letter”-type templates and not for “Design” templates.
If you want to design a piece of
marketing that will be completely copied when used, like a Birthday Card,
choose “Letter” for the type. If you want this to be a style that can be
applied to any other form of communication like stationery, choose “Design”.
Next, choose whether you want the template to be “Public” for all users in your
office or for your own “Private” use. You can choose to put the template into a
“Group” using the drop-down menu. This is also just for your own organizational
use.
In the text editor below, you can design
your template just like a Marketing campaign step. You can type anything you’d
like included whenever this template is used, insert pictures, links, and
videos, and use meta-tags to pull relevant information. If this template is a
“Design” type and will be used to apply to other marketing communications, you
can use the “##TEXT##” meta-tag to identify where the message text will appear
in the template. Similarly, you can use the “###SIGN###” tag to insert your
email signature.
If you already have a design created
using HTML markup, you can simply import it instead of recreating the design.
In that case, just open the “Tools” menu in the text editor and click “Source
Code”. Paste the HTML text into the pop-up message, then click “OK” to import
it to the text editor.
Once your template is complete, click the
“Update Template” button above or below to save your changes.
Modifying
Templates
You will be returned to the Templates
List of your Marketing Tab, and the new template you designed will be listed.
From here, you can always copy, edit, or delete a template using the Action
Menu icons to the right of the list.
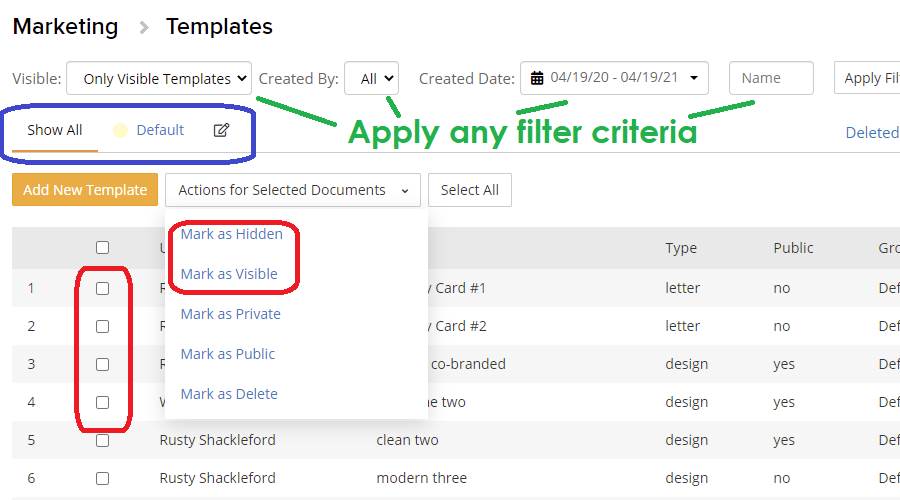
If you want to clean up your template
list, you can mark templates that you don’t need to see here as “Hidden” using
the checkboxes to the left and the “Actions for Selected Documents” menu above
the list. Templates that you “Mark as Hidden” aren’t deleted, but they will not
appear in this list by default. You can view hidden templates using the “Visible”
drop-down menu in the upper-left corner. If you need to make any templates
visible again, just check their boxes and click the “Mark as Visible” button.
You can change sharing status for templates this way, too, as well as delete
those that you no longer use. These options will also appear in the Action Menu
to the right of each template.
Template List
Options
Using the menus at the top of the
template list, you can view visible, hidden, or all templates, see only those
created by specific users, or filter the list by the date the template was
created. You can also enter search terms in the “Name” field and click “Apply
Filter” to find templates that match all of the
criteria you have set in these menus.
Any template groups that you have added
templates to will appear as sub-tabs above the list. You can click on these
tabs to show only templates in that Group, and you can add or edit groups by
clicking the Edit icon to the right. Similarly, any templates that have been
deleted will be saved in a separate group that you can access by clicking
“Deleted” in the upper-right corner.
In addition to the template list view,
you can also choose to display each of your marketing templates with preview
thumbnails using the “Block View” toggle. This will change the format of the
list below, but you can still use the checkmarks to modify multiple templates
at once, open the Actions Menu for a template, and preview it by clicking the
thumbnail or blue template name.

Where are
Templates Used?
Once you have added templates to your
account, they will be available whenever you are creating or editing marketing
campaign steps or composing email messages.
Depending on your account settings and
the configuration of the campaign, you may have a default template set for some
forms of communication. If the “Template” menu is greyed-out when editing a
message, this means that the selected default template is being applied. This
can only be changed by editing the campaign, so please contact your
administrator if you need help.
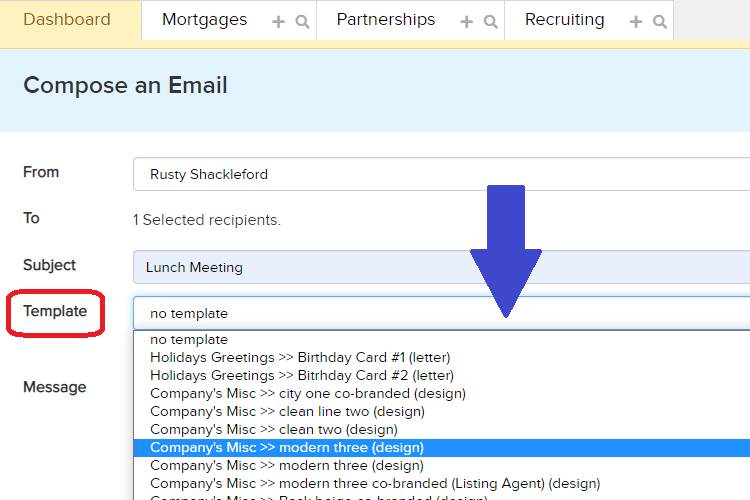
If a campaign isn’t using a default
template, you can select from all templates in your account using the
“Template” drop-down menu. These templates will be organized by the Group that
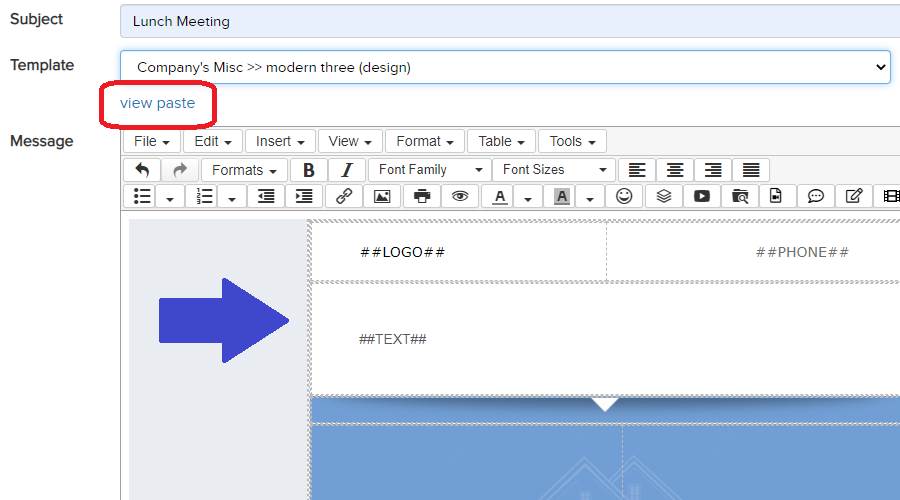
they have been added to. You can always see what the template will look like by
clicking the “View” link to the right. Even if you don’t end up applying a
template, you can still add the material from it to your message by clicking
the “Paste” link, which will add all of the template’s
material to the text editor below.
Want to Learn More?