Initial Training – Mortgages Tab
Managing the
BNTouch Mortgages Pipeline
The Mortgage Record List in BNTouch provides a
detailed, easy-to-navigate database of your borrowers. All records in your
BNTouch CRM, whether added manually, generated from a borrower portal, or
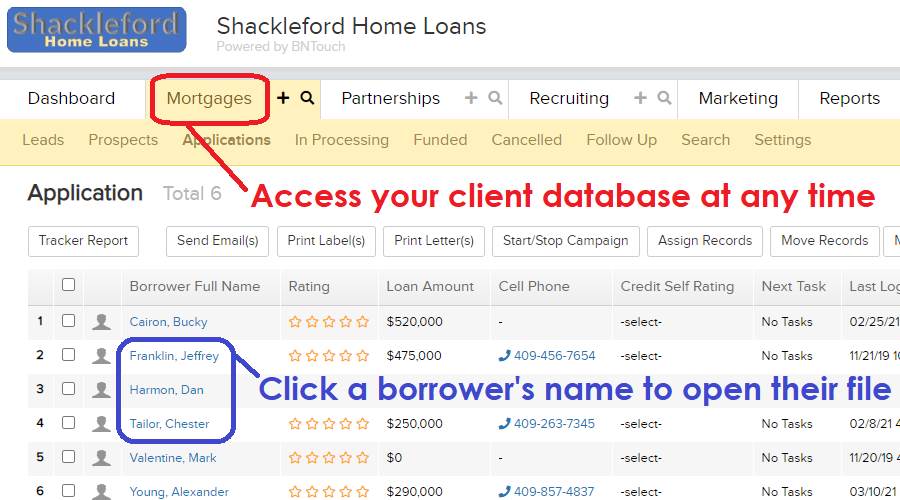
imported to your system, will be listed here. To access this list at any time,
simply click the Mortgages Tab at the top of your screen.
Mortgages Tab
Views
The Mortgages tab contains a large amount
of information; to find the data you need, you can change the View Setting using the buttons in the
upper-right. These include the Marketing Sequence Pipeline View, Group View,
and Custom View.
To see the flow of your business as leads
progress into funded loans, click the Pipeline View button. In this view,
records will be sorted into tabs at the top of the screen according to the stage
that the borrower is currently at in the mortgage process. Clicking any of the
stage names will show all borrower records that are at that stage.

Alternatively, you can view borrower
records according to customized groups using the Group View. Instead of listing
records by status in the mortgage pipeline, this view will display records
organized into various groups. Clicking any of the group names will show all
borrower records that have been added to that group. Your loans will still be
in the appropriate marketing sequence; the Group is an added modifier for your
company’s organizational purposes.
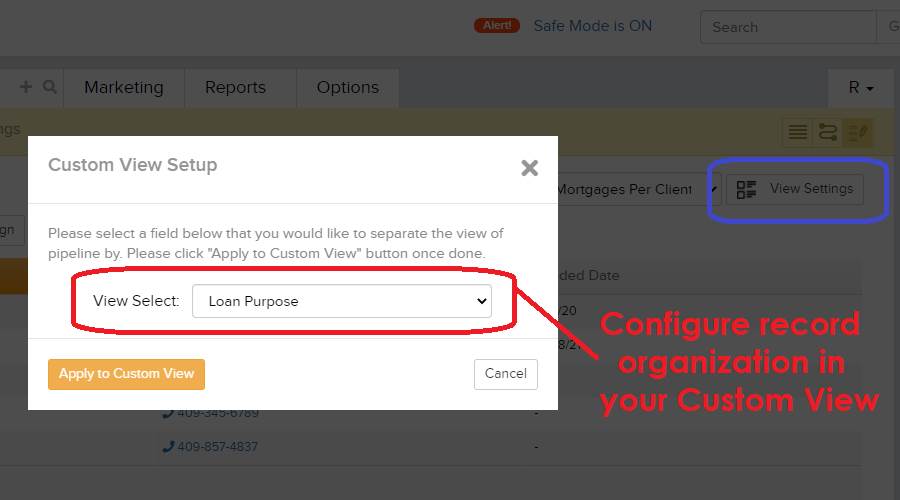
The Custom View allows you to sort your
borrower records by fields of your choosing instead of by group or marketing
sequence. This view must be configured before it will display any records; to
do so, simply click the “View Settings” button in this view. Here, you can
choose which record field will display in the Custom View using the drop-down
menus. When finished, click “Apply to Custom View.” Once saved, you will be
able to click any of the field titles to view records that match the selected
value for the custom field.
Adding Records
Borrower records can be added to your
BNTouch CRM in many ways. Some are automatic, including importing a ‘.csv file’ from a
previous CRM database, retrieving leads from a synced LOS system, or submitted
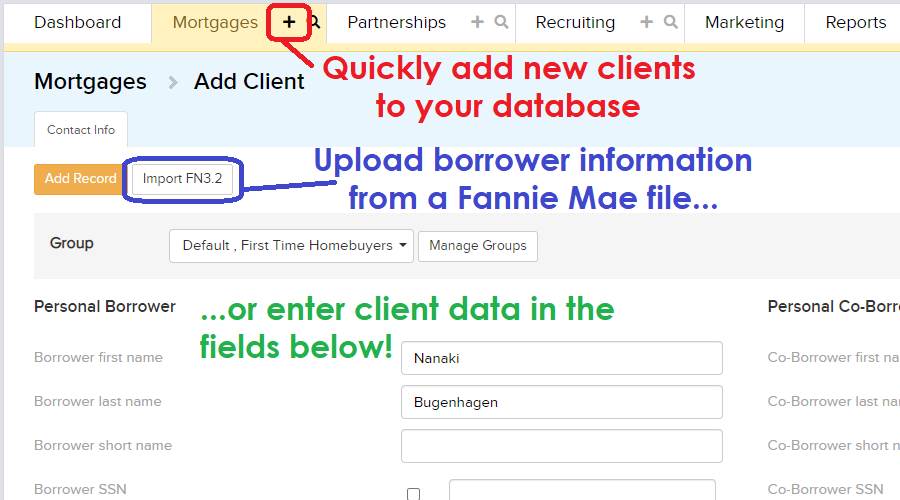
directly from partner portals. You can also add records at
any time by clicking the plus sign to the right of the Mortgages tab. Records
can be imported from a Fannie Mae 3.2
or 3.4 file by clicking the “Import FN3.2” button. When importing
records, make sure each file has a unique File Name.
When adding new records, you can include
as little or as much information as you like. You can add the new record to any
relevant groups using the drop-down menu at the top of the page, and new groups
can be created using the “Manage Groups” button. When finished entering
borrower information, click the “Add Record” button to create the new borrower
record.
Mortgage Record
List
No matter which view is used, several
options will be available for each list of records in the Mortgages tab.
Depending on your access privileges in your company, this list will show either
all records in your CRM or those specifically assigned to you. The list of
records can be reordered by clicking on any of the column headers. Any new
records that haven’t been opened yet will appear in bold. Individual records
can be opened and edited by clicking the borrower Name. More options are available
when editing a record than when initially creating the record; you can learn
more about these options in the next Initial Training article, “Mortgage Records.”
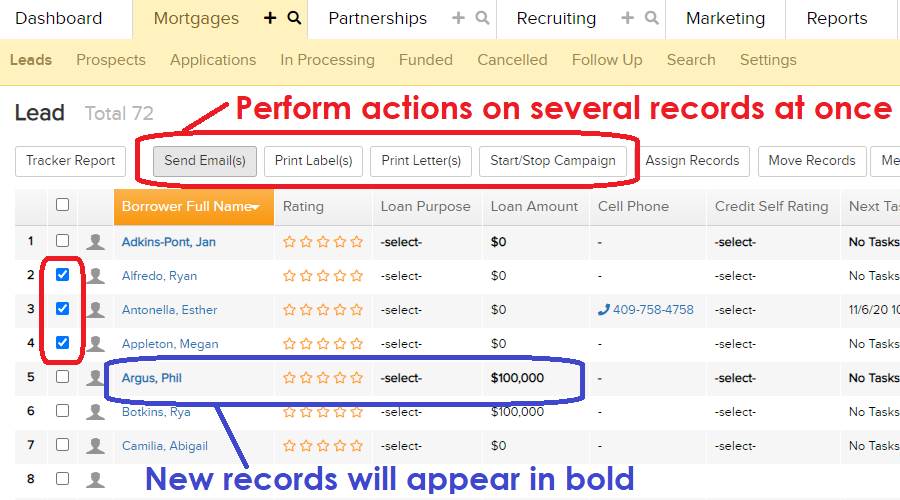
Actions can be taken on multiple records
at once by using the checkboxes to the left and the buttons above the record
list. These include printing labels, sending emails, starting
or stopping marketing campaigns, assigning records to other users, and moving,
merging, or deleting records.
Searching
Records
You can search for any information in any
record in your borrower database by clicking the magnifying glass icon next to the Mortgages
tab. By default, your last search criteria will automatically appear when you
start a new search; if you want to reset these criteria, click the “Clear
Search” button.
To choose between the categories of
search criteria, click the category names in the list to the left. More
categories can be shown by clicking “More” at the bottom of the list. The
checkboxes to the left can be used to select frequently-used
categories that will appear on a short list when you click “Less” below.

When searching using any date-based
criteria, you can either manually enter date ranges, choose them from a
calendar by clicking the calendar icons, or choose a dynamic range from the
drop-down menu to the right.
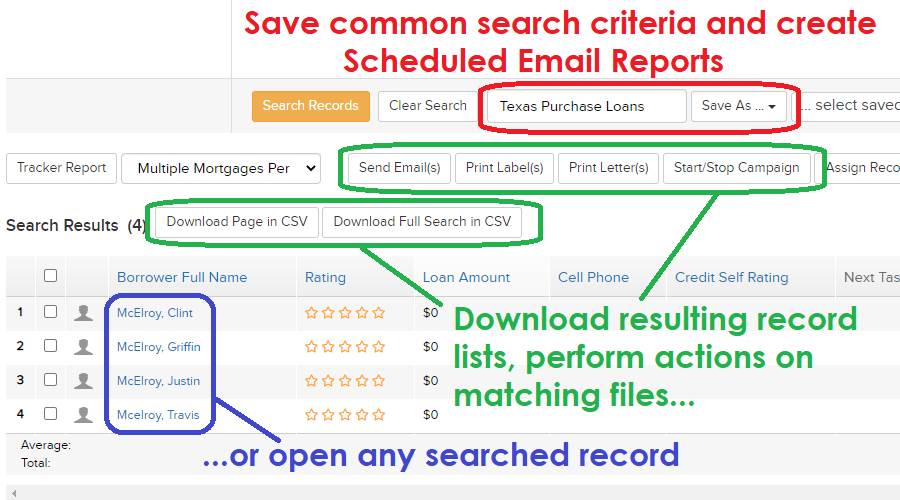
If
you search for similar sets of information using the same criteria frequently,
you can save these criteria as a Report by entering a
name in the box below the search and clicking “Save As Report.” Once saved, you
can quickly search for the same criteria later by
choosing the Report from the drop-down menu and clicking “Load Report.”
Several search options and criteria can
be selected using the checkboxes to the left. Choose what parts of your CRM you
want to search and enter the search terms in the boxes to the right. When
finished, click the “Search Records” button. The search results will display in
a list with the same options available as the Mortgage Record List.
Additionally, you can download the currently displayed or full search results
as a ‘.csv file’ using the buttons above the list.
What should I do
next?
To learn more about the tools, features,
and options available in BNTouch, please continue with the rest of our Initial
Training series. These articles and videos will walk you through each tab of
your new CRM and show you common workflows you can use in your business. The
next step in your Initial Training delves deeper into the Mortgages Tab and
shows you the multitude of options available when editing Mortgages Records.
To learn more about any particular feature, check out our training video library and
online manual. You can access these at any time in the user menu in the
upper-right corner of your screen.
Want to Learn More?