Partnerships – Partner Documents List
Uploading and
Requesting Partner Documents
Many different types of information need
to be maintained and tracked in detail when working with partners for your
mortgage loans. In addition to storing contact information, updating mortgage
details, and logging communication between your borrowers, partners, and
yourself, BNTouch also enables you to store documents that may be relevant to
your partners. In each partner’s record, you will have the ability to upload
files, transmit them to that partner, update document statuses, and handle
e-signatures for that partner in your CRM.
Accessing a Partner’s
Document List
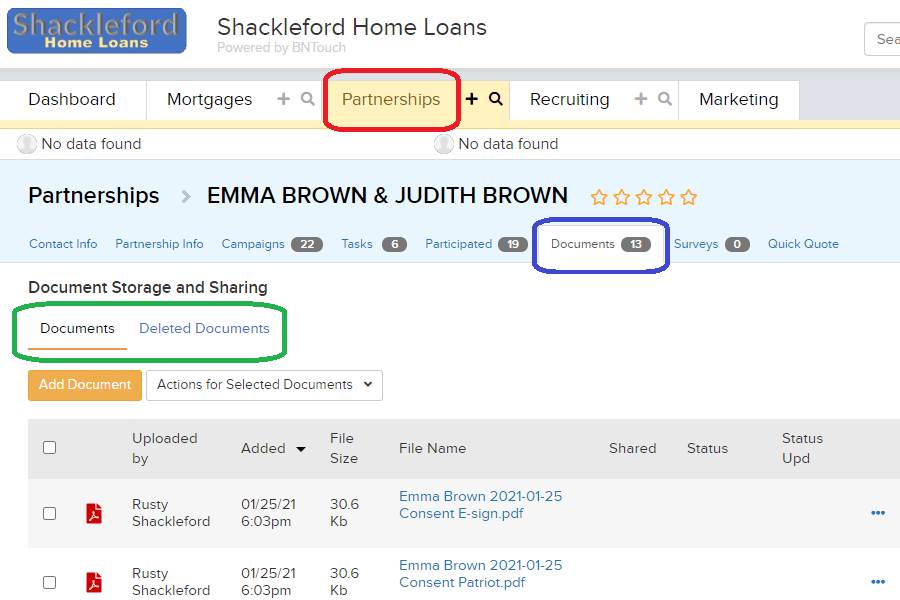
The first step in handling partner
documents is to open their record in the Partnerships Tab; you can do this by
clicking their blue “Name” link. In the “Documents” sub-tab of their record,
files can be managed for your own use or for transmission to that partner. The
first area that will appear here is the “Document Storage and Sharing” list.
This list will show files that you and other users have uploaded as well as
those submitted via partner portals.
Uploading
Documents to a Partner Record
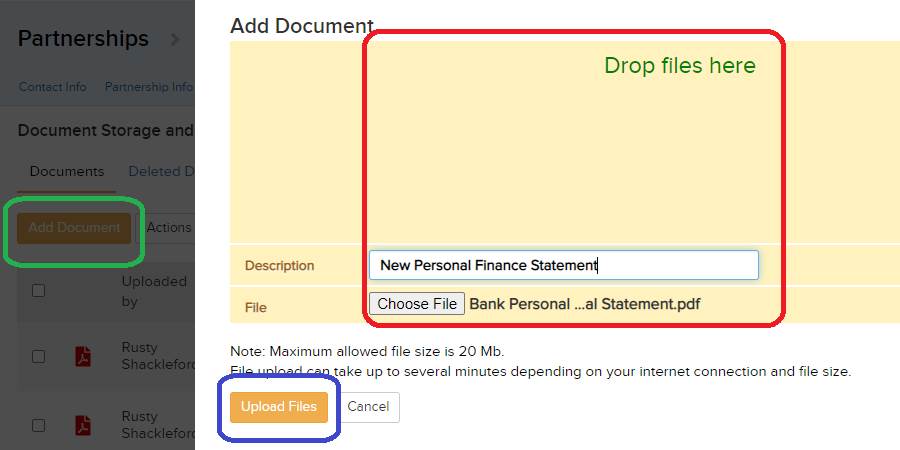
New files can be uploaded using the “Add
Document” button. Here, you can drag and drop a file into the top-most area or
use the “Choose File” button to select one from your computer. You can also
enter a brief description in the text field. This description is for your own
benefit, and clients will not see it with the file. Please note that the
maximum file size for each individual document you upload is 20 megabytes. The
file will be added to the record list once you click the “Upload Files” button.
Document Storage
List
You will be returned to the document
list, and the new file will appear here. Files can be downloaded by clicking
the “File Name” link, and details about each file will display below, including
who uploaded it and when, its size, and a description. Actions can be taken for
each file using the ellipsis icon to the right, including options to download,
edit, and delete the document.
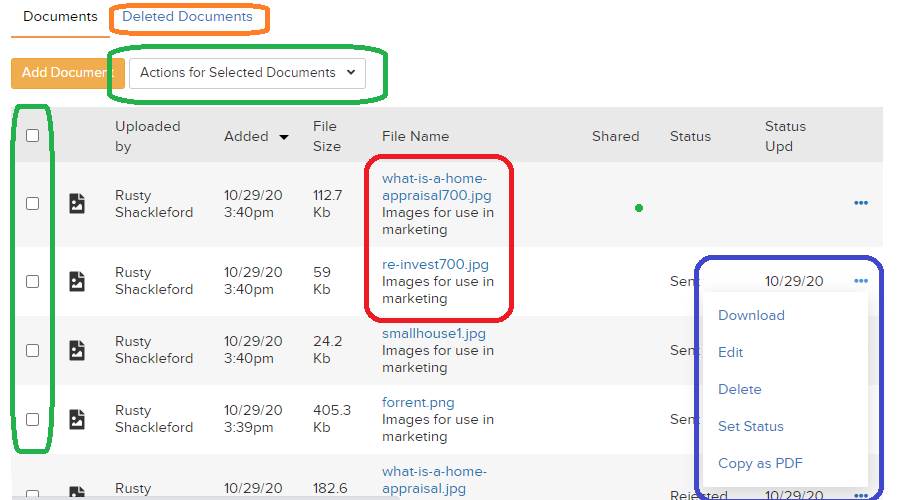
In addition, you can also set a
document’s “Status” here. This allows you to track files and search through
documents more easily. You can choose from a list of statuses or enter a custom
one in the text field. The “Status Management” link will let you add new
statuses for your business, delete ones you no longer use, and choose one to
set as a default status for newly-uploaded documents.
Multiple files can be downloaded,
deleted, or given a status using the checkboxes to the left and the drop-down
menu above the list. You can also view any recently deleted files by clicking
“Deleted Documents” above. From this list, you can restore documents to the
previous storage or permanently delete them from your CRM.
E-signed
Documents
Any documents that need to be securely
signed by partners and made available to you and other users in your account
will appear at the bottom of this page in the “E-Signed Documents” list. This
feature is only available for accounts that have the “E-Signing” module enabled
by their administrator. If you are interested in securely acquiring signatures
from your partners, please contact your administrator.
Here, you can see the document name and
when the signature request was made, the date it was signed, the signer and
their IP Address, and a link to download the file. For files that have not been
signed yet, a “Pending” message will appear in the “Signed Date” field. You can
send a new request message to the partner by clicking the “Request Again”
button, which will renew the “Requested Signature Date” for that document.
Pending documents will show the requested signer’s name, but the IP Address and
download link will not be available until they have completed the signature.
Want to Learn More?