Marketing – Social Media Integration
Marketing
Integration with Social Media
In many ways, Social Media is a
requirement in order to stay relevant in one’s
industry, and the Mortgage industry is no exception. In BNTouch, you have the ability to integrate your Social Media accounts
with your CRM, allowing you to manage your Facebook, LinkedIn, and Twitter
posts alongside your marketing.
Synchronizing Your
Social Media Accounts
The first step to handling your social
media presence from within your BNTouch CRM is to connect your company’s social
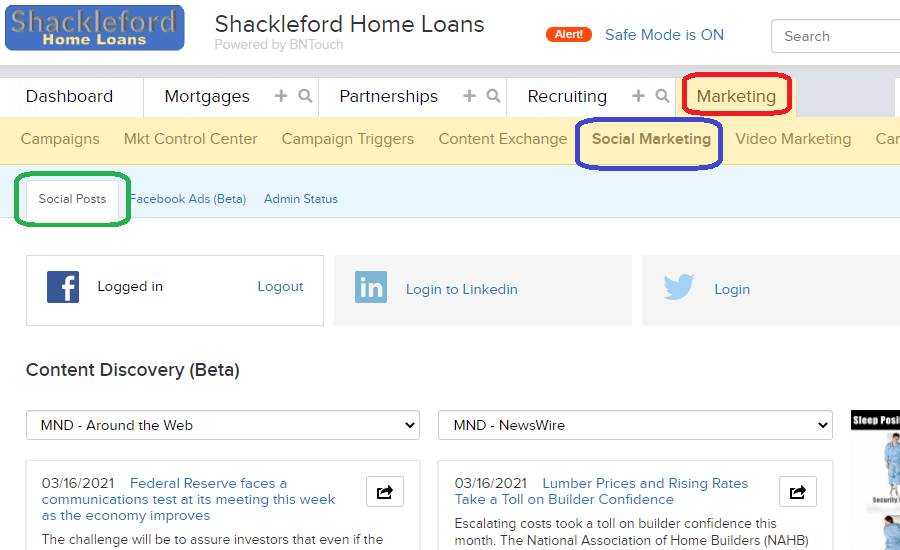
accounts to your CRM account. To do this, open your Marketing Tab and click the
“Social Marketing” sub-tab. If you can’t see this option, click the “More”
drop-down menu in the upper-right corner of the screen to display other
sections.
Here, the options available for social
media integration are separated into three categories: “Social Posts”,
“Facebook Ads”, and “Admin Status”. The latter option will only display for
administrative accounts. This video will focus on the first section: Social
Posts.
The sub-tab that will display by default
is “Social Posts”. Here, you can connect your social media accounts, find
interesting news articles and images to share, post directly to your social
feeds, and even schedule posts to be made later.
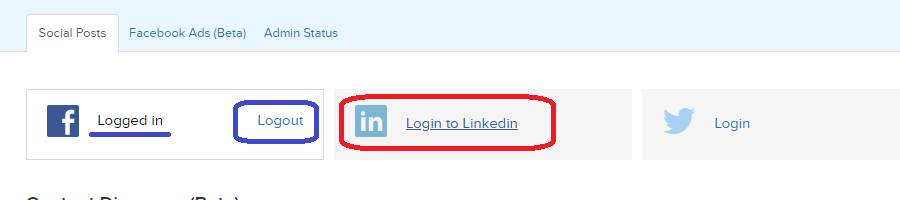
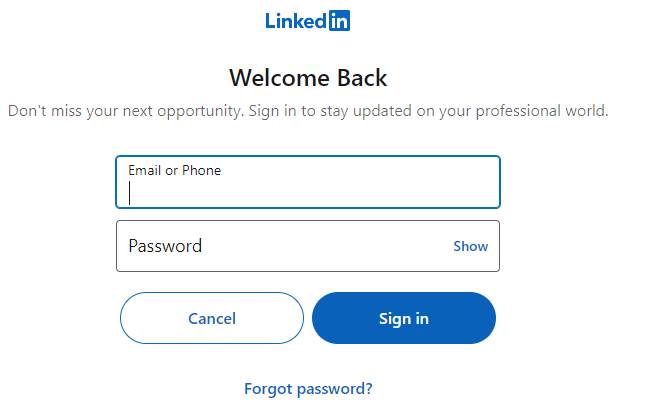
First, you will need to connect your
accounts. At the top of the page, you will see options for logging into
Facebook, LinkedIn, and Twitter. When you click on any of these options, you
will be taken to a page where you can log into the corresponding social media
service, choose which permissions and what settings you would like to apply to
your CRM, and connect your media account to your BNTouch account. If any of
these services are already connected, you will see “Logged in” for that service
and instead have a “Logout” link that can be used to disconnect your accounts.
Content
Discovery
Next, you will see a list of news stories
and mortgage-related images. The articles below are pulled from various RSS
feeds related to current news or the mortgage and financial industries. You can
change feeds to choose from using the drop-down menus above the article lists.
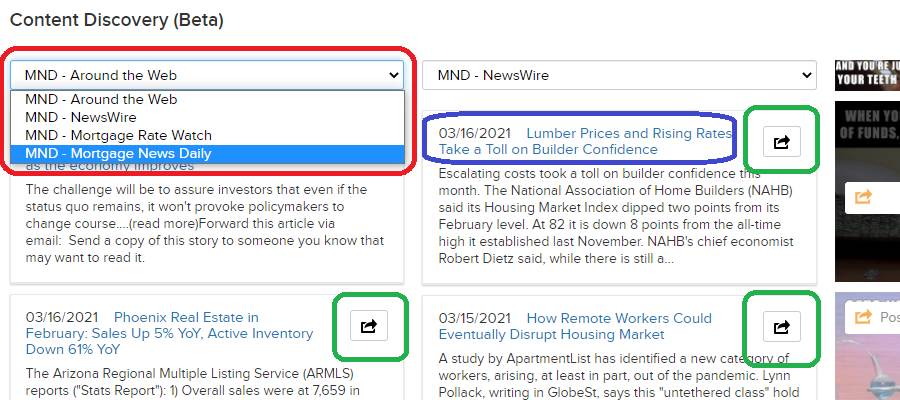
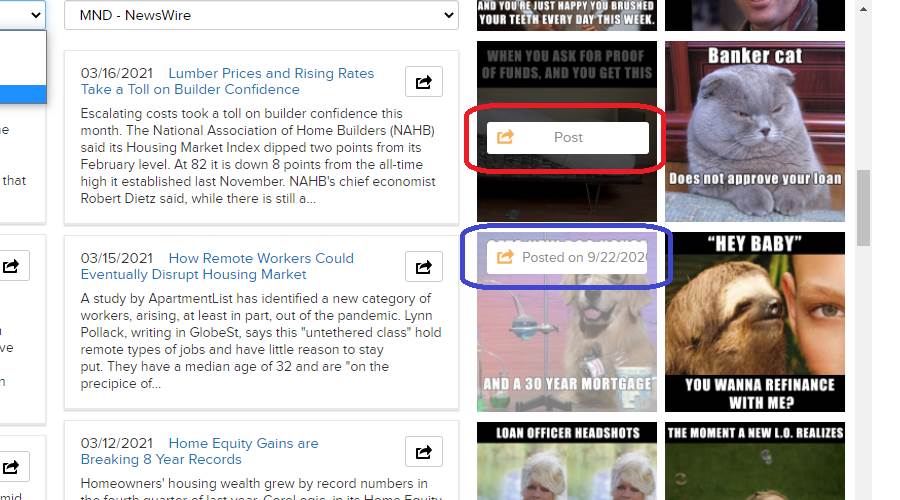
You can check out any of the articles
yourself by clicking the blue title link at the top of a story. Additionally,
you can post any of these stories just by clicking the button to the right of
the title. For images, you just have to click on them
to post them. Any images you have already posted will display a message with
the date you last used them.
When you post a story or image, a new
page will open. Here you can choose which social media services you want to
post it to. Next, you can set the title of your post and add any of your own
text. To the right, you will see the article brief displayed in a small text
box. You can copy and paste this into the “Post Text” box to include it with
your social media posting.
For social media services that have a
character limit, the “Characters Count” will show how many total characters
have been added to your post. If you go over the total characters allowed by a
social media site, a link will be included in the post to view the complete
post.
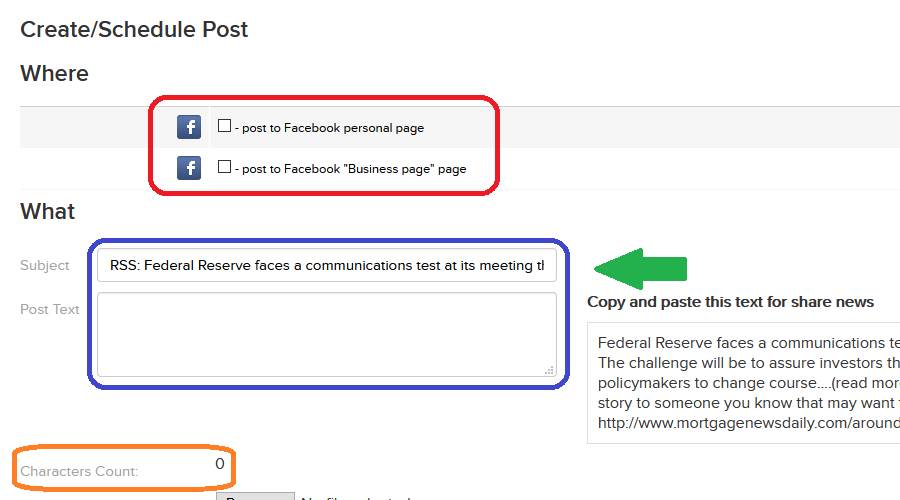
To include an image with your post, just
click the “Browse” button to select a file from your computer.
Lastly, you can choose to either “Post
Now” or “Schedule for Later” using the “When” drop-down menu. If you opt to
schedule a social media post for later, you can then set a date and time when
it will be posted. Please note that the “Schedule for Later” feature is not
available for accounts with “Safe Mode” enabled for their marketing.
Once your post is ready, click “Create
Post” to either post it immediately or ready it for a scheduled posting.

Scheduled Posts
List
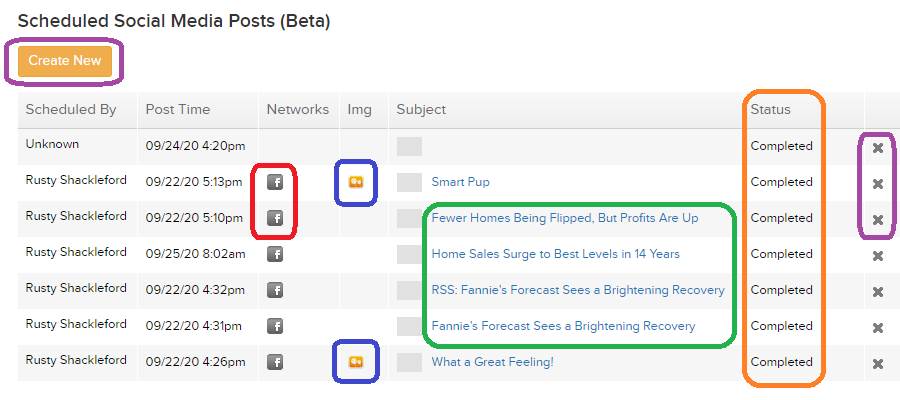
Below the Content Discovery articles, you
will see a list of all Scheduled Social Media posts for your account. Any posts
you have created and scheduled for later posting will appear here, and the
“Status” column to the right will show whether they are still pending or have
been successfully completed.
From this list, you can jump to any of
the actual posts on your social media networks by clicking the icons in the
“Networks” column. The “Image” column allows you to view any pictures you have
attached to your posts, and the blue “Subject” titles can be clicked to edit
posts. Once the scheduled post time has passed, you will only be able to view
posts this way, as they cannot be edited once posted.
You can add new posts from here using the
“Create New” button. This uses the same process as scheduling a later post from
the Content Discovery list above, but you will not have the ability to copy
news feed material to your message.
Want to Learn More?