Initial Training � Marketing Tab
Managing Marketing
Campaigns in BNTouch
Communication with your borrowers and
partners can be managed and automated in the Marketing tab of your BNTouch CRM.
Here, a �Campaign� represents marketing communication that is sent to groups of
people, not necessarily an individual email or text message sent to a specific
person. This communication could be to borrowers, partners, co-workers, or
yourself. Campaigns can be sent via several media, including email, SMS text
message, phone call, mobile app push notification, CRM reminder, and
more--depending on which BNTouch modules you have activated. These campaigns
can be automated to send to applicable groups based upon predetermined
triggers.
Campaign List
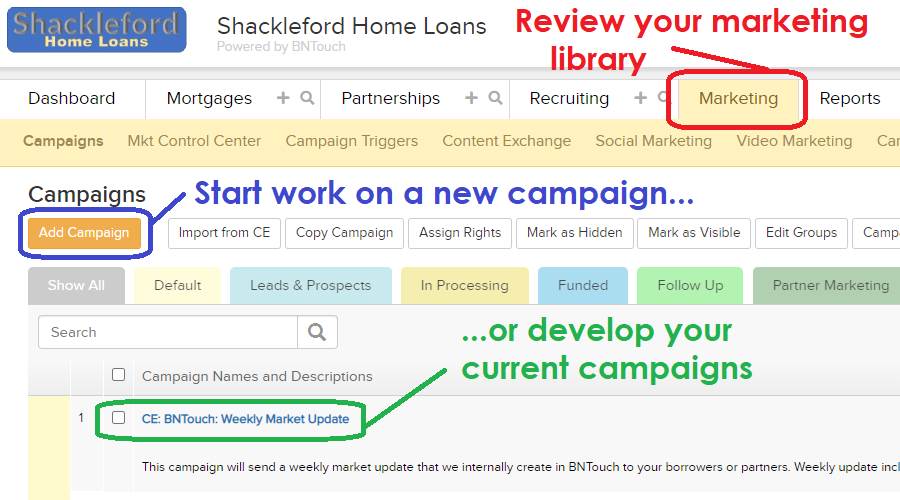
To access your list
of available campaigns, simply click the Marketing tab from anywhere in
BNTouch. Depending on your account, some campaigns may already be listed here
for you by your administrator. If you have the permission to do so, new
campaigns can be created using the �Add
Campaign� button.
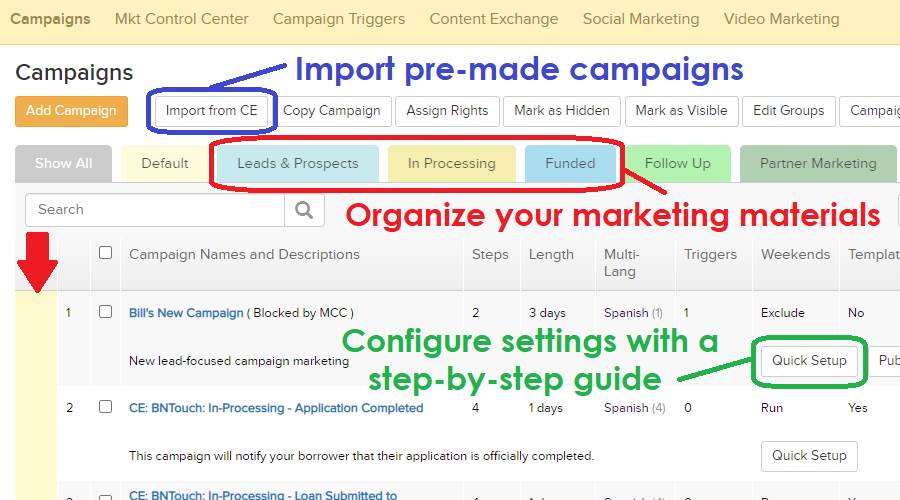
The color and title to the left of the
list will show what �Group� the campaign is part of. These groups are
organizational for your business, not groups of targets for the campaign. The
groups listed here can be changed by clicking the �Edit Groups� button above
the list. You can view specific groups of campaigns at a time by clicking the
colored tabs above the list.
Actions can be taken on the campaigns in
the list using the checkboxes to the left of each campaign and the buttons
above the list. �Import
from CE� will allow you to bring campaigns made by BNTouch and its users
into your CRM. �Copy Campaign� can duplicate a campaign, saving time when
making similar marketing. �Assign Rights� can transfer ownership of a campaign
to a different user in your company. Campaigns can be marked as �Hidden� or
�Visible� using the appropriate buttons, and the drop-down menu in the
upper-right corner of the list can be used to filter campaigns by this status.
Each campaign will be listed with a name
and brief description. Clicking the �Campaign Name� or the �Edit� pencil icon
will open the campaign for editing. The �Steps�
for each campaign represent how many actions take place during that campaign. A
campaign�s �Length� shows how many days the campaign runs for. The �Triggers�
column shows if the campaign has any automated logic for adding the campaign to
your records. �Weekends� will show whether the campaign is set to send on
weekends or only during the week. If the campaign uses your default template,
it will display in the �Template�
column. The �Owner� and �Created� columns will show who created the campaign
and when. Only the owner of a campaign can update its settings
or step content.
The �Quick
Setup� button will open the setup wizard for that campaign, which will ask
a series of questions to customize automation in your CRM. The �X� icon to the
right of a campaign can be clicked to delete it.
Editing a
Campaign
When you open a campaign, options for
modifying that campaign will appear as sub-tabs at the top of the page. The
first, �Steps,�
will display the individual parts that the campaign is made of. These steps are
separated into two categories.
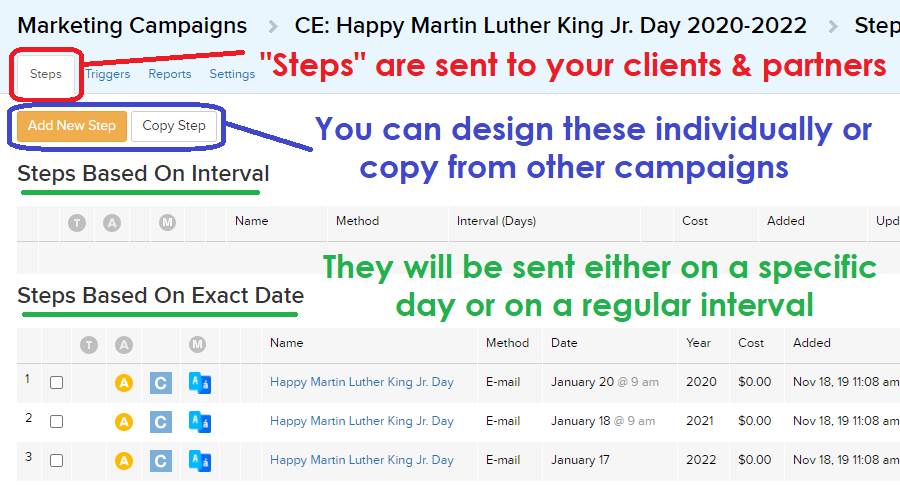
�Steps Based on Interval� will activate
based upon a period of time after a specified �trigger� takes place. This type
of step can be used to send out an automated email one, three, and five days
after a lead is generated, or to send a reminder to yourself in-system to call
a lead after a certain period. The �Interval� column will show a number
representing how many days after the triggering event the step will activate. A
value of �1� in this column means that the step will trigger as soon as a
record is added to the campaign.
�Steps Based on Exact Date� will activate
on the specified date, regardless of the duration of the campaign. This type of
step can be used to send campaigns for holidays, birthdays, or other events
that take place at the same time each year.
Steps can be added to the campaign using
the �Add New Step� button at the top of the list. To duplicate a step, check
the box to the left of a step and click the �Copy Step� button. You can also
copy steps from one campaign into another existing campaign.
If a �T� appears for a step, that step
isn�t set to use your default template information. Instead, each of these
steps will need to have template
information applied individually. If an �A� appears for a step, that step
is automated via Triggers. The third letter-icon column will show who the step
is being sent to. A �C� means the step will be sent to the �Client� or
Borrower. A �P� means the step will be sent to a �Partner� associated with a borrower�s
file. An �M� (for �Me�) means the step will be sent to yourself.
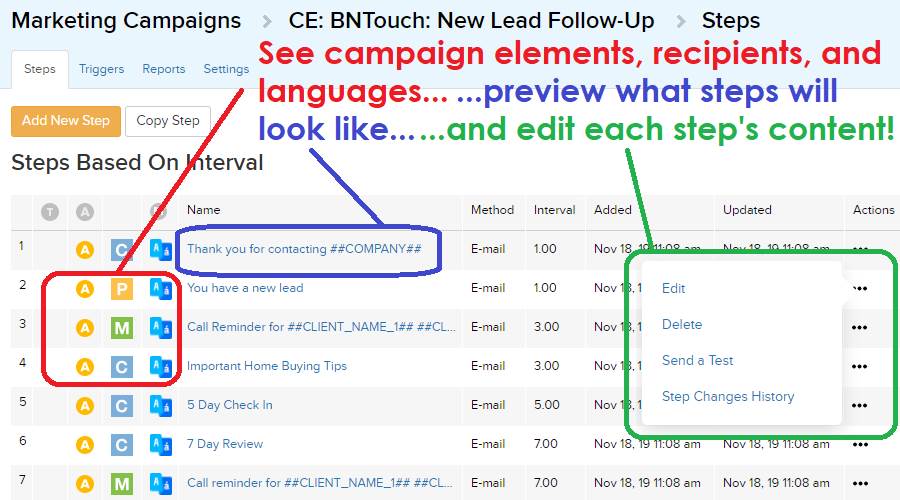
Clicking the step name will show a
preview of the step. The �Method� column will show the media used to send that
step, including email, SMS text, phone call, mailed postcard, in-system
message, and other forms. The �Cost� column will only matter for specific
module-based delivery methods, like automatically mailed postcards. The
�Actions� menu button contains options to edit, test, or remove a step.
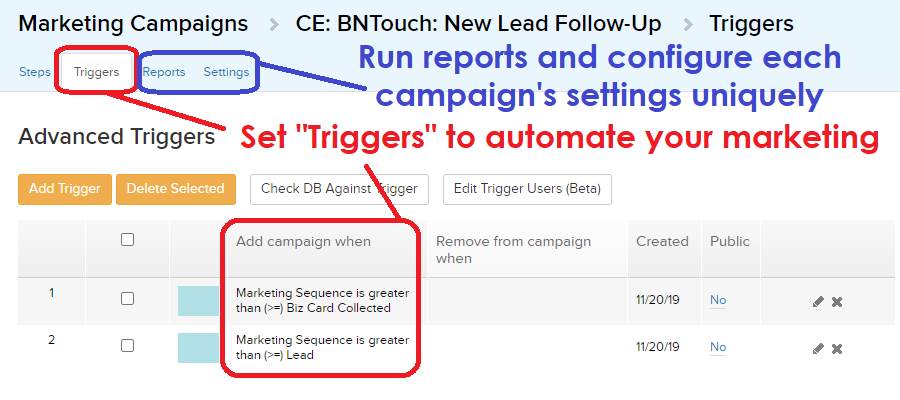
The �Triggers�
sub-tab will show any automated elements of the campaign. These advanced
elements can perform many marketing functions for you if configured properly.
If you are interested in setting up automation triggers and want some examples
to use as a pattern, reference the �Advanced
Marketing Trigger Examples� article for a head-start.
The �Reports�
sub-tab will display a summary of the selected campaign, including counts of
records for which the campaign is active, paused, unsubscribed, or finished.
Clicking the �Records on Campaign� link will display a list of all borrowers,
partners, and BNTouch users for this campaign. Clicking the �Summary� link will
generate a report for the campaign, which can be filtered by status using the
drop-down menu in the upper-right.
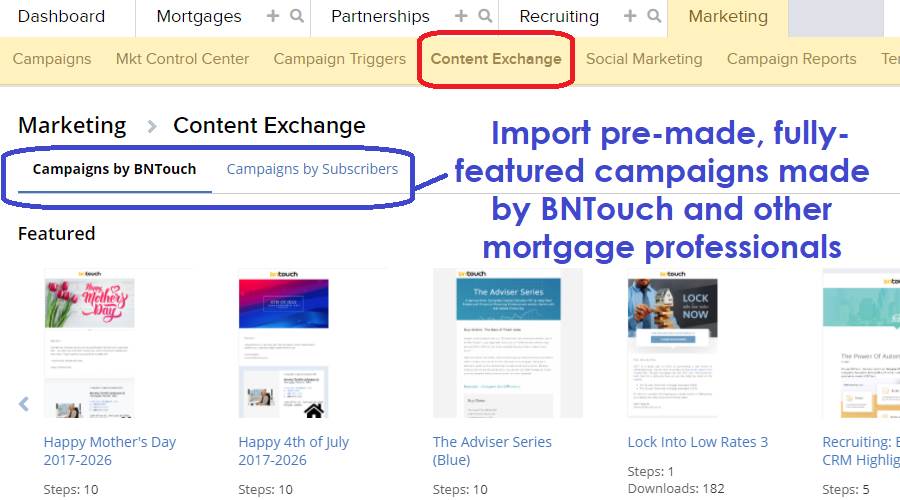
Content Exchange
To access a list of premade campaigns
that you can add to your own business, click the �Content
Exchange� sub-tab. This list is separated into two sections.
�Campaigns by BNTouch� are prebuilt campaigns
that BNTouch has made to help your business thrive. These campaigns are
available to all users at no charge.
�Campaigns by Subscribers� are campaigns
that other BNTouch users have created and made available for everyone to freely
use. BNTouch is not responsible for the content of these campaigns, and we
recommend that you review all steps of campaigns that have been shared by other
users before sending it to your clients and partners.
Social Marketing
Social media services that your company
uses can be linked to your BNTouch CRM in the �Social
Marketing� sub-tab, including Facebook, LinkedIn, and Twitter. In the
Content Discovery section, RSS feeds can be accessed and shared to your social
media accounts.
New Social Media posts can be created
below. Linked platforms can be selected for each post. The �Subject� of the
post is only visible in BNTouch and will not be posted. Both a text field and
an image can be included. Entries here can be set to post immediately or after
a scheduled delay.

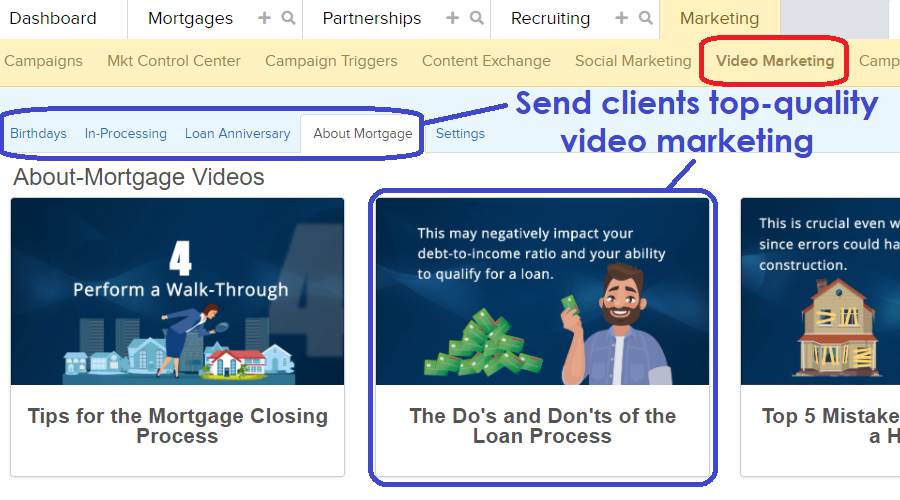
Video Marketing
The �Video-Marketing� sub-tab contains
pre-generated videos you can use in your marketing communication with your clients.
These videos are organized into categories, including Birthdays, In-Processing,
and Loan Anniversary. When you hover over a video, you can click the �Play�
button to view it or the �Send� button to send it to one of your clients. When
sent, the video will appear on a unique page with your contact information, and
the video will feature customization for the record you sent it to. To change
the splash page the video appears on, use the �Settings� sub-tab to select a
design.
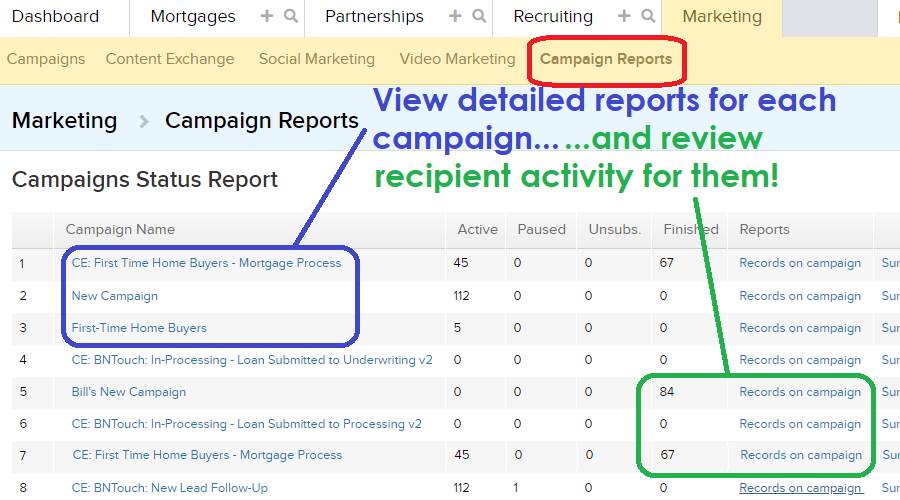
Campaign Reports
Detailed reports for each of your
marketing campaigns can be generated in the �Campaign
Reports� sub-tab. Clicking on the campaign name will open the Edit Campaign
screen. The �Records on Campaign� and �Summary� links function as they do when
editing a campaign.
Campaigns can be stopped and restarted
using the buttons below. Individual steps in the campaign can be rerun or
assigned using the checkboxes to the left of the steps and the buttons below.
What Should I Do
Next?
This should give you a basic
understanding of the tools available in the Marketing Tab and how to use them.
Many additional features are available, including advanced
campaign triggers, the use of meta-tags
to personalize your marketing, Facebook
Adds integration for Leads and Audiences, and multiple optional
modules.
To learn more about the tools and options
available in BNTouch, please continue with the rest of our Initial Training
series. These articles and videos will walk you through each tab of your new
CRM and show you common workflows you can use in your business. The final step
in your Initial Training explores the many options available when you access
your CRM on-the-go via the BNTouch
Mobile App.
To learn more about any particular feature, check out our training video library and
online manual. You can access these at any time in the user menu in the
upper-right corner of your screen.
Want to Learn More?