Mortgages – Pre-Approval Information
Reviewing Client
Pre-approval Information
Getting quotes and requesting
pre-approval for a loan can be an involved process, requiring specific
information from borrowers and clear, prompt communication with your clients.
BNTouch provides multiple ways for your clients to gather this information and
submit these requests directly to your CRM, saving you time and keeping your
work organized. In each client’s record, you will be able to view incoming
pre-approval requests, customize and send pre-approval letters in response, and
keep track of previous pre-approval data.
How Can
Borrowers Request a Quote?
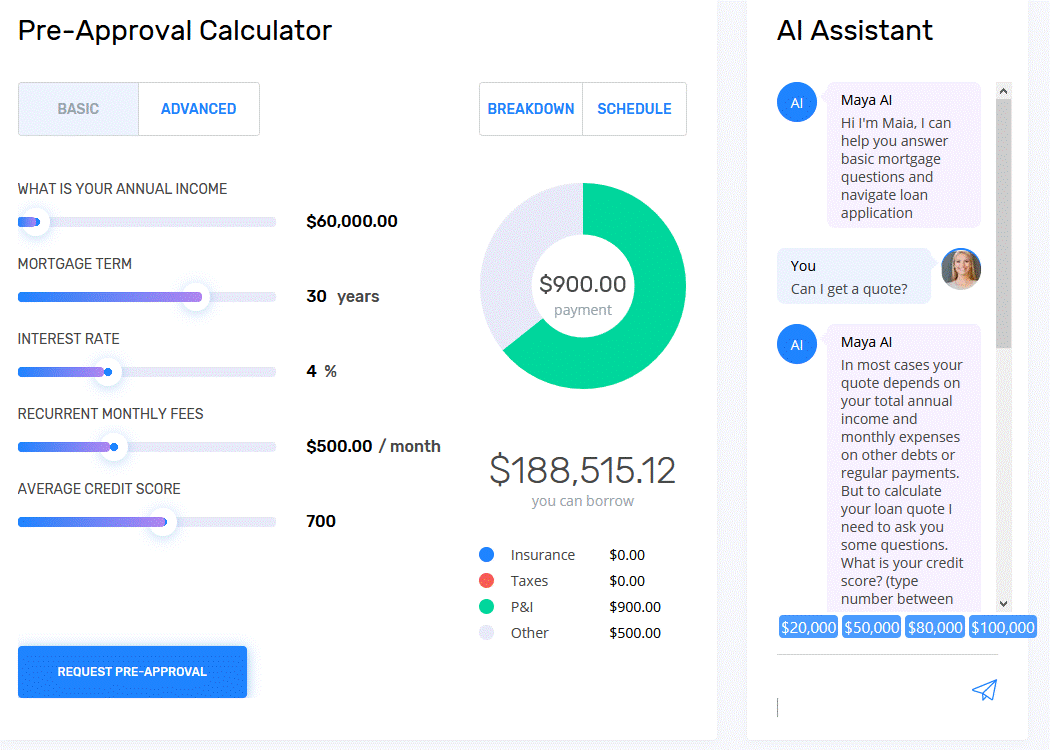
The easiest way for borrowers to request
a quote is through our white-labeled, client-facing site, Mortgage Circles.
Your clients will be able to access a Pre-Approval Calculator via the Borrower
Portal, where they can enter their income details and desired mortgage options.
Your partners can also access this feature in their Partner Portal.
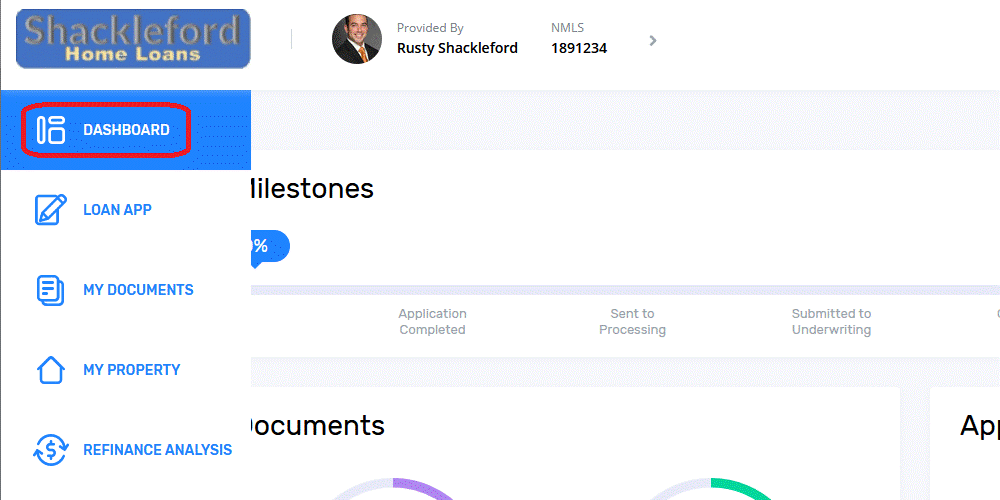
This feature can be found in the
“Dashboard” tab when a client or partner first logs in. Once they have entered
the required information, they can click “Request Pre-Approval” to send it to
your CRM. They can also use the calculator feature to estimate loan breakdown
data, payment options, and even a payment schedule with detailed interest
breakdown.
Borrowers can also get help from MAIA,
your Mortgage AI Assistant, to the right of the Pre-Approval Calculator. When
they ask her, “Can I get a quote?”, MAIA will walk them through a series of
questions to gather the necessary information. She can also answer any
questions they have about the mortgage process. Once she provides them an
estimate, the borrower can then opt to have MAIA send that information to you
for pre-approval.
Accessing
Pre-Approvals in Your CRM
In your CRM, you can check a client’s
pre-approval information by opening the Mortgages Tab, then clicking the
client’s name to open their record. There, click the “Pre-Approvals” sub-tab to
see a list of any pre-approval requests and responses that have been made with
that borrower.
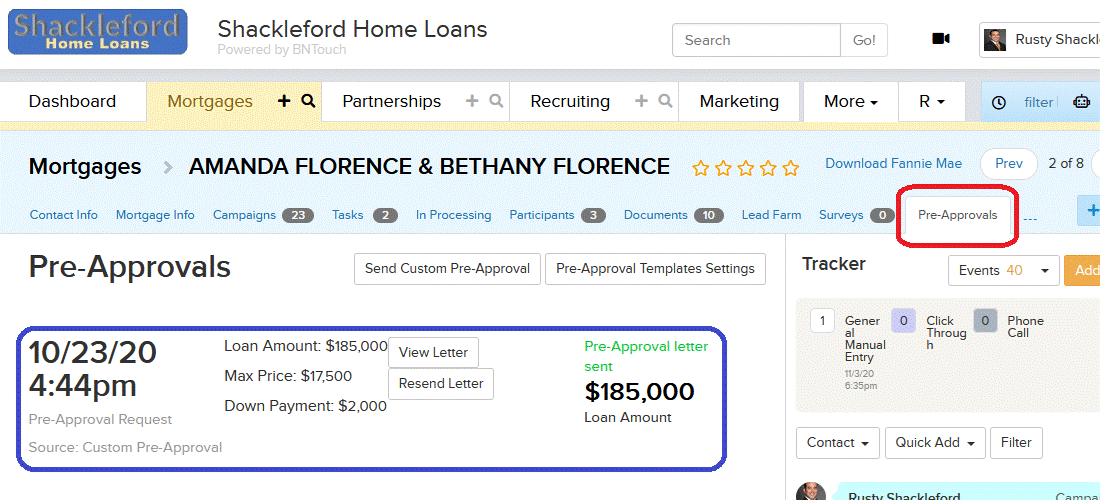
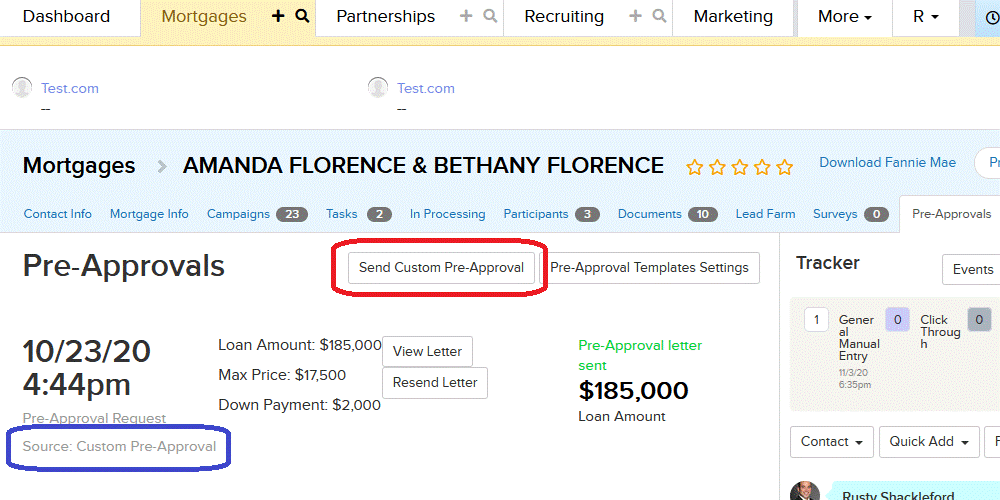
Each pre-approval will be listed with a
date and time, followed by any information included with the request. In
addition, you can see where the pre-approval was sent from in the “Source” section,
which lets you know if it was submitted by a user from the Mortgage Circles
site, chatting with MAIA, the Mobile App, or directly from a Custom
Pre-Approval message. You will be able to see any data that the Pre-Approval
Calculator would have shown the borrower, and you can even see the estimated
Payment Schedule by clicking the link to the right.
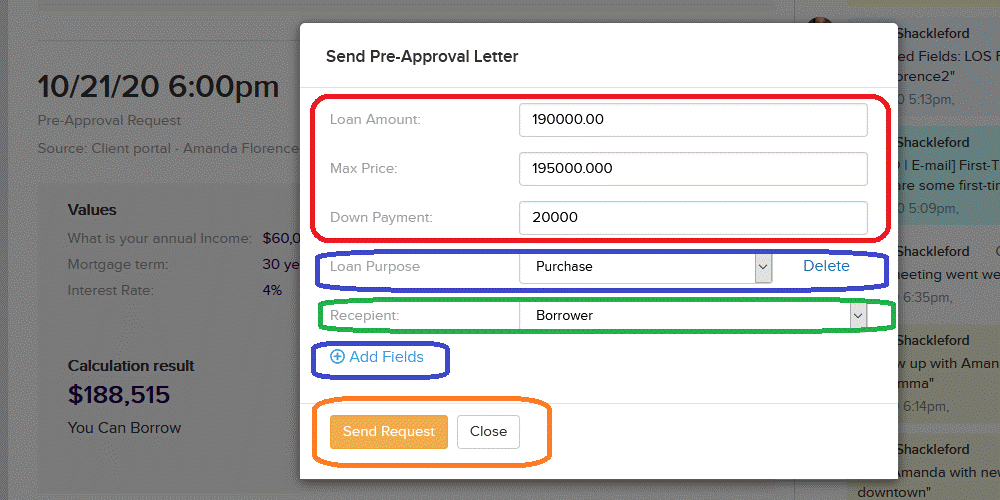
Once you are ready to reply with a
pre-approval for a request, just click the “Send Pre-Approval Letter” button to
the right. You can then enter the loan amount, max price, and down payment, as
well as choose who to send the pre-approval to, including the Borrower, a
Co-Borrower if applicable, or any Participants that have been listed for the
record.
Additional fields may appear here based
upon settings configured by your administrator. If you are an administrative
user, you will be able to click the “Add Fields” link below to bring in
additional information. You can search through data fields using the “Select”
drop-down menu, then click “Add Field” to make it available when creating
pre-approval letters. Custom fields can be removed from this prompt by clicking
the “Delete” link.
When you click “Send Request”, an email
editor will open with a default Pre-Approval Letter. The client’s contact
information and the submitted pre-approval values will automatically populate,
but you can still change or add anything, modify the email template, or attach
files to the message just like any other email sent from your CRM. When you are
ready to send the letter to your client, click the “Send” button in the
upper-right corner.
You will be returned to that client’s
“Pre-Approvals” list, and the entry will have a green “Pre-Approval Letter
Sent” message identifying its success. You can always view the letter you sent or
send a new one using the buttons for that request.
Custom
Pre-Approvals
Even if a client hasn’t
already requested a quote through your CRM, you can still send a pre-approval
letter from their record. Above the Pre-Approvals List, click the “Send Custom Pre-Approval”
button.
This will let you enter a loan amount,
max price, down payment, recipient, and custom field information as before, but
when you click “Send Request”, you will be brought to an email editor without
any mortgage loan values listed. You can enter these details manually or attach
a pre-approval file to this message, then send it exactly as before. This type
of request will still appear on the Pre-Approval List for that client’s record,
and it will be identified as a “Custom Pre-Approval Request”.
Setting
Pre-Approval Letter Templates
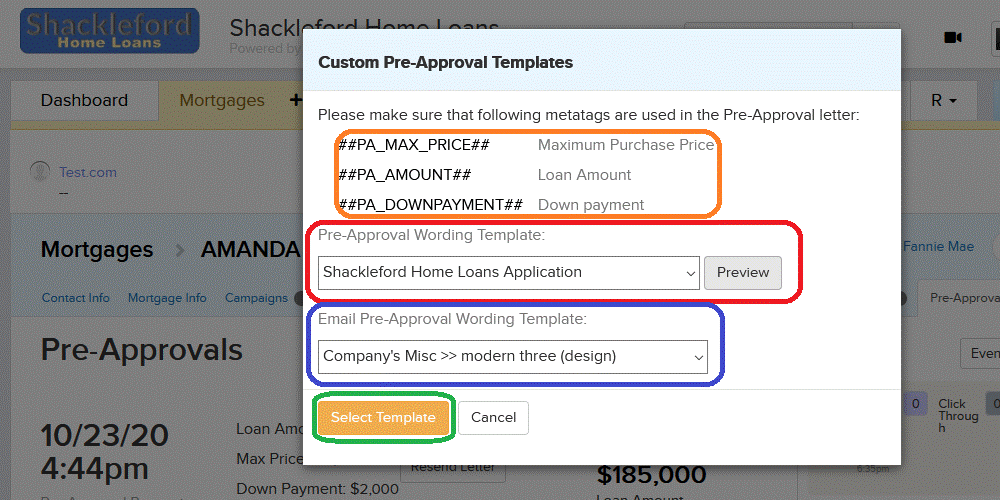
To customize the attached letter that is
sent with your Pre-Approval messages, click the “Pre-Approval Templates
Settings” button in a client’s record. Here, you can choose from a drop-down
list of pre-made wording templates or customized templates that have been added
for your account. You can see what any of these files look like by clicking the
“Preview” button, which will download the template file to your computer. If
you are an administrative user, the selections you make here will be set as the
default options for other users in your account.
The document files listed here can be
accessed in the Marketing Tab under “Docs Library”. Here, you can also choose
the stationery template for the pre-approval email that you send using the
“Email Pre-Approval Wording Template” menu. These options will be the same that
you have available when sending marketing emails.
When working on pre-approval templates,
remember to use the Meta-tags specific to pre-approval fields in order to auto-populate the appropriate data into the
document. These meta-tags are listed in the “Custom Pre-Approval Templates”
menu, and you can also find them in the Meta-tag Search Tool when composing an
email message.
When you click “Select Template”, any
options you have chosen will be saved as the default templates for the
pre-approval document and email.
Want to Learn More?
