Modules – Microsoft Outlook Add-In
Synchronizing
Mocrosoft Outlook with Your BNTouch CRM
Keeping up-to-date
with your emails, appointments, and calendar is important when handling several
mortgage clients and partner interactions. If you use Microsoft Outlook to
handle your email communications, calendar scheduling, personal contact
management, and task tracking, you can connect your CRM to Outlook so that your
emails, tasks, appointments, and contacts can be synced between both
environments and seen in whichever format you are working. With only minimal
set-up, your information will be synchronized and you
can focus on your business.
Download the
BNTouch Outlook Add-In
In order to link your email communication between Outlook and your BNTouch CRM,
you will first need to download a small add-in for your Outlook program. This
will allow you to configure a two-way, automated synchronization of your
messages and contacts. Emails you send in Outlook will create corresponding
tracker events for records in your CRM, and those you send from BNTouch will be
accessible from your Outlook interface.
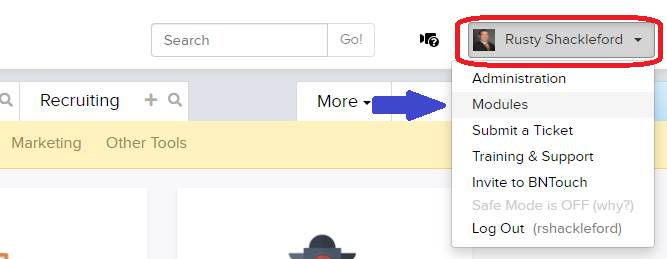
To download the BNTouch Outlook Add-in,
open the User Menu in the upper-right corner of your screen. Click “Modules”
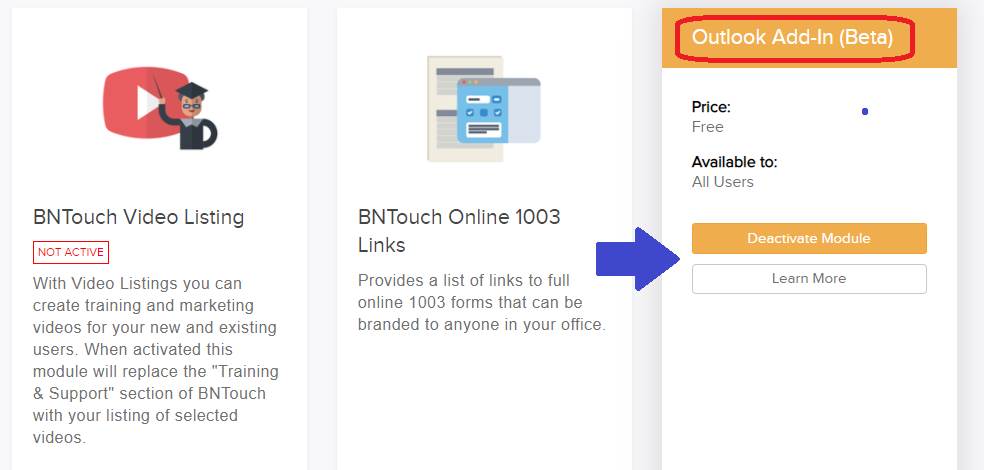
and find the “Outlook Add-in” option. This module is enabled by default, so you
just need to click the “Learn More” link. Here, you will see a “Download” link
among the support options. Click this link and save the add-in file to a
location on your computer that you can find easily. Once downloaded, find the
file on your computer, open it, and follow the installation instructions.
The “Modules” section of your CRM is only
accessible by Administrative users. If you need help setting up this feature
but do not have access to Modules, please contact your administrator.
Configuring the
Outlook Add-In
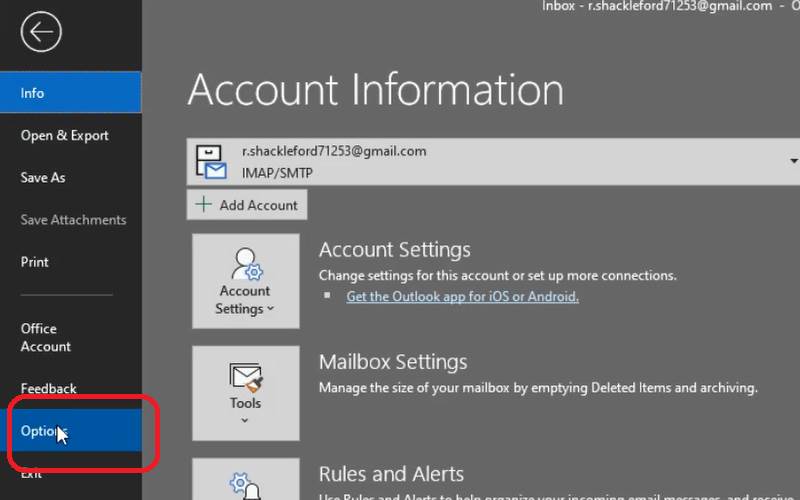
Next, you’ll need to add the module to
your Outlook program. If Outlook is already open, we recommend closing the
program and restarting it. Once it is open, click “File” in the upper-left
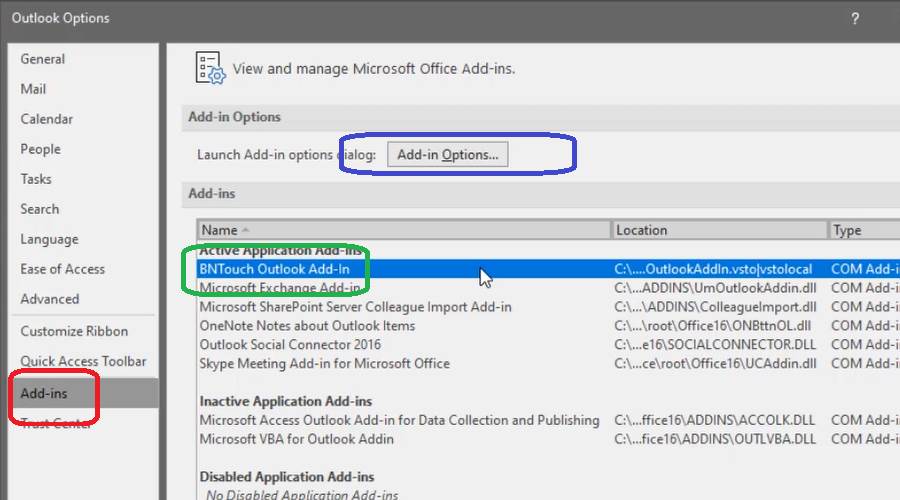
corner of the screen, then click “Options”. In the “Add-ins” tab, look for the
“BNTouch.OutlookAddIn” line in the list. Select this
option, then click the “Add-in Options” button.
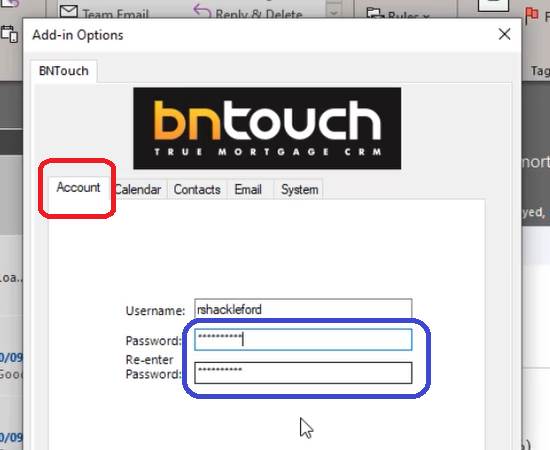
The settings here will be separated into
several sub-tabs. First, you will need to log in to your BNTouch account from
the “Account” sub-tab. Enter your login credentials used to access your BNTouch
CRM, then click the “Apply” button below.
Once your user account is connected, you
can choose what calendar events will be synchronized using the “Calendar”
sub-tab. Here, you can choose an Outlook calendar to sync with BNTouch using
the drop-down menu and enable the Appointment Sync using the checkbox below.
This is generally preferable, as it is a quick and simple process. “Full
Appointment Sync” will update all upcoming and past appointments, which can
take quite a while for users with a large history of appointments. If you need
to clear appointments brought into Outlook from your CRM, you can click the
“Remove All BNTouch Appointments” button. In this case, only appointments added
via the synchronization will appear in Outlook.
Like your appointment calendar, you can
also synchronize your client and partner records from CRM communications as
Outlook contacts in the “Contacts” sub-tab. The same options will be available
as when syncing and importing calendar events. You will also see an option to
bring co-borrower contact information into Outlook from your CRM as a separate
contact from the borrower. In your CRM, borrowers and co-borrowers are kept
track of as a single record; however, you can separate these contacts in your
Outlook client if you prefer.
In the “Email” sub-tab, you can choose
whether to automatically log incoming and/or outgoing emails into BNTouch. If
either of these is left unchecked, that type of email can still be copied to
your CRM, but each will need to be logged manually.
Lastly, the “System” sub-tab will include
error-reporting and debugging options. Generally, leave these settings as they
are unless one of our support staff asks you to enable or disable advanced
diagnostics for account support purposes.
Creating CRM
Entries from Outlook
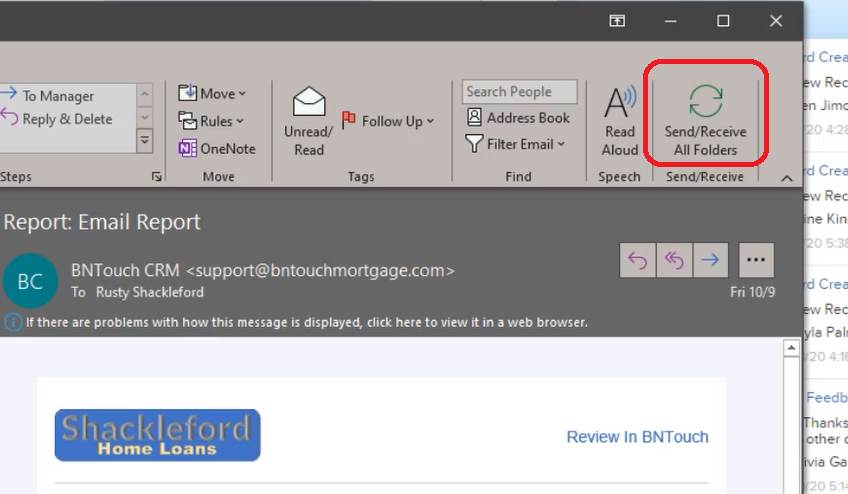
Now that you have configured your Outlook
Add-in settings, you will be able see your appointments, tasks, and contacts
from BNTouch in Outlook. This information will update every time your Outlook
performs the “Send/Receive” action.
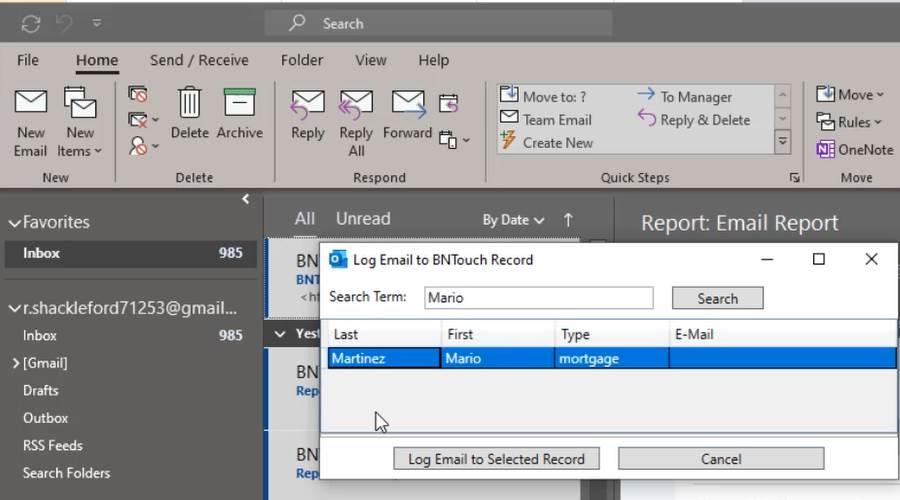
When you send or receive an email in
Outlook, a log of that email will be sent to BNTouch automatically if you had
that type of email selected in the Add-in Settings. If not, you will be able to
right-click on an email to see options for logging that email to your CRM
manually. When you click “Log to BNTouch”, a log of the email will be sent to
your CRM and attached to the record with a matching email address. You can also
use “Log to BNTouch to Contact”, which will open a prompt in Outlook that
allows you to choose which record the email will be logged to in your CRM. You
can search through your CRM records, then click “Log Email to Selected Record”
when you find the right one.
For synced calendar appointments, new
appointments that are made in the Dashboard tab of your CRM will appear in your
Outlook Calendar whenever you perform the “Send/Receive” function in Outlook.
Similarly, appointments you make in Outlook will be sent to your CRM calendar
when you “Send/Receive”.
In addition to CRM Calendar events, you
can also send Tasks from your CRM to Outlook if you have the Appointment Sync
feature enabled. When you create a task from a record in your CRM, it will be
added to your Outlook Calendar when you perform the Send/Receive action--just
like an appointment.
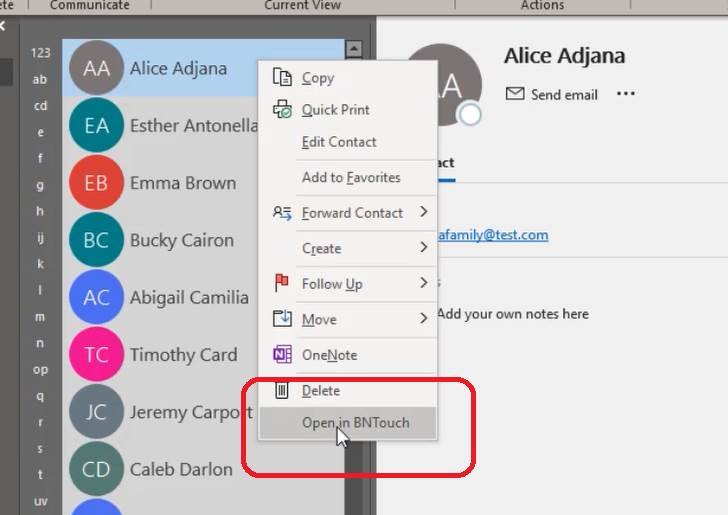
Syncing your Contacts between Outlook and
BNTouch is just as easy. Any records from your CRM that you brought over
through the Contact Sync feature will appear in the Contacts section of
Outlook. When you Right-click on one, you can click “Open in BNTouch” to go
directly to that record in your CRM in a browser window. If you create a new
record in Outlook, you’ll see a different option when you right-click it–”Add to BNTouch”. This will open a prompt that will let you
choose what information will transfer from your Outlook Contact to a new CRM
Record. Any relevant information from the Contact will automatically populate,
and you can choose which type of record it will be using the drop-down menu at
the top. When finished, click “Save to BNTouch”, and the record will appear in
your CRM once you perform the “Send/Receive” action.
Want to Learn More?
