Options – BNTouch Voice Settings
Improve Your
communication with BNTouch Voice
The BNTouch Voice module is an expansive,
powerful addition to your BNTouch CRM. Using this feature, you can communicate
with your borrowers and partners in more personal and direct methods than
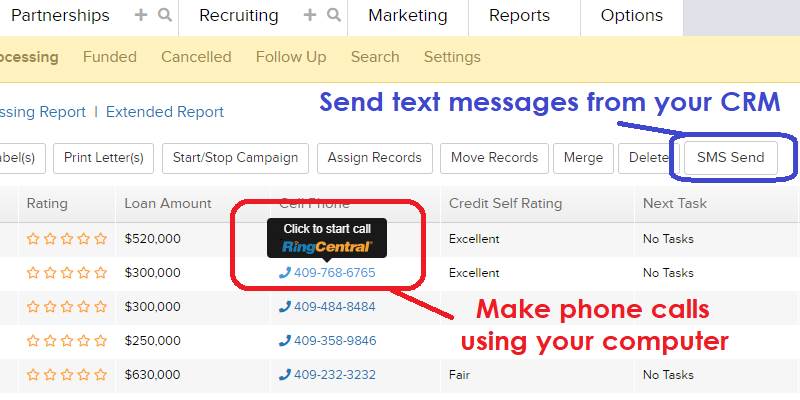
simple email and postcard marketing. This module allows you to send text
messages to your leads, click on phone numbers in your CRM to call partners
right from your computer, pre-record audio messages to send with your marketing
campaigns, and more!
This article focuses only on the settings
and preferences available for the Voice module in the Options Tab of your CRM.
To learn more about enabling or using this feature, please watch our “BNTouch
Voice Module” training video.
BNTouch Voice
Settings
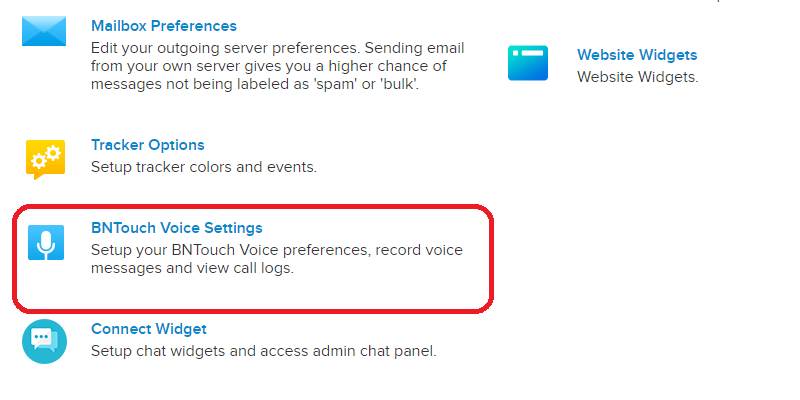
To configure preferences for the BNTouch
Voice module, open the Options tab of your CRM and click the “BNTouch Voice Settings”
link. You can easily find this option by clicking the “Modules” category to the
left. Here, the various settings are separated into several sub-tabs, starting
with “Voice Home”.
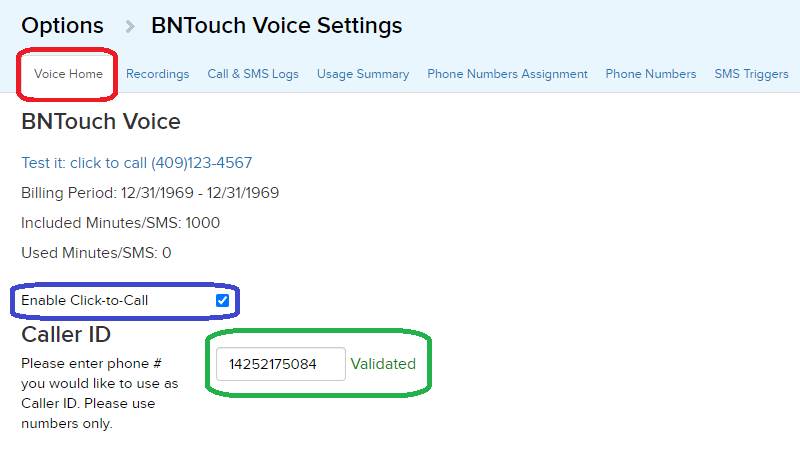
Voice Home
This section will give you a link you can
use to call yourself and test the click-to-call functionality, as well as the
dates of your current billing period, your plan allotment for call minutes and
SMS messages, and the amount of those minutes and messages that you have used
this billing period. You can also activate and deactivate the click-to-call
feature using the checkbox here.
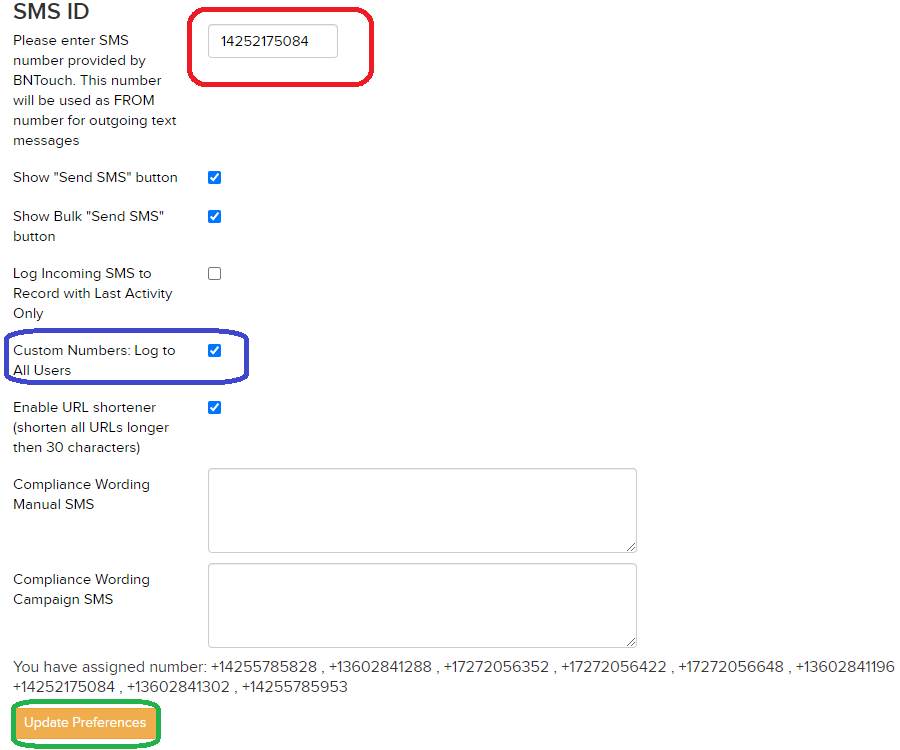
Below, you can determine what phone
numbers will be displayed to recipients of your calls and SMS messages sent
from BNTouch Voice. You can use your own phone number for the Call ID, or you
can use one of the available numbers below for calls or SMS messages. Your
calls and messages will be routed through these numbers. You can find phone
numbers to use for these fields in the “Available Numbers” section. You will
have the option to choose an area code, then a list of numbers will appear that
you can select from. Once you choose one, it will automatically assign to the
“Caller ID” and “SMS ID” fields above, which can be validated using the button
to the right.
In addition, you can use the checkboxes
below “SMS ID” to choose which SMS Messaging buttons appear in your CRM, which
incoming messages will be saved to client records, and whether to shorten URL
links in your SMS messages. By default, incoming text messages to an assigned number
will be logged only to records of users with that assigned number. If the “Log
to All Users” box is checked, the system will instead look through records
belonging to all users to find a matching record. The text fields below are
used to set any necessary compliance phrasing for SMS messages that you send,
both individually and via campaign steps.
If you change any information in this
section, be sure to click the “Update Preferences” button below to save your
work before navigating away
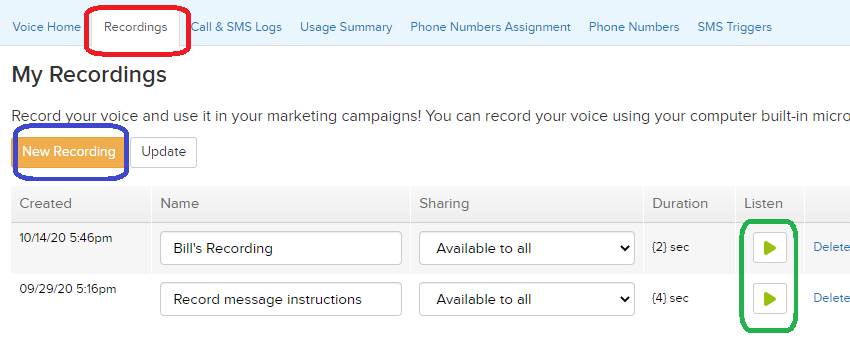
My Recordings
In the “My Recordings” sub-tab, you can
record voice messages that can be used elsewhere in your CRM. This page will
have a list of all recordings that you currently have ready to use. To start a
new recording, just click the “New Recording” button above the list.
Using your computer microphone, record a
message that you would like to have available to send to clients and partners.
Enter a name for the recording file, then choose which users in your account
will have access to it. You can listen to these recordings using the play
button to the right, and you can remove unwanted recordings using the “Delete”
link. If you change any recording names or sharing settings, click “Update” to
save your changes.
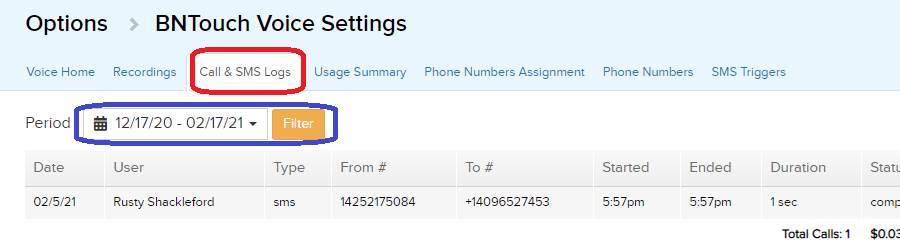
Call and SMS
Message Logs
The “Call & SMS Logs” sub-tab allows
you to review all phone calls and text messages that have been sent via BNTouch
Voice for a time period you select from the drop-down
menu. This includes details about what user sent the message and when, what
type of message was sent, who sent it to whom, call duration and SMS status
information, and any associated costs for the message. Below the report, you
can check the total call cost for all messages in the selected time period.
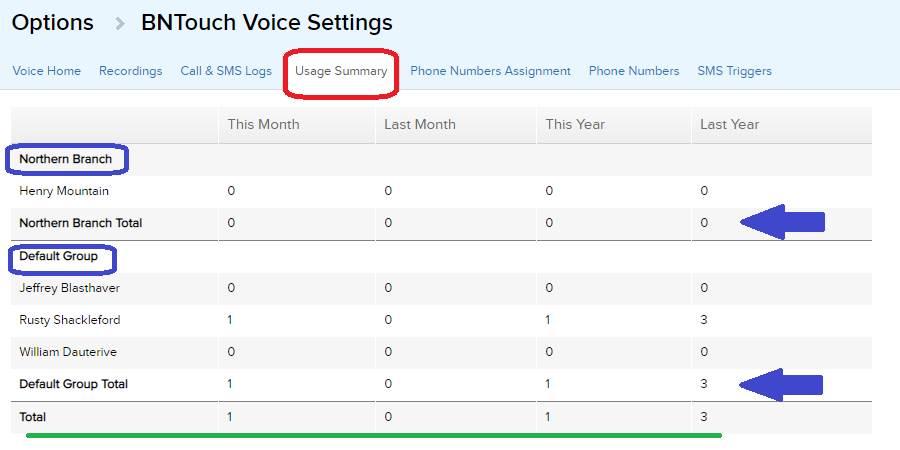
Usage Summary
Report
You can also see what users in your account
have been using BNTouch Voice in the “Usage Summary” sub-tab. Here, you can
view how many SMS messages and calls have been sent for each user in the
current and previous month and year. These users will be organized by user
group, and you can view group total messages in the row below each group.
User-Based Phone
Number Assignment
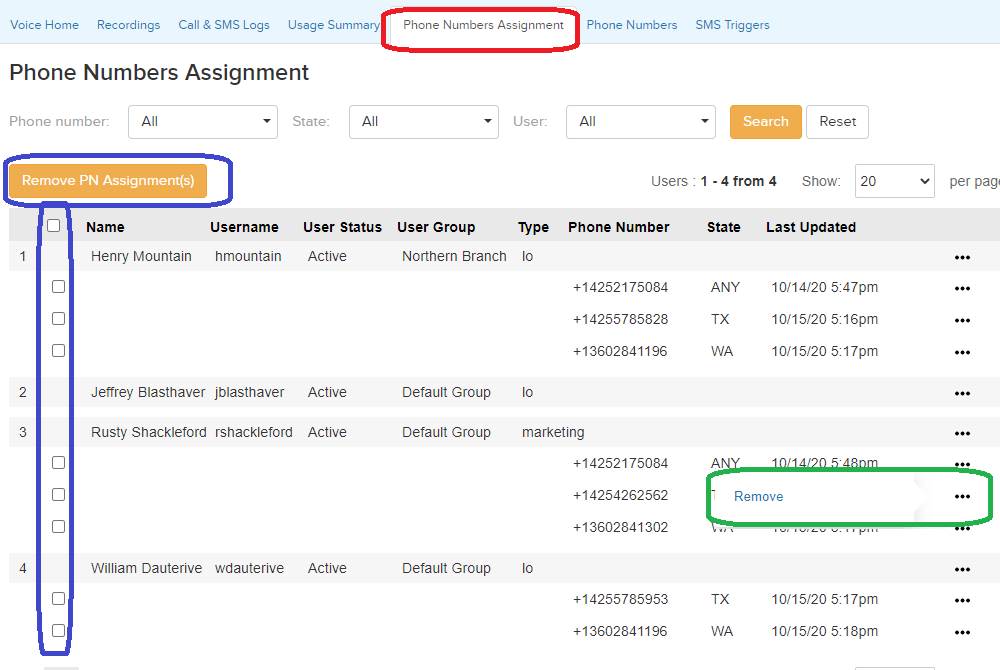
In the “Phone Numbers Assignment”
sub-tab, you can see which phone numbers from the “Voice Home” tab have been
assigned to various users in your account. Numbers can be assigned to a user by
clicking the action icon to the right, and numbers can be removed using the
checkboxes to the left and the “Remove PN Assignment(s)” button. If you have
several users to track, you can refine the list using the drop-down menus above
to see only those with specific assignment numbers or those from specific
states. The “User” drop-down menu can also be used to search by typing into the
search box above.
Registering and assigning multiple phone
numbers from various area codes can be a very helpful
way to reach your clients. You can assign several state-based numbers to a
user, and when that user sends messages to clients and partners, BNTouch Voice
will automatically select a "local" number based on the state of the
recipient. This will make your text messages and calls seem local and improve
the rate of successful receipt.
If you have several users but do not use
personal phone numbers for each user, be sure not to assign the default number
to only a single user here. Otherwise, the other users in your account will not
be able to send or receive messages.
Assigned Phone
Numbers
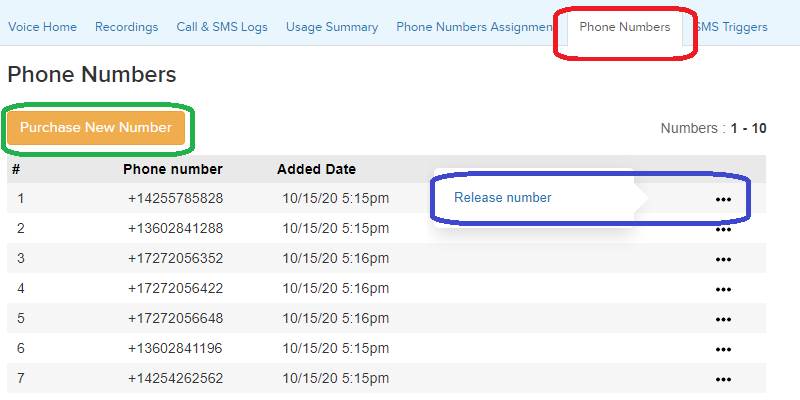
To manage which phone numbers are
assigned to your account, open the “Assigned Phone Numbers” sub-tab. Each
number you have associated with your BNTouch Voice calls and texts will appear
here with the date and time they were assigned. You can release numbers you no
longer use by clicking the action menu to the right, and you can acquire new
numbers by clicking the “Purchase New Number” button above the list.
Just like in the “Voice Home” tab, you
will be able to search for numbers by area code and add them to your list.
Please note that each additional phone number assigned to your account will
accrue an additional monthly cost.
SMS Campaign
Triggers
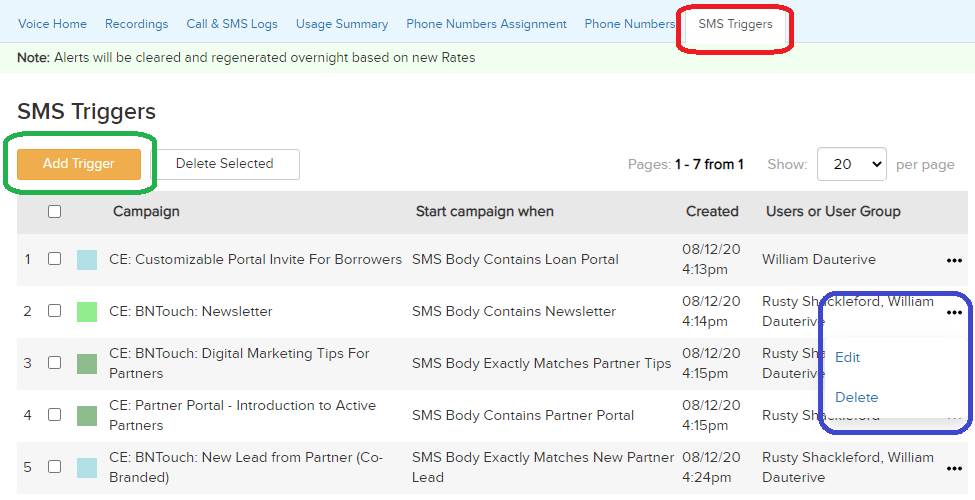
Lastly, you can view a list of all
marketing campaign triggers that are tied to SMS text message content in the
“SMS Triggers” sub-tab. Triggers listed here will activate marketing campaigns
for clients and partners who text you specific words
or phrases. Each SMS trigger will display below with the campaign name and
type, the trigger conditions, its creator, and when it was created. You can
edit or delete any of these triggers using the action menu to the right.
To add a new SMS Trigger, click the “Add
Trigger” button. You will then be able to choose a campaign to activate from
the drop-down menu. In the “Users” menu, choose which of your user accounts
will trigger this campaign upon receiving an SMS text message. Next, you can
enter text that will trigger the campaign if the SMS message “Contains” or
“Exactly matches” the listed characters. Once finished, click the “Add Trigger”
button to save the campaign trigger.
Want to Learn More?