Modules – Electronic Signatures
Cut Days Off
Your Signing Time with E-Signatures in Your CRM
As more of the paperwork required in the
mortgage process becomes digitized, securely collecting signatures for
documents has become extremely important. Acquiring and transmitting these
signatures doesn’t need to slow down your process. Using the E-Sign Module, you
can add electronic signature features to any of your uploaded documents, send
them securely to your clients, and receive their responses via Portal sites—all
from within your BNTouch CRM.
If you are an administrator for your
account, you can enable E-Sign from the user menu in the upper-right corner of
your CRM. To do so, open the “Modules” section, then scroll to the “E-Sign”
panel. You can hover over the panel for pricing and support materials, and you
can enable the feature by clicking the “Activate Module” button. Please note
that this module has an additional cost that will be added to your monthly bill
for your BNTouch CRM.
Creating
Documents for E-Sign
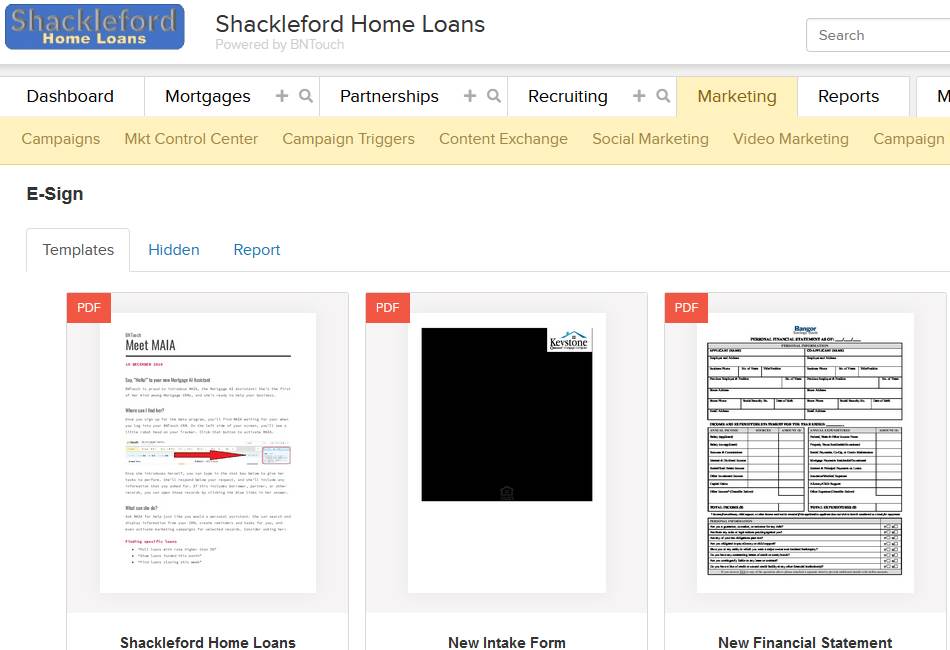
After the E-Sign module is activated, you
will see an extra option in your Marketing Tab titled “E-Sign”. Here, you can
manage your library of documents that can be used for digital signing. You can
upload your first file using the “Add Template” button at the bottom of the
list.
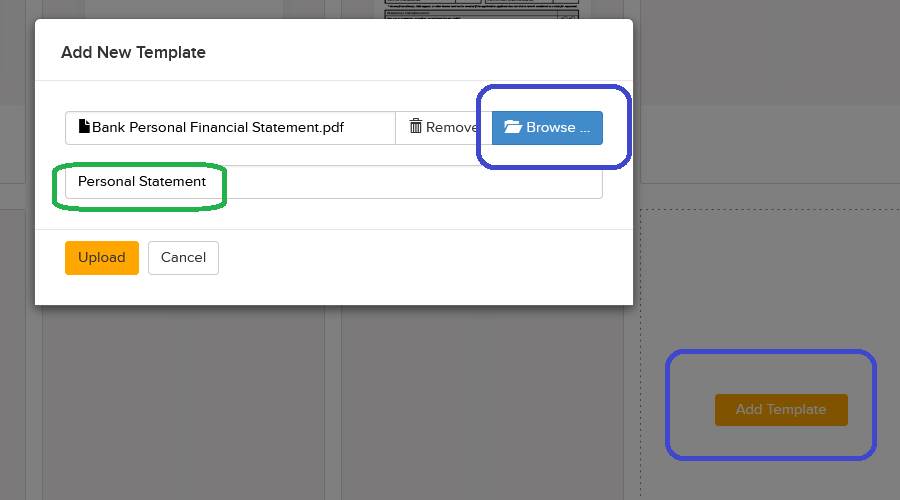
First, you will need to click “Browse”
and locate a .pdf or .docx file on your computer. Once you have selected a
file, enter a title for the document, then click “Upload”. This will add the
new document to your E-Sign library. When you hover over a document panel here,
you can delete files using the “Trash” icon or customize them by clicking “Edit
Template”.
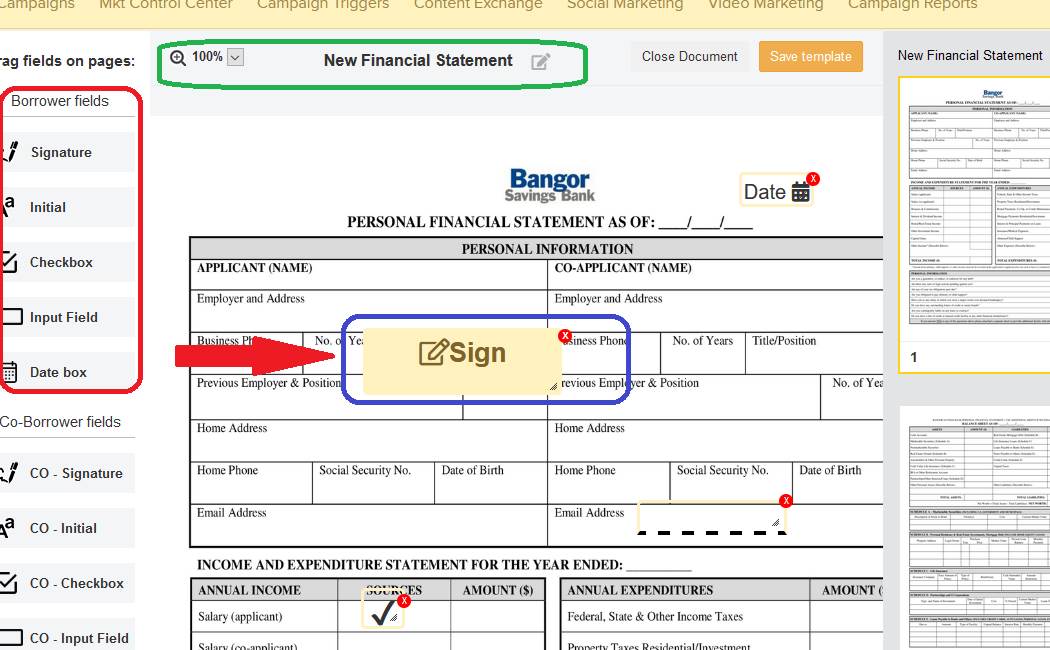
When you edit a E-Sign document, you’ll
see a new editor appear for your uploaded file. You won’t be able to edit any
images or text for the file here; instead, you will see a list of signature
fields to the left of the document. You can drag these elements onto the
document and position them where you would like the signed element to appear.
You can use the “X” icon to remove elements or stretch them using the icon in
the lower-right corner. Options include basic Signature and Initial fields,
checkboxes, text input fields, and date selection menus. Each of these can be
chosen to represent either the Borrower or Co-Borrower according to the
categories to the left.
You can zoom the image of the document in
or out using the magnifying glass in the upper-left corner of the document. The
text field directly above the file can be used to edit the title of the
document in your E-Sign Library. To the right, you’ll see a thumbnail image of
each page in the document, and you can jump to any page by clicking this image.
When you are ready to save your changes, click the “Save Template” button to
the upper-right.
Sending
Documents to Clients for E-Signing
Once you have documents prepared with
signature fields, you can send them to your borrowers from this page by
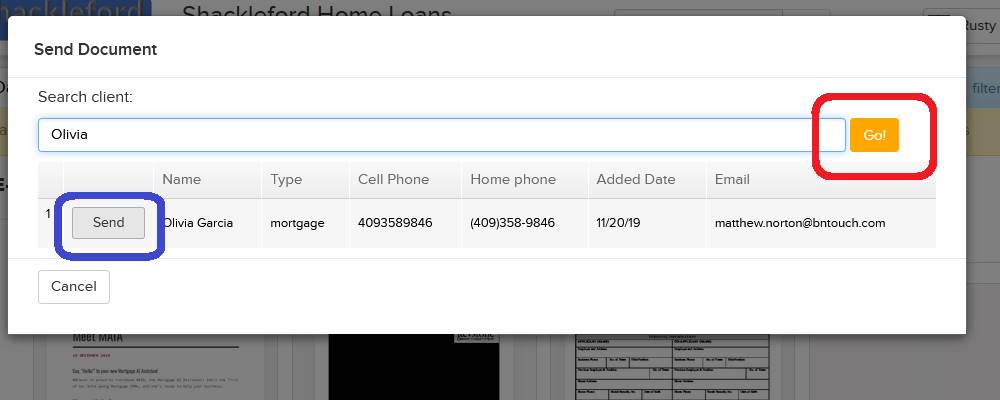
hovering over a file and clicking “Send”. You can then look for a client using
the search box, click “Go!”, then click the “Send” button to the left. The
button will change to a “Sent!” indicator, and the file will be transmitted to
that client’s Borrower Portal. There, they can open the file in their Documents
section, fill out any signature elements you added, and send it back to you
securely.
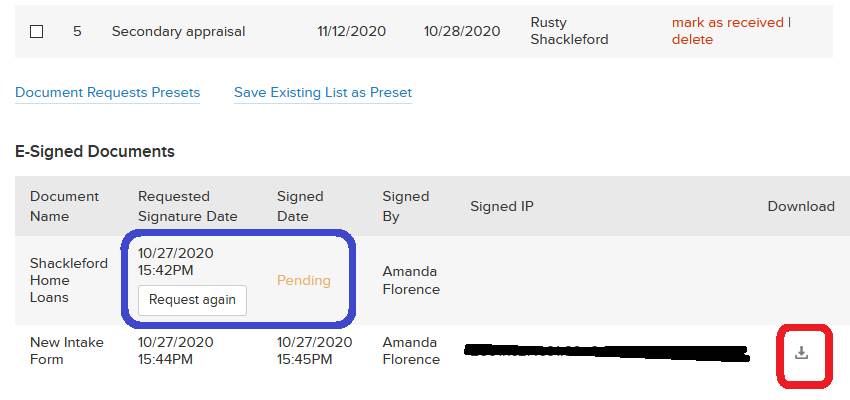
After you send the E-Sign request to a
client, you can see the status of that file in that client’s record in your
CRM. In the Mortgages tab, open a client’s file by clicking their blue “Name”
link. In the “Documents” sub-tab, scroll below the other files uploaded for or
requested of that client. In the “E-Signed Documents” section, you’ll see a
list of all electronic signature requests that have been sent to that borrower.
Each will have the name of the document,
the date you requested a signature and that the signature was completed, the
signer’s name, the IP address the secure signature was made from, and a link to
download a copy of the file. Until the client signs the document, the “Signed
Date” field will show “Pending”, and a “Request Again” button will appear in
the “Requested Signature Date” field. You can click this button to send the
file to the client once more, which will update the request date accordingly. Pending
documents will show the requested signer’s name, but the IP Address and
download link will not be available until they have completed the signature.
Signed Document
Management and Reports
Back in the Marketing Tab, you may have
noticed that the “E-Sign” section has multiple sub-tabs listed above. You can
see a list of any documents you have removed from your E-Sign Library in the
“Hidden” sub-tab, and you can return any to the “Templates” tab by hovering
over a document and clicking “Return to List”.
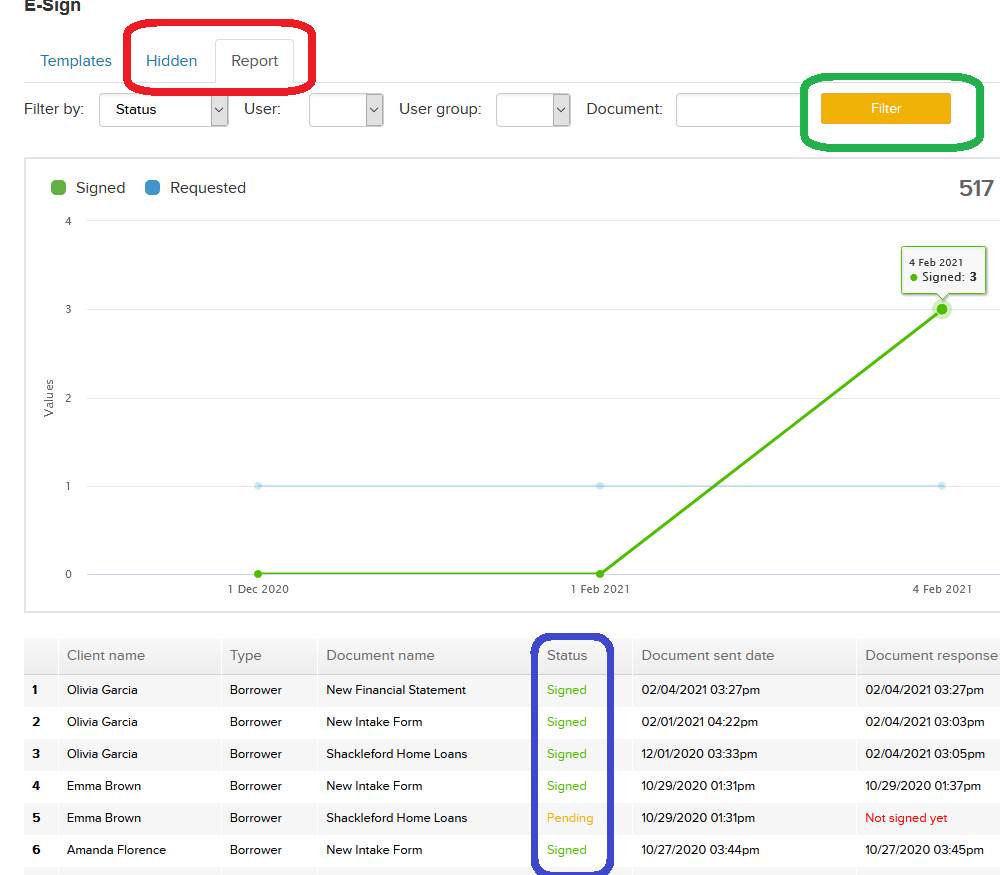
You can also see the overall status of
electronic signature requests and completions for all clients using the
“Reports” sub-tab. Here, you can see a graph of recent E-Signatures and a
comprehensive list of such document requests below. You can hover over the
chart to see more details, and you can see the current status
of each requested signature in the following list. These reports can be
filtered by specific signature status, CRM user, and user group using the
drop-down menus at the top of the page. You can also search for keywords in the
document title and restrict your search to a particular time
period using the calendar menu in the upper-right corner. When you click
“Filter”, the graphs and signature list below will update to show the requested
information.
Want to Learn More?