Marketing – Video Marketing
Using Videos to
Improve your Marketing
In order to be most effective, your marketing campaigns need to catch the
attention of your clients, convey lots of information clearly, and provide a
personal touch. This can sometimes be difficult when using simple media like text
messages and emails. In the BNTouch CRM, you can add video content to your
marketing to make it jump from the page, whether through pre-made animated
videos or greetings you record yourself.
Accessing Your
Video Library
Videos can be attached to your
communications throughout your CRM, but the best place to start is the Video
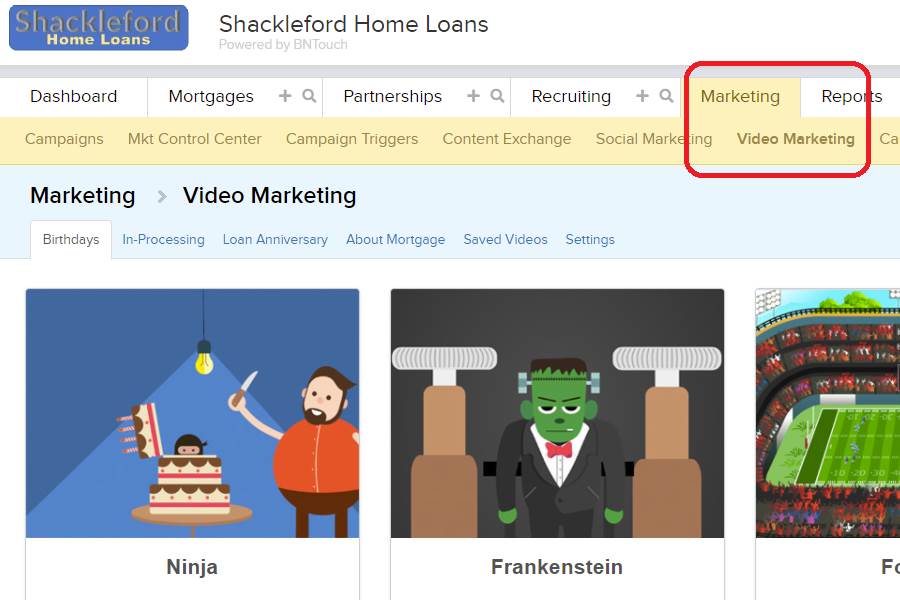
Marketing Library. In the Marketing Tab, click the “Video Marketing” sub-tab at
the top of the page. If you can’t see this option, click the “More” drop-down
menu in the upper-right corner to show any sub-tabs that are hidden due to the
size of your browser window.
In the Video Marketing Library, your
video content will be separated into tabs according to their category. The
first four, “Birthdays”, “In-Processing”, “Loan Anniversary”, and “About
Mortgage”, contain several animated videos that have been made available for
your marketing use by BNTouch.
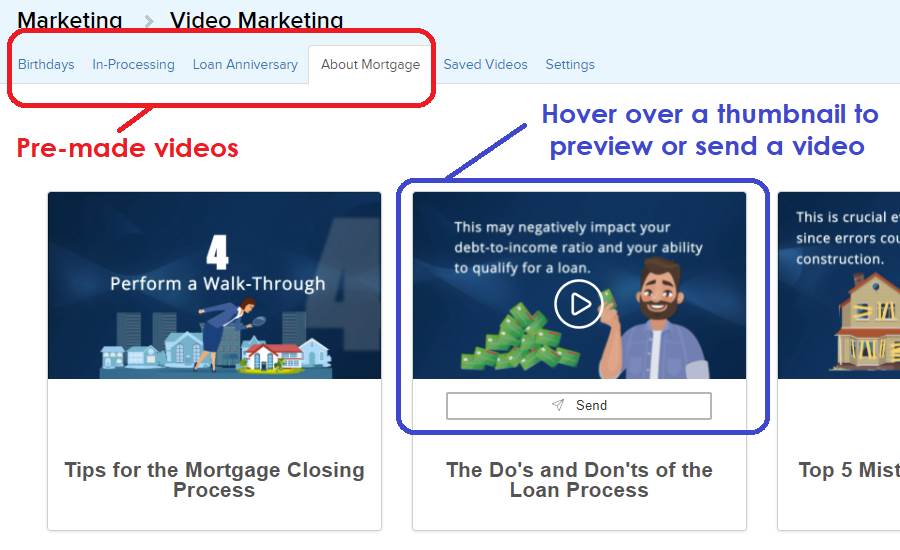
When you hover over any of the thumbnail
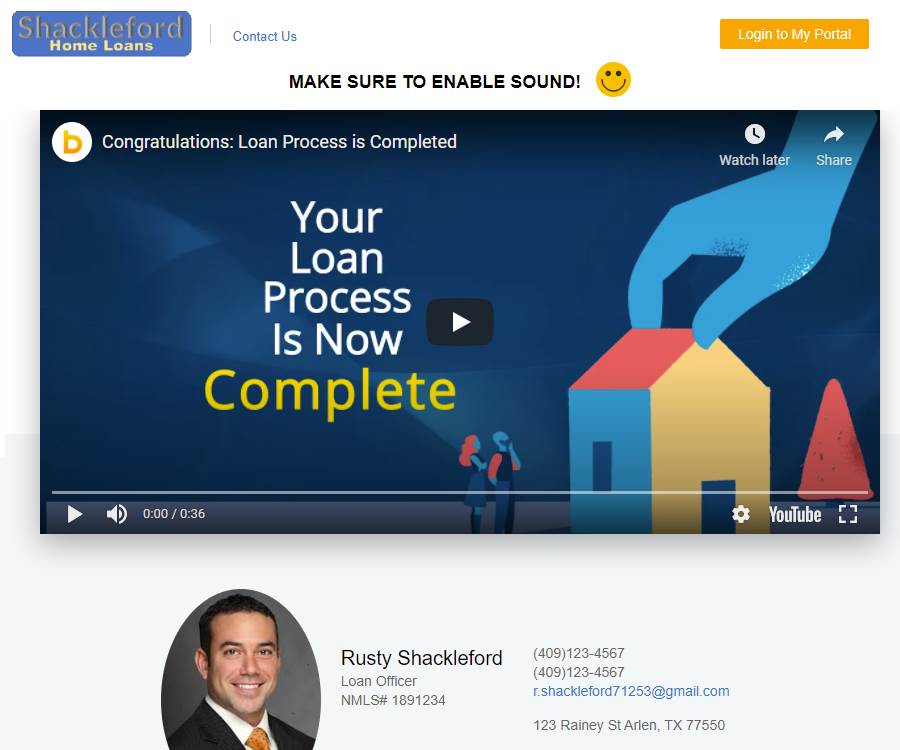
preview images, you can click the “Play” button to watch an example version of
that video. The video will open in a new tab with a preset display page; this
is the type of page that a client or partner will see when they open a video
you send them. This page includes your contact information and an option to log
into their Borrower
or Partner Portal. Some videos will show your name or other information in
them—these fields will auto-populate with the corresponding information for
each recipient when you send them out.
In addition to the preview option, you
will also see a “Send” button when you hover over a video thumbnail. When you
click this button, you can then search your record database for clients and
partners by name. For each search result, you can view basic contact and
mortgage (or partnership) information to the right, and you can click the
“Send” button to open a new email editor. The video you selected will
automatically be added to the email message, and you can customize
the email, add attachments, and apply templates in the same way to do
elsewhere in the CRM.
Recording Your
Own Video Messages
Back in the Video Marketing section, the
next part of your video library, “Saved Videos”, allows you to upload or record
your own video content for use in your campaigns and communications. When you
open this sub-tab, you will see a list of any personal videos you have added.
You can find specific videos using the
“Search” box above the list, change the ordering of the list using the “Sort
By” menu, and choose whether to display all videos you have access to or only
those you have added. For large video libraries, you can navigate pages using
the numbers in the lower-left, and you can change how many video listings are
shown using the menus to the right.
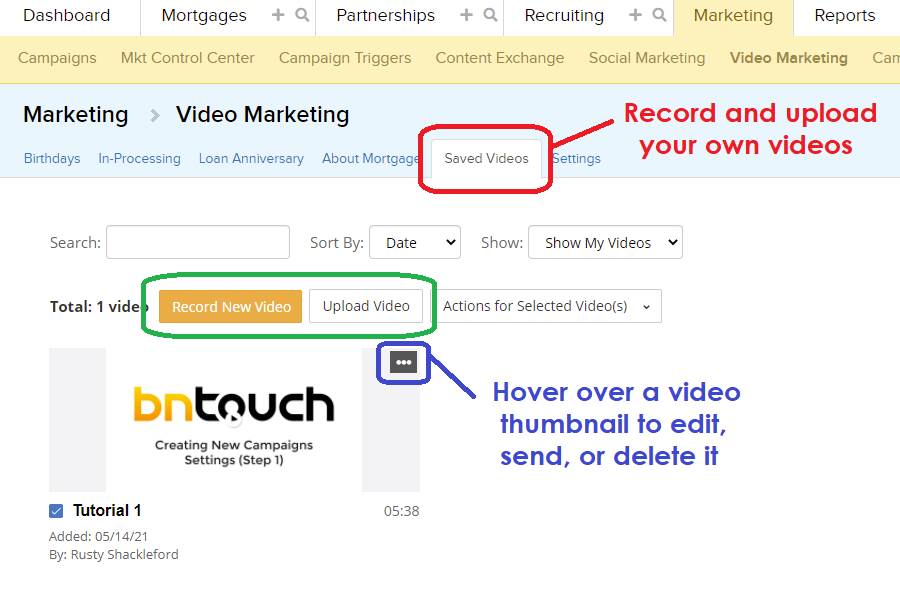
For custom videos, you can hover over the
thumbnail image and click the “Actions” icon to send them, edit their title and
sharing status, or delete them from your library. You can also delete multiple
videos using the checkmarks in the thumbnails and the “Actions for Selected
Videos” menu above the list.
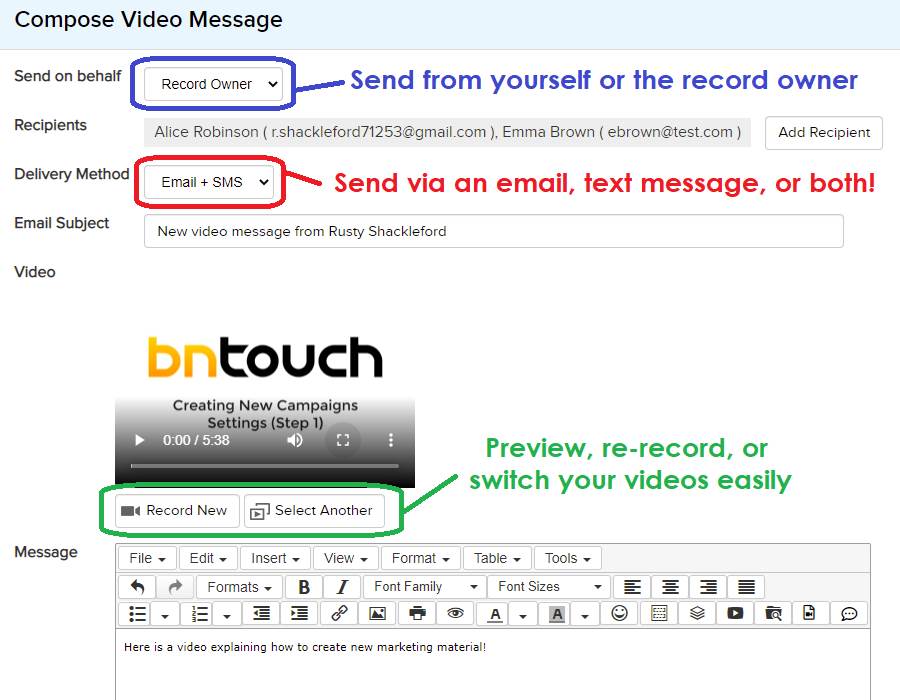
When you click “Send to…” for a custom
video, you will see a different page than what was shown for pre-made videos.
Here, you can choose whether to send the message from your own account or the
record owner’s, search your databases for recipients, and opt to send the video
via email, MMS text message, or both. Like before, you can enter an email
subject, customize a message, and attach any documents you need to, but you can
also record new videos or change attached videos using the buttons below the
video preview. When your message is ready, click “Send” below.
If you want to add video content to your
library, you have two main options: recording a new video using your camera or
uploading a video file from your computer. In the “Saved Videos” sub-tab, you
can click the “Record New Video” button to make a new video using your webcam
or mobile camera. You will be prompted to allow your CRM to access the camera,
then you can use your default options to record the video and add it to your library.
You will be prompted to name the new file and choose whether to share it with
other user accounts in your CRM.
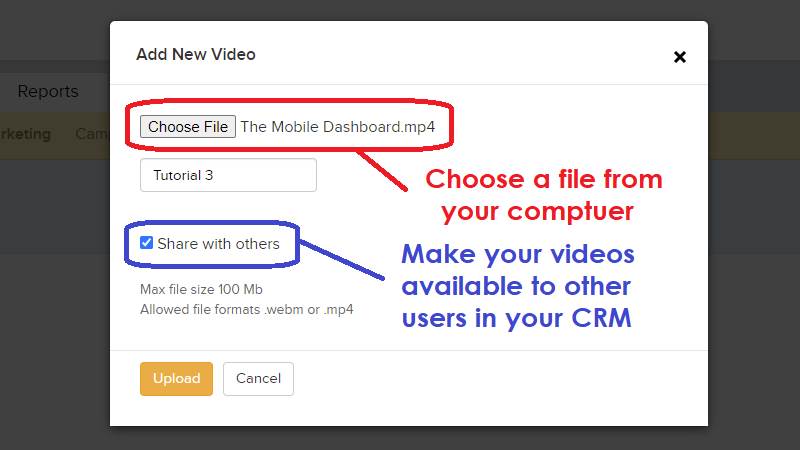
Uploading videos that you have already
made is just as easy; simply click the “Upload Video” button and choose a file
from your computer. Files you upload must meet the file size and type
requirements listed here, and you will be prompted to name the video in your
library and set the sharing status.
Choosing a Video
Page Design
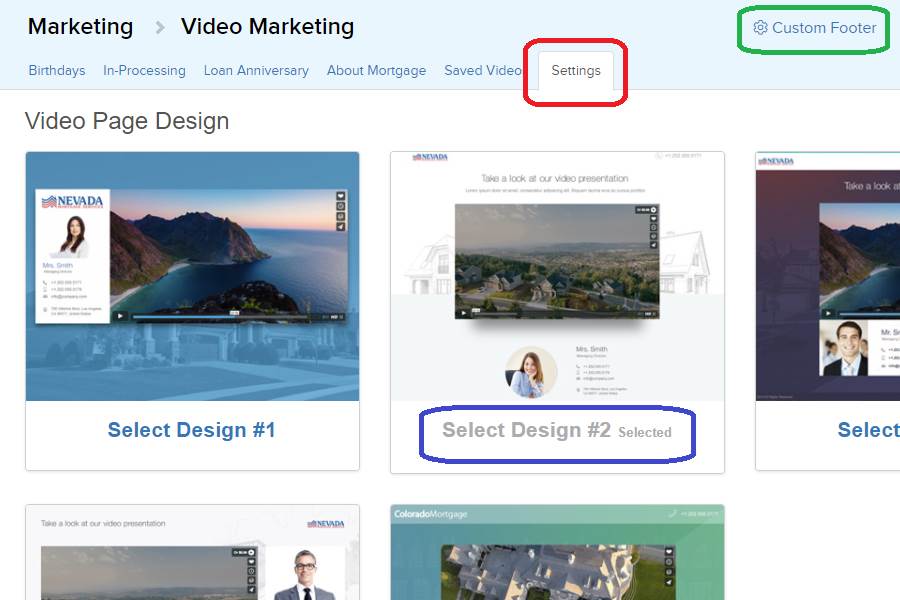
To further customize your video
marketing, you can select from several video host pages that recipients will
see when they open your videos. In the “Video Marketing” tab, just click the
“Settings” sub-tab to view the display options. When you click one of these
designs, it will display “Selected” to indicate the current page setting. You
can see what any of the designs look like in your browser by previewing a video
in your library.
You can also add your own text to these
video pages by clicking the “Custom Footer” link in the upper-right corner. Simply
enter any text you wish to appear on the video host page, click “Save”, and the
message will be displayed below the video frame for all videos you send to
clients and partners.
Adding Videos to
Your Marketing
You don’t need to open the “Video
Marketing” tab every time you want to use video content in your communications.
Whenever you are editing an email or campaign step, you can insert videos from
your library directly through the Text Editor.
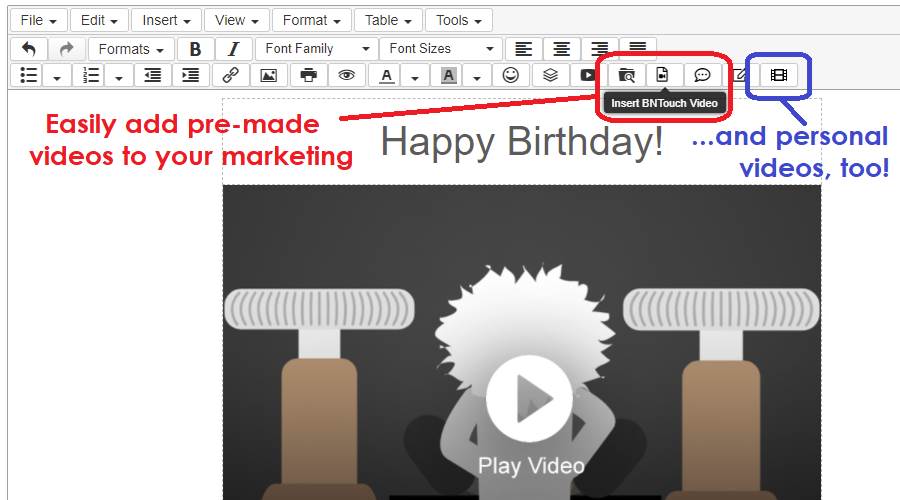
For pre-made videos, simply click the
“Insert BNTouch Video” button above the “Custom Text” field of a step or email.
You can then navigate the library sub-tabs, preview videos, and click “Insert”
to add a personalized video to your message.
To add a video
you recorded to an email or campaign, just click the “Insert Video Message”
button above the text editor. You can then search for the video you want to
add, preview them using the “Play” button, and add them to the message by
clicking “Insert”.
Want to Learn More?